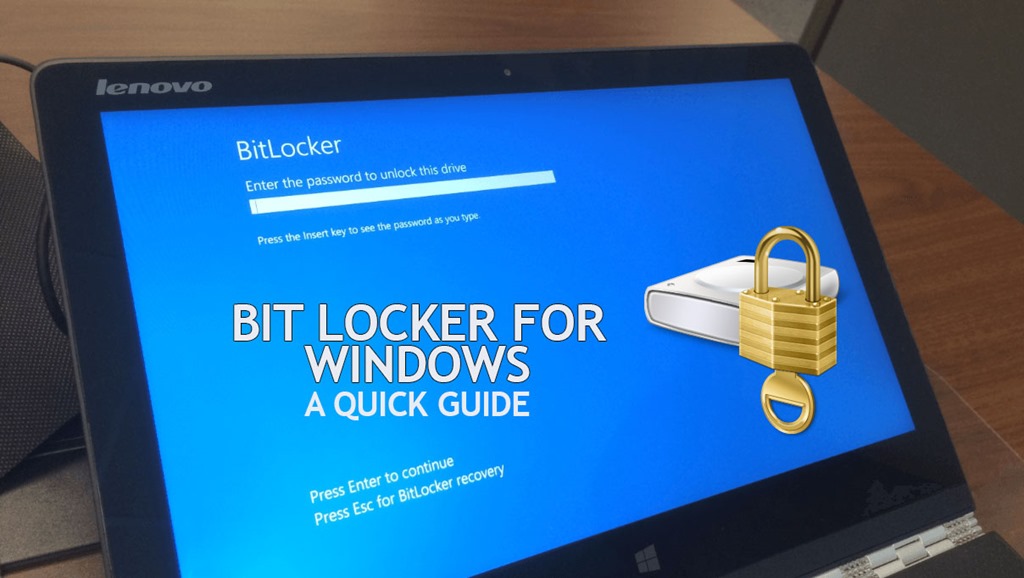
Security of your files is one of the most important aspects when it comes to using your PC. This is where Microsoft’s own encryption service BitLocker comes in play. So what exactly is BitLocker for Windows and how to get started with it? In this post, we will have a detailed look into BitLocker Encryption for Windows.
What is BitLocker?
BitLocker is a feature in Windows which provides full disk encryption feature and was included with Windows Vista and later. It is designed to protect data by providing encryption for entire volumes by using the AES encryption algorithm in cipher block chaining (CBC) or XTS mode with a 128-bit or 256-bit key. BitLocker is not available in all versions of Windows and if you are using Windows Vista or 7 Ultimate, Windows Vista or 7 Enterprise, Windows 8.1 Pro, Windows 8.1 Enterprise, or Windows 10 Pro, you can enable BitLocker on your PC.
Initially, Microsoft offered the BitLocker only for the drive where OS was installed but later extended to include all the drives. When used in conjunction with a compatible Trusted Platform Module (TPM), BitLocker can validate the integrity of boot and system files before decrypting a protected volume on Windows and in the event of an unsuccessful validation, it will prohibit access to a protected system there by giving protection to your files. When you are using BitLocker, it will automatically check if there is a TPM.
If you are extremely concerned about privacy and protection of your files, you should be using BitLocker on Windows. It is a closed source program by Microsoft and provides a good level of safety for your files.
How to Use BitLocker?
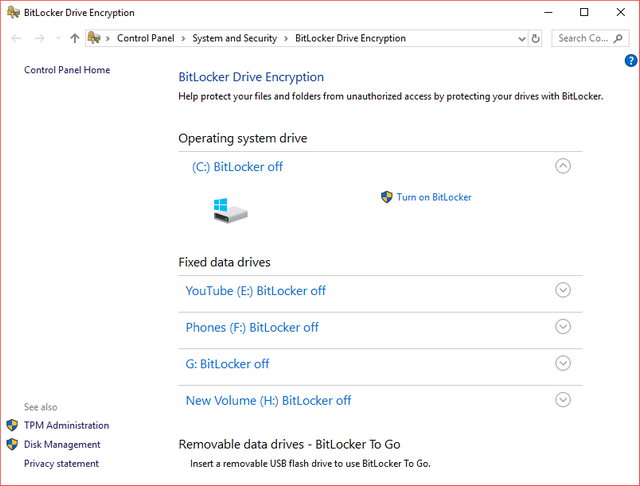
If you PC has support for BitLocker (based on the version of Windows), you can type BitLocker in the start menu or open BitLocker from the control panel. If BitLocker is not listed, then it means you PC does not support it. When BitLocker opens, it will check your PC’s configuration to make sure your device supports Microsoft’s encryption method.
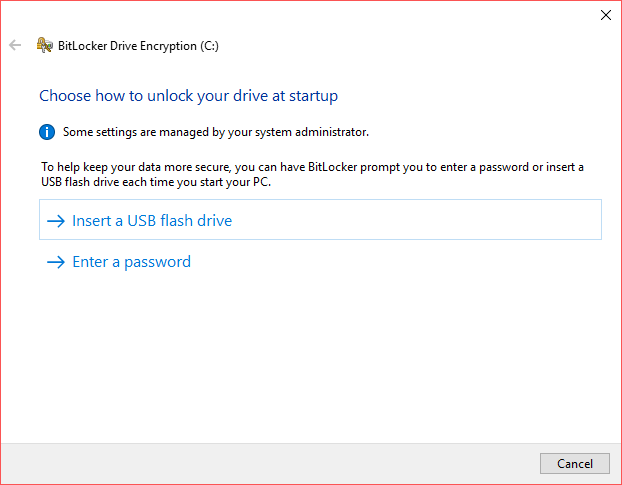
Before starting the encryption process, you will be asked to enter a password which in turn will be required for booting the device every time. Windows provides you with an option of either entering the password manually or inserting a USB key. You can choose any of the methods, but using a password would be much better.
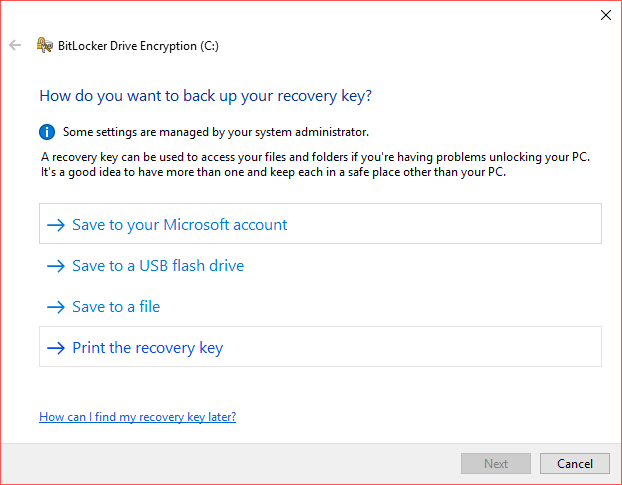
In the next step, you need to have a recovery key in place in case you have problems unlocking the device and there are four options for recovery key in Windows 8.1 and Windows 10.
- Save the file to Microsoft account
- Save to a file
- Save to flash drive
- Print the recovery key
You can choose to have all the options because in case one fails, you will always have a backup option.
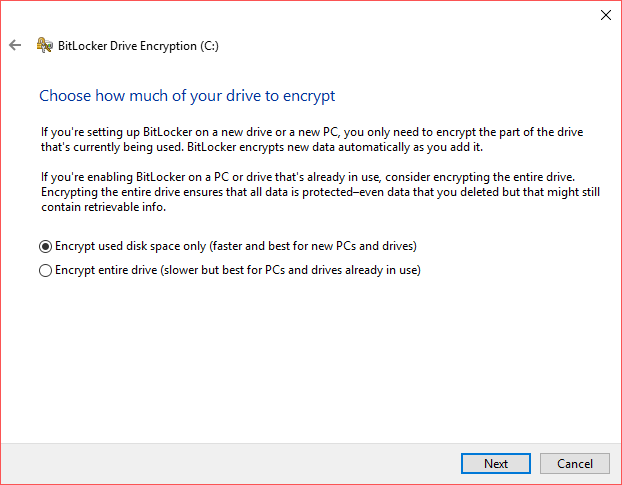
In the next step, you have two options for encryption:
- Encrypt used disk space only
- Encrypt entire drives.
If your PC is relatively new, the first option works fine, but if you are using a PC for a long time, then it is better to go with entire drives. Encrypting entire drives will obviously consume more time.
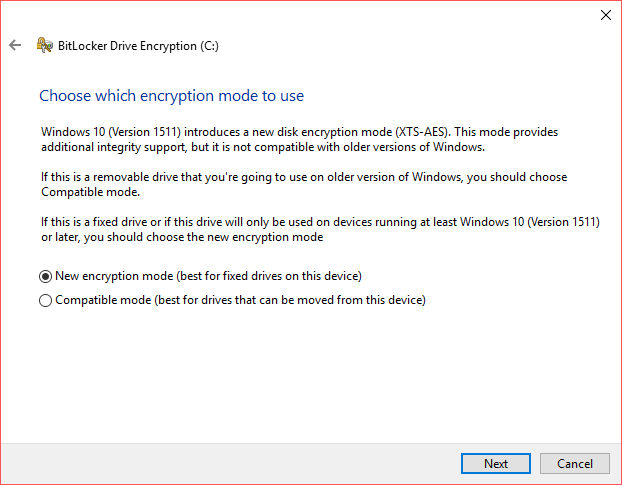
In Windows 10, there is an additional option to select mode, you can choose either new encryption or the compatible mode. In case you are using external drives on an older version of Windows, then it is better to go with the compatible mode so that your external drives encrypted are accessible.
Once you have selected this, you will see a notification that Encryption process has started. This will take some time depending on the files on your PC. You can use the PC in the background without any issues. Your PC might be a bit slow when the encryption process is going on. Once this is completed, you will have a completely encrypted PC with all drives having protection.



Hi Nirmal,
This is the first time I am visiting your site and glad to see the very useful and high quality content you publish here. Looking forward to come back and read more updates in future and also more interactions.
Thanks for the great share.
Best regards
Reji Stephenson
AWESOME ARTICLE THANKS FOR SHARING