Windows 7 has a task scheduler like the one in Vista where you can schedule any program to run at a specified time. The task scheduler in Windows 7 has lots of options such that you can configure each and every setting available for scheduling. With task scheduler you can set it to run any program or task at any specified time using the specified set of conditions. To start task scheduler, type “task” in Start menu and enter. This will open up the Windows 7 task scheduler. On the right hand panel of the task scheduler, click on either “Create basic task” or “Create task” link.

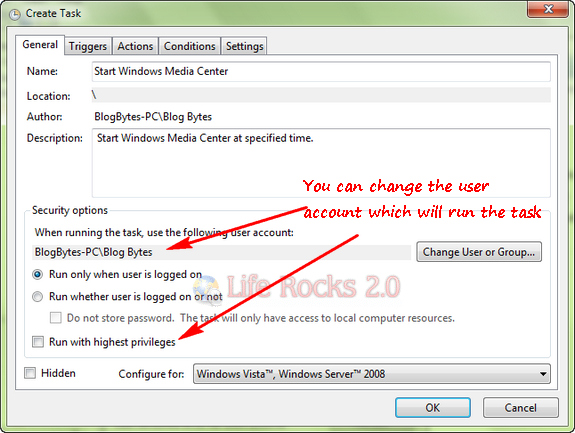
In the Create Task Window, you can specify the task name, description and other details. If you feel that the task needs elevated privileges, then run the task as administrator or with elevated privileges.
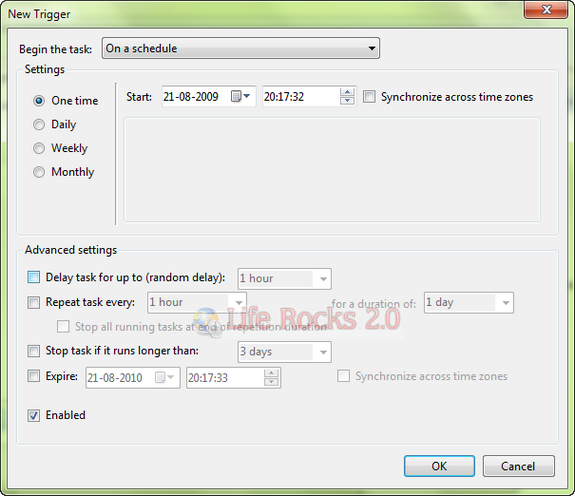
Next, click on the Triggers tab and select the date, time and frequency of the task. You can also set an expiration time for the task.
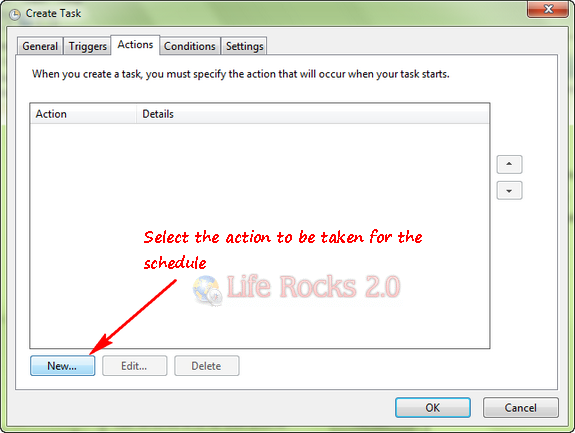
In the next step, click the actions tab and click on the new button available below. This will open up the action to be performed for the task.
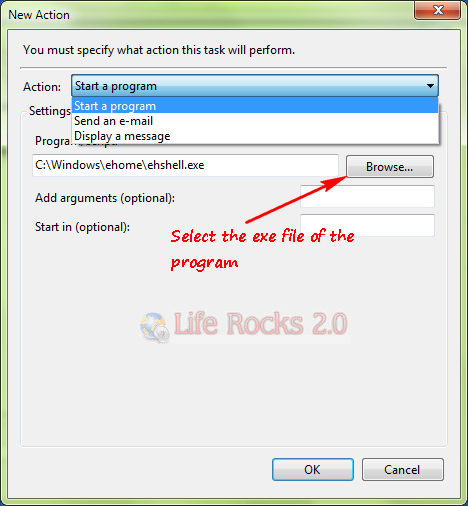
In the new action window, select Start a program from the drop down list and browse for the exe file of the program where it is installed.
Next step is to specify any conditions for the task, like start the task only if computer is connected to AC power etc.
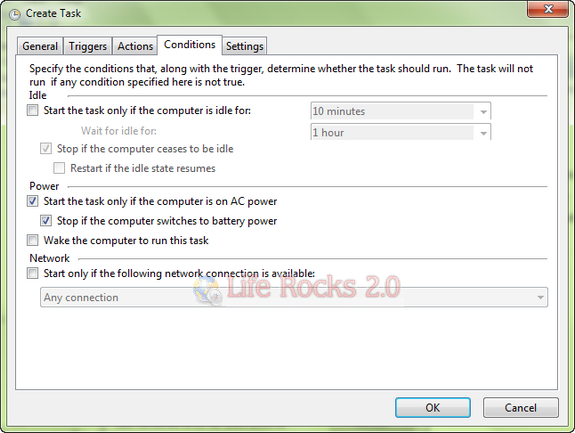
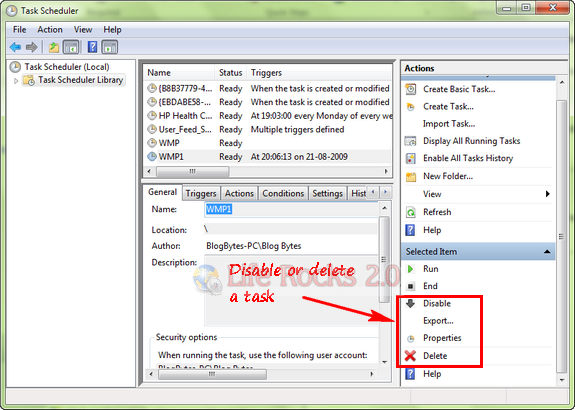
Once you are done, click OK and your task is ready and it will run at the specified time and date. If you want to disable or delete a running task, double click the task and select Disable or Delete on the right hand panel.
The same features and settings also applies to Windows Vista and you can schedule a task in Vista as well.



Scheduled antivirus scan, worked awesome!