A power plan in Windows 7 is a collection of hardware and system settings that manages how your computer uses and conserves power. Power plans are designed such that they can save energy, maximize system performance, or balance energy conservation with performance. Windows 7 has default power plans- Balanced and Power Saver. There is also a High Performance power plan. You can edit, create new or even delete power plans in Windows 7.
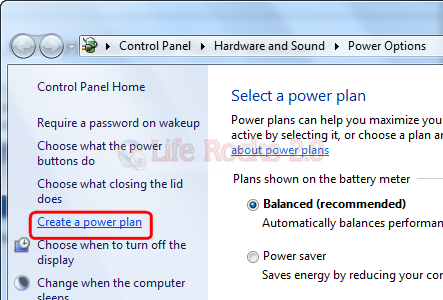
1. Create a New Power Plan: To create a new Power Plan, open Control Panel-> Hardware and Sound-> Power Options. On the left hand side, you can see link “Create Power Plan”.
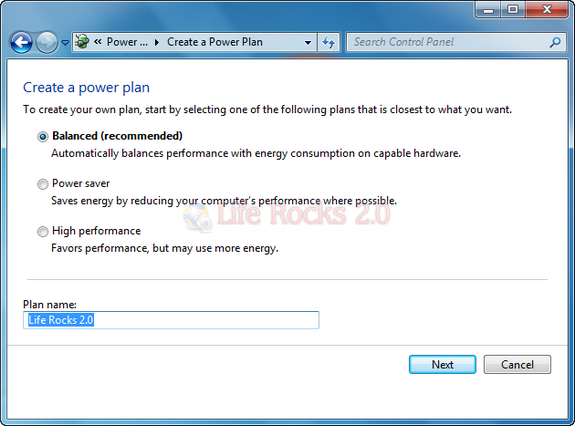
On the Create a power plan page, select the plan that’s closest to the type of plan that you want to create and enter a name for the Power plan.
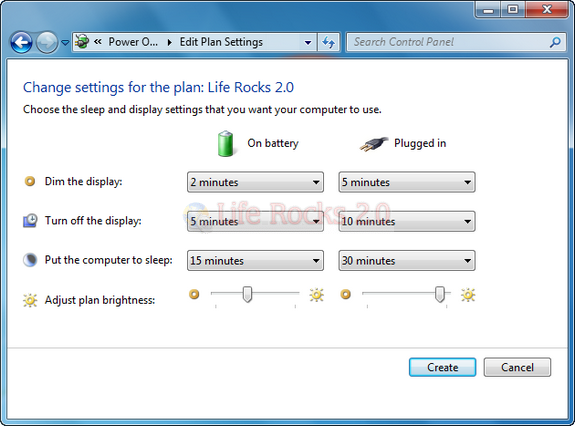
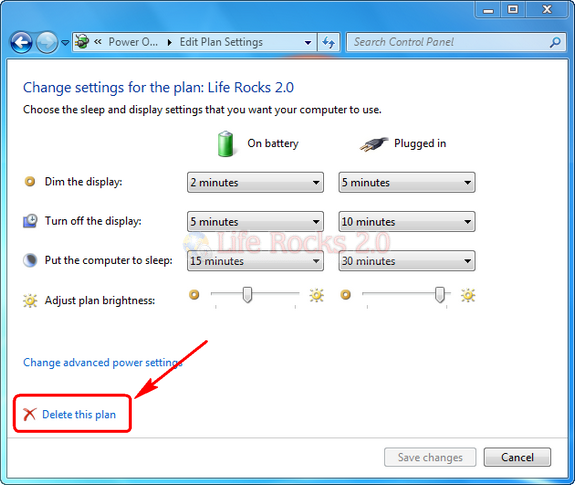
On the Change settings for the plan page, choose the display and sleep settings that you want to use when your computer is running on battery and when it’s plugged in.
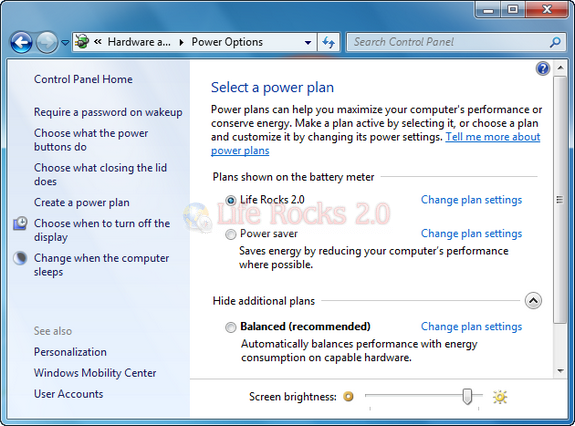
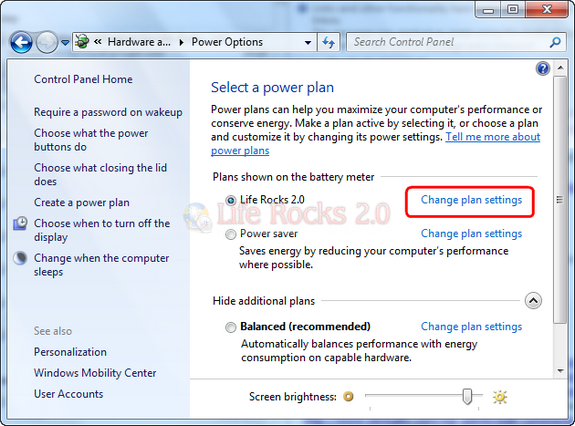
Once you have created the plan, you can see the plan selected in Power options.
2. Edit Power Plans: To edit any power plan, click on the Change Plan settings link and you can change all the plan details.
3. Delete Power Plans: You can delete power plans which are user created, which means Windows 7 does not provide an interface to delete default power plans (although this can be achieved through registry hack). To delete any plan, it should not be the active plan. If the active plan is the one that you want to delete, make a different plan the active plan. Click the Change plan settings, you can see the Delete power plan option.
It will prompt for a confirmation on whether to delete the plan.
Click OK and the plan will be deleted.


