Have you ever gotten the ‘Blue Screen of Death’ or a cryptic error message upon starting your Windows PC? These scenarios can baffle not only beginner computer users, but even IT professionals. Luckily, there are some very effective ways to troubleshoot these start-up problems, repair Windows using Microsoft’s own tools and get your PC running again.
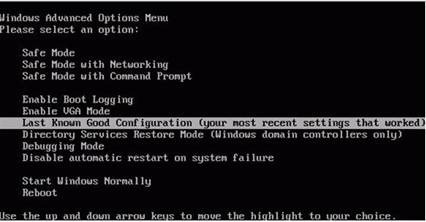
1. If Windows doesn’t start, restore your system using the “Last Known Good Configuration” mode: It restores many of the changes you made during your last Windows session, such as driver updates, system settings and registry changes.
After it has failed to load, Windows should automatically offer the “Windows Advanced Options Menu” to Windows XP users or the “Windows Error Recovery” screen to Windows Vista and Windows 7 users. However, if that screen does not appear, repeatedly press the F8 key right before the Windows boot logo would normally appear. Select “Last Known Good Configuration”, and wait for Windows to boot up. This restoration method should work in the majority of cases.
If it doesn’t, select the “Safe Mode” option, and try to manually undo all of the changes you made the last time Windows worked. You may need to uninstall a program, a driver or an update to resolve the start-up issue.
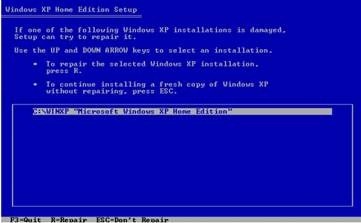
2. Windows XP users can also use the installation CD to try and repair their system: It contains an option to restore all of the operating system’s files, including those that are responsible for Windows XP to start.
To repair the operating system, insert the installation CD, and hit a key when Windows asks you to “Press any key to boot from CD”. Wait a moment, and then hit “Enter” when it says “Welcome to Setup”. Hit “F8? and then “R” to perform a repair installation. This should get your Windows XP system up and running again.
If the repair option is unavailable, the CD you’re using isn’t recognizing the Windows XP installation. This could have happened for several reasons; for example, you might be using an older Windows XP installation CD that is compatible with Service Pack 1 or Service Pack 2, but you might have already upgraded your system to Service Pack 3.
However, you still have the option to manually repair the startup files. Again, insert the installation CD, and hit a key when Windows asks you to “Press any key to boot from CD”. Wait a moment, and then hit “Enter” when it says “Welcome to Setup”. Then, press “R” to enter the recovery console, select your Windows installation (usually 1 for drive C:), and log in to the administrator account. Now enter the command: Bootcfg /rebuild. This tool scans your hard disk for your Windows XP installation. It should come back with something like “[1]: C:\Windows”.
To add your installation to the boot list, hit “Y”, and press “Enter”. Next, enter the name of the operating system you want to appear in the boot menu. This is irrelevant on computers with only one operating system, but you could type in “Windows XP Home Edition” or “Windows XP Professional Edition”, for instance. Next, the Bootcfg tool asks you to “Enter OS Load Options”. Type in “/Fastdetect”, and Windows should load as normal.
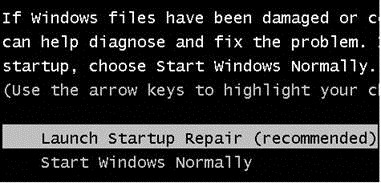
3. On the other hand, Windows Vista and Windows 7 users have the ability to perform a “Start-up Repair”. This feature solves the most common start-up issues, like repairing common registry keys, system files and drivers usually associated with a failed system start.
Fully integrated into Windows 7, the feature has proven to be very effective. After an unsuccessful start-up, “Windows Error Recovery” will open and allow you to launch it. “Start-Up Repair” will then automatically detect and repair any problems, but bear in mind that this process might take awhile.
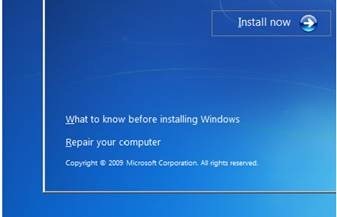
If you’re using Windows Vista, or if your Windows 7 system was not able to launch the feature, you can manually start it. Turn on your computer, insert the Windows DVD, and hit a key when Windows asks you to. Wait for it to start, hit “Next” and select “Repair your computer”.
Confirm the Windows installation, and hit “Next”. You’ll then be in “Windows Recovery Environment.” From there, just click on “Start-up Repair” to troubleshoot your system.
4. If you’ve performed “Start-Up Repair” and are still having Windows start-up problems, you’ll need to rebuild the start-up files. Boot into “Windows Recovery Environment”, and instead of launching “Start-Up Repair”, select “Command Prompt”. Now, enter the following commands one by one, and confirm each with Enter:
bcdedit /export C:\Boot_Backup
c:
cd boot
attrib bcd -s -h -r
ren c:\boot\bcd bcd.old
bootrec /RebuildBcd
This will back up your old start configuration data and create an entirely new startup system. Continue on by entering the following commands:
Bootrec /FixBoot
Bootrec /RebuildBcd
Once done, reboot your system to see if your PC is running again.
These four repair methods should hopefully leave you with a working Windows system again.
This is a Guest post by Tibor Schiemann, President and Managing Partner, TuneUp. For additional tips and tricks to restore and maintain PC performance, I invite you to visit the TuneUp Blog about Windows (http://blog.tune-up.com). If you want to submit a guest post, use the this form.


