Windows 8 has many new features included in it and major ones are Start Screen, Windows Explorer and the all new Task Manager. But apart from these, there are other features as well and one of the most important feature is Storage Spaces. We had mentioned about this feature on this blog some time back and now with the release of Windows 8 Consumer preview, you can actually try this feature. Storage spaces feature allows you to add physical disks into what is called as a storage pools and then creating virtual disks using these pools. This feature is meant to ensure that data is safer on the hard drive through fail-proofing it against crashes.
Storage Spaces allow organization of physical disks into storage pools or virtual disks, which can be easily expanded by simply adding disks. These disks can be connected either through USB, SATA (Serial ATA), or SAS (Serial Attached SCSI). A storage pool can be composed of heterogeneous physical disks different sized physical disks accessible via different storage interconnects.
This virtual disk is usable just like a regular physical disk – you can partition it, format it, and start copying data to it. For example, you can create a 10TB virtual disk by attaching a 4TB physical disk and select two way mirroring. You can create a virtual disk with capacity of 10TB although the underlying physical disk is only 4TB and this is achieved by thin provisioning. Thin provisioning ensures that actual capacity is reserved for the space only when you decide to use it.
Two way mirroring ensures that in case one of the two hard drives will fail, user’s data will remain accessible on the second drive, so the feature increases the reliability of the system.
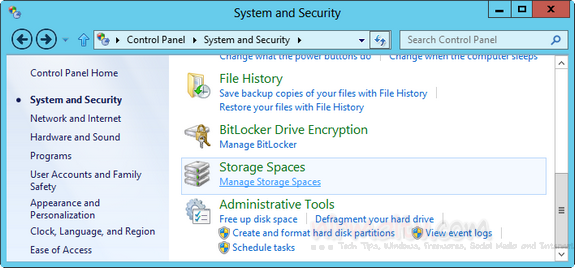
To set up Storage spaces, open Control Panel-> System and Security. In case you are wondering how to open Control Panel, type “Control panel” from the new Windows 8 start menu.
Go to System and Security and select Storage spaces option.
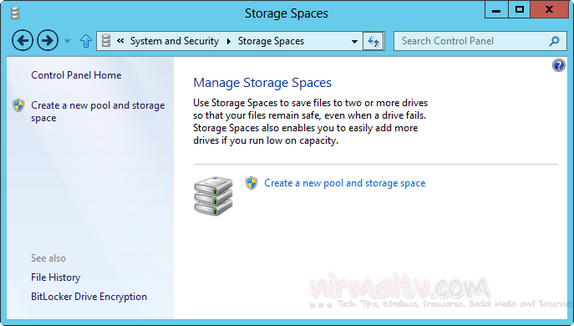
Before you start creating a new pool and storage space, attach an external hard disk via USB drive or SATA. Click on the Create a new pool and storage space link.
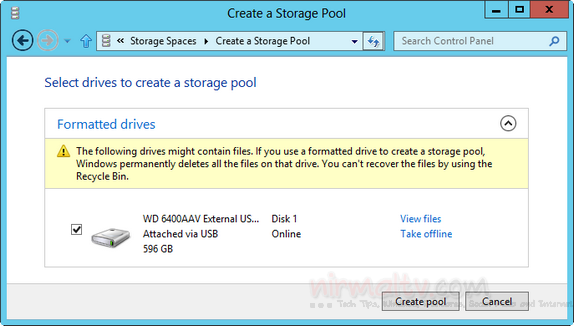
Select the attached drive via USB, you can attach multiple drives and select them. Please note that while creating the pool, the hard disk will be formatted, so take a back up of all files in the external drive. Click on Create pool button.
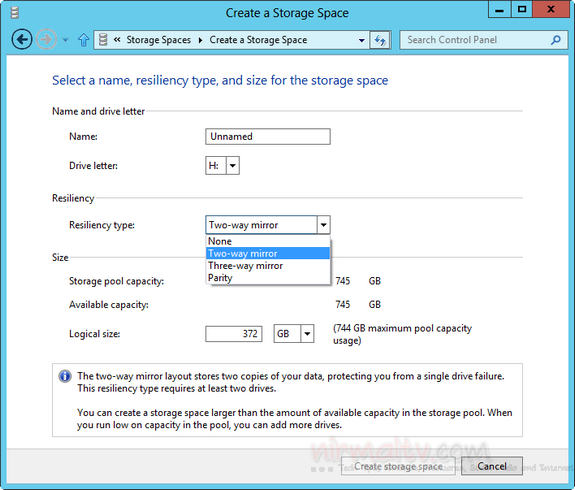
In the next step, you need to specify the name, drive letter for the new storage space.
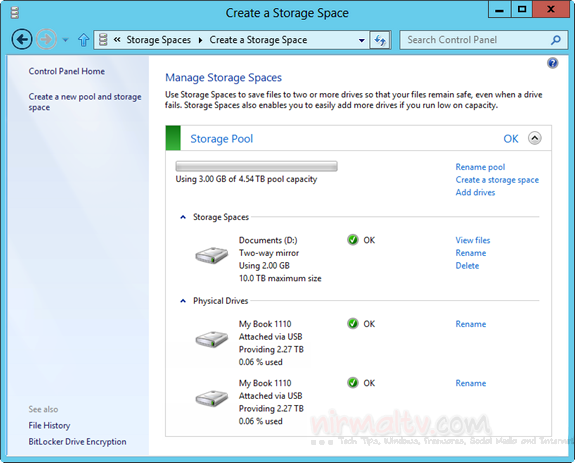
You can select the resiliency type which can be two way, three way or parity. If you are selecting two way, you need to attach two physical drives to the system to have a two way copy of files. You can see from the below image, we have created a new storage space with capacity 10TB, but the actual size is only 4.5TB and when the actual storage capacity becomes short, Windows asks you to add other disks to the pool.
You can access this new virtual storage from the Windows Explorer. This feature is really useful one especially if you want to keep the files in safe storage even in case of a hard disk crash.


