One of the best ways to improve your blog presence is to share your links to Social networking sites like Facebook, Twitter, Google+ etc. Although there are many tools to auto publish posts to Twitter, for Facebook there wasn’t much option other than the third party apps. But if readers have blocked apps, your posts will not get coverage of Facebook. But now Facebook has released its own new WordPress for Facebook plugin which provides quite a lot of options for bloggers using WordPress.
You can now automatically publish your posts to Facebook page of your blog as well as author’s timeline. If you have multiple authors on your blog, the post is published to the author’s timeline when you hit the publish button on your WordPress.
How to set up Auto Publish to Facebook page and Timeline:
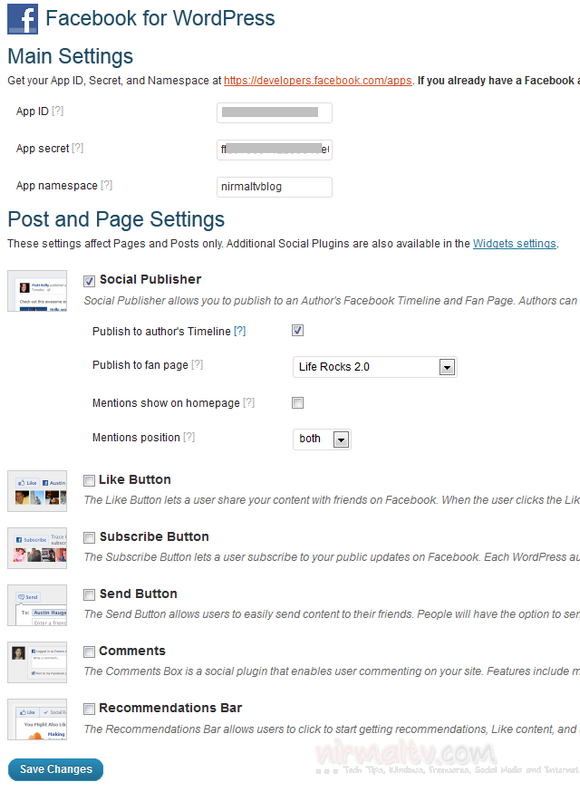
First step is to Install Facebook for WordPress either via the WordPress.org plugin directory, or by uploading the plugin to your server (in the /wp-content/plugins/ directory). Once installed activate the plugin and go to the plugins settings page. You will need to login using your Facebook account to get started.
The plugin provides options for Like button, subscribe, Send, comments and also recommendations bar. If you want to use Like, Subscribe, Send and Reccomendations, its pretty straight forward, just select the settings by checking the box against them. If you want to have comments enabled, you can read our tutorial on it.
Now coming to the social Publisher option available in the plugin, you can publish to author’s timeline, a fan page or even mention people on the post on Facebook. The first step for all these is to create an app for your blog. Go to http://developers.facebook.com/apps and click on your app (if you do not have an app for your blog, you can easily create one). Now get the App ID, secret key and also the namespace from the app settings. Enter the details in the plugin on the top section.
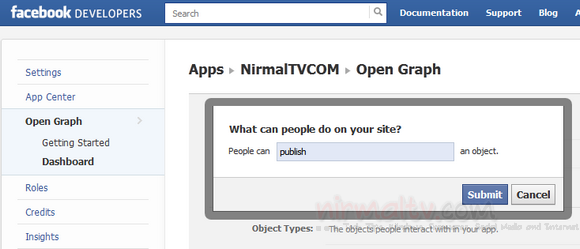
Publishing to fane page is easy once you have entered the app details. You will see all the fan pages of which you are admin inside the drop down list. Select the page and all the articles will be published there. To set tup author’s timeline publishing, click the ‘Open Graph’ tab. Click ‘Create New Action Type’. You should see the dialog below.
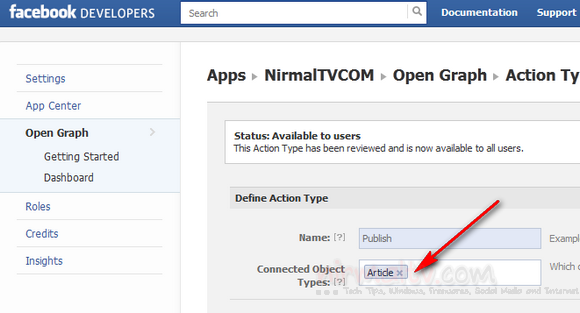
Enter ‘publish’ and click ‘Submit’. In the next step, for ‘Connected Object Types:’, enter ‘article’ and click on the auto-complete. Now save all the changes.
In order for these posts to authors’ Timelines to be public, you will need to submit your action for approval. For this you need to publish a post on WordPress and you can see it in your Timeline(which can be deleted once done). Go back to the Open Graph tab in your app settings and click on the ‘Submit’ link next to the new publish action. This will submit the action for approval, which allows the public to see content posted from the author. The approval process takes less than a day.
Once the approval is complete, all authors on your WordPress blog will see a notification at the top of the admin control panel prompting them to authenticate with Facebook. Once they do that, all of their new Posts and Pages will post to their Timeline.
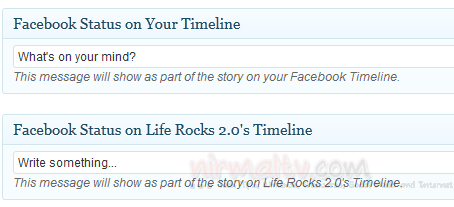
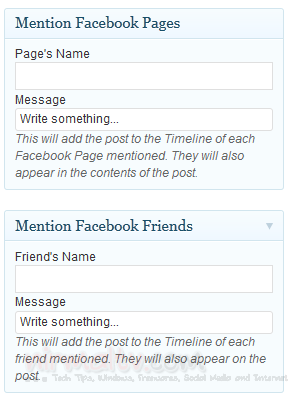
The plugin has option to mention people or pages when you publish a post, and these options are available in the edit mode for posts and pages.
Although the settings seem a little complicated, its pretty easy when you actually do it. If you have any doubts on this process, please do ask in comments.






I’ve got this set up, but no photo appears in the timeline story. Where is that photo pulled from, and how can I direct it to specify a photo? (I’m speaking specifically of the larger photo that appears next to “XX published XX on XX.” not the tiny profile photo)
I get the RSS symbol next to my post on my Facebook Timeline instead of the image on the post itself (which is what I normally get if I manually make a post to my page). How do I fix that?