Office 2013 was released earlier this year and there are quite a lot of new features and improvements in this version. One of the main changes is the interface which has been made cleaner and easy to use. We have covered quite a lot of tips on Office 2013 on this blog.
There are many features which has been retained in the new version as well. When you share documents which are confidential in nature or documents which are copyrighted, it is always good to have them watermarked. Similar to image watermarking when you share online, you can also watermark Word 2013 documents.
You can either add image watermark or a text watermark in Word 2013 documents and we will explain how to add it.
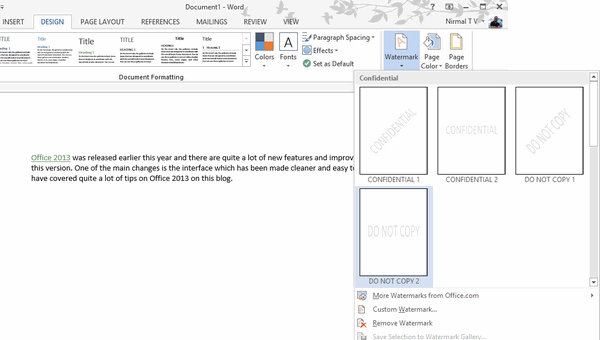
Open Word 2013 document, either an existing document or a new one and then select the Design Tab. On the right side of this tab, you can see the Watermark option. Click on it and you can see the default options to watermark. Select any one and the watermark is instantly applied on the document.
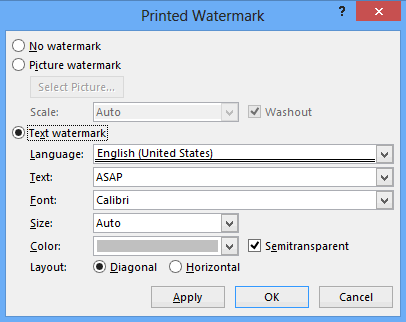
You can also add a custom watermark and for this select the Option Custom Watermark from the list. This will open a new pop up window where you can select the type of watermark. You can either specify an image watermark.
If you have selected image watermark, you can browse for the image from local hard disk or from SkyDrive and insert it. You can also scale it based on your requirement.
If you have selected text watermark, you can select the language and set the text, font, size, color, layout etc. Once you have applied, you can see it live on the document. If you are using image watermark, make sure that the image has good size or else it will extend to the entire document and will not look good.
So next time you share a confidential document, make sure you have this option selected.


Thank you for any other excellent post. The place else
may just anybody get that type of information in such a perfect manner of writing?
I have a presentation next week, and I am on the
look for such info.