.NET framework in now at version 4.5 and Windows 10 which was released few months back comes with the latest version of .NET framework included. But, at the same time some of the older apps which are designed for Windows 7 and Vista will still require .NET framework 3.5 and this does not come built it.
You can always download the .NET framework from the web and install it, but we are showing a method to install it offline. For this you need to DVD installation media of Windows 10. In case you do not have it, use the ISO to burn it into a bootable DVD.
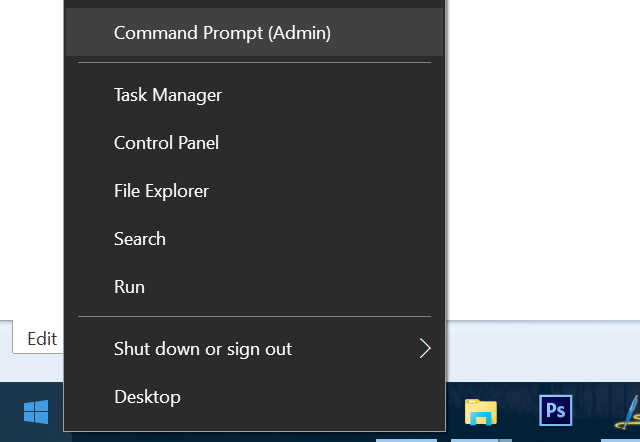
You can install it from the DVD using Deployment Image Servicing and Management command line tool. First step is to insert the DVD drive and then right click on the start menu and select Command prompt in admin mode.
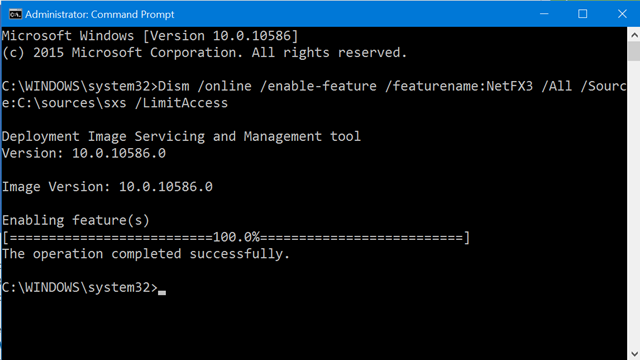
Now type the following command in the prompt.
Dism /online /enable-feature /featurename:NetFX3 /All /Source:D:\sources\sxs /LimitAccess
Here the D denotes the drive where Windows is installed, if it is in C drive, replace it with C. This will deploy the imaging services and install .NET framework 3.5 on your Windows 10.
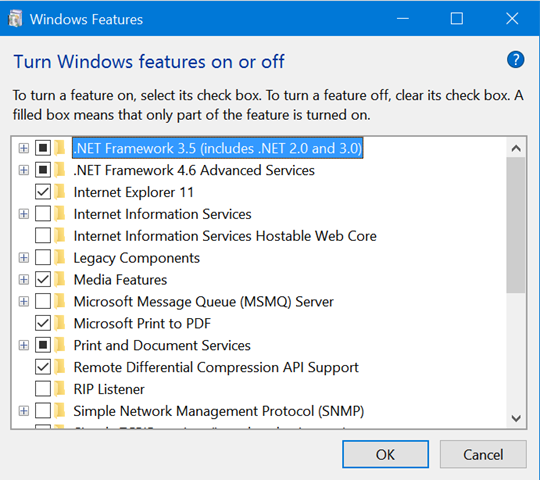
Alternatively, if you have an Internet connection, you can enable it using the programs and features. Just use the run command and type appwiz.cpl and press enter. This will open the Programs and Features window. On the left side, you will see a link “Turn Windows features on or off”. Click on this option and you see an option .NET Framework 3.5 (includes .NET 2.0 and 3.0), check this option and click ok.
It will install the framework by downloading from the internet.


Great article, today i am finding about how can install IIS on windows 10. this is very helfpful for me thanks for sharing.
“the D denotes the drive where Windows is installed, if it is in C drive, replace it with C.”
D: shpuld be the drive from where the Windows 10 was installed. That is the drive where the Windows 10 ISO was loaded. In my case it was E:. When I tried the command with C: it did not work. However when I used E: it worked smoothly.