Similar to other versions of Windows, Windows 10 also comes with built in user accounts. This includes the guest account and also the administrator accounts which are disabled by default. These account are disabled on Windows 10 for security reasons as hackers might get hold of access to your account.
Guest account, as the name indicates is for guest users who just want to use the PC for browsing or checking email. So instead of creating a new user, it is always good to have the guest account enabled. So here is how to enable this account.
Important Note: It is not advisable to enable the guest account as it might put your computer to risk.
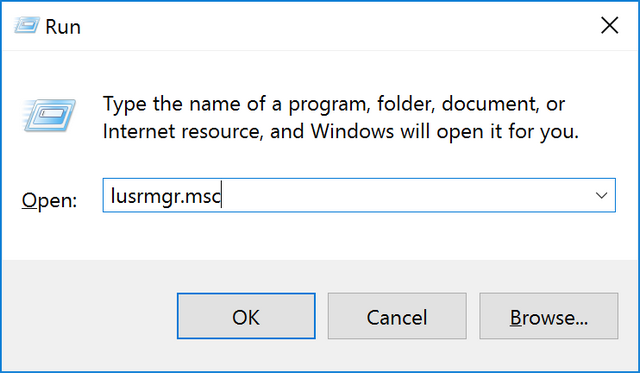
To enable the guest account, open the run command in Windows 10 (Win key + R) and type lusrmgr.msc. Press enter and this will bring in the local users and groups.
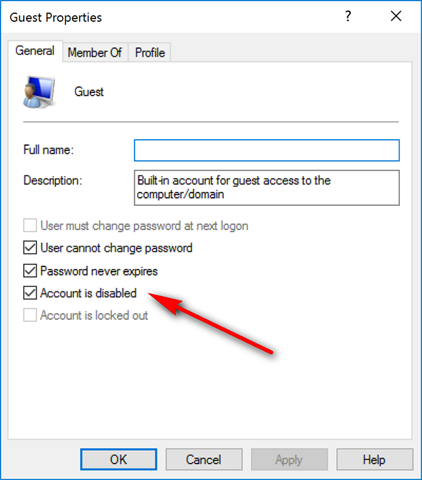
Select the users folder in the local users and on the right side you will see all the account available. Here you will see guest account as well. Now, double click on the guest account and it will pop up the guest account properties.
In the properties window, you will see an option “Account is disabled”. Uncheck the box against this option and click OK. Now the guest account is enabled on your Windows 10 PC. Now you can log off from your existing account and you will see the guest account enabled on the login page.
Once the use of guest account is done, make sure you disable this account as it makes your PC less secure.


