Windows 10 is the latest version of Windows and comes with host of new features and improvements over the previous version. Now, when you install Windows 10 for the first time, you might have to set up the display resolution. The display resolution is important as it decides the clarity of text, images and videos on Windows 10. You can easily change Windows 10 screen resolution from the settings panel.
Also, some of the app change the screen resolution automatically when they are running and once the app is closed, the resolution does not come back. So in this post, we will show to ways to change the display resolution on Windows 10.
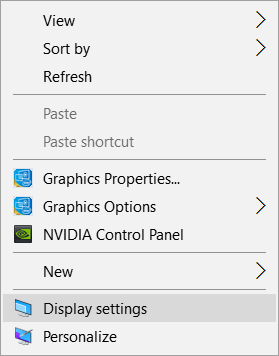
To change the Windows 10 screen resolution, right click on the desktop and select the option Display settings.

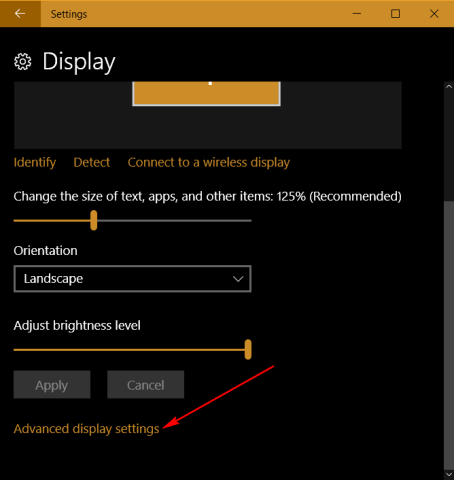
This will open the settings panel of Windows 10 with display settings. You can also open the display settings from Settings-> System-> Display. Scroll down in the display settings and you can see the advanced settings option and click on the link.
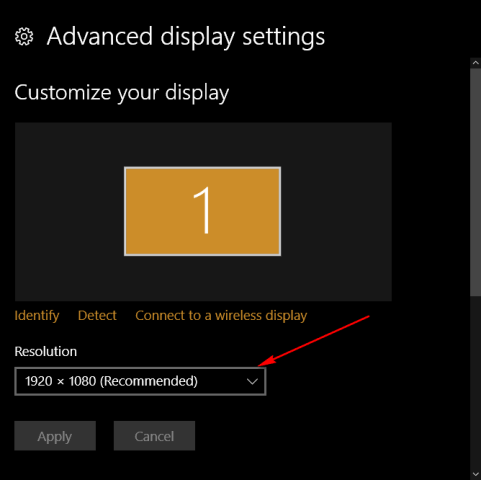
This will open the option to customize and change Windows 10 screen resolution. The dropdown panel offers all the available resolutions and you can set the option accordingly.
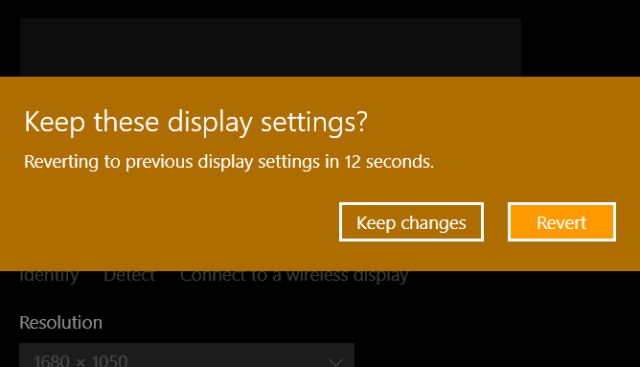
Once you apply the new screen resolution, you get the confirmation box to keep the new settings. If you are ok with the new settings, you can keep the changes or revert back if you find it not good.
Now you can enjoy the new screen resolution on Windows 10.


I think it would be good to add that increasing the screen resolution on Laptops will drain more battery and will slow it down just a tiny bit, that goes without saying of course but someone who is relatively new to technology might not know this.