Windows 10 has multiple plans to manage the battery on your laptop. There are different modes like balanced, power saver, high performance etc to get the better out of your laptop battery when using Windows 10 as your OS. To switch power plan in Windows 10, you need to open the power settings in Control panel or Settings and change it. This option to change is not a very easy option especially when you change power plans quite often in a day. This is where a free app called PowerPlanSwitcher helps. This app is a Windows Store app, which when installed provides easy option to change the power plans from the system tray.
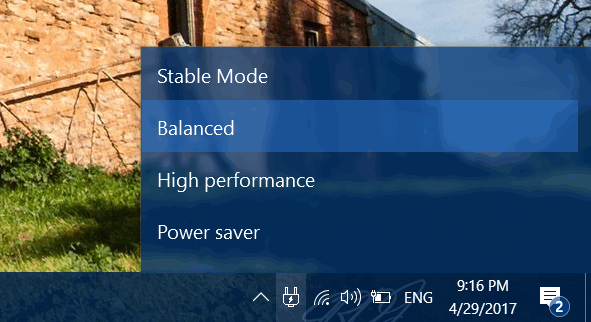
You can install the free app from the Windows Store (link below). Once installed, just run the app and you can see a power adaptor icon in the system tray. When you click on this icon you can see the different modes available and easily switch between them from the system tray without having to go to settings.
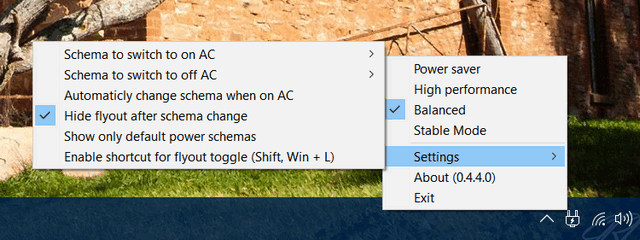
The app also can automatically switch power plans when you connect the PC to power source.
Features of the app:
- Windows10 styled flyout that allows quick power plan schemas changing
- Ability to limit flyout only to Windows default power plan schemas
- Automatic schema switching when AC adapter gets (dis)connected (disabled by default)
- Launch on Windows startup
- Flyout shortcut (Shift+Win+L)
- Navigate flyout with keyboard
- Change all settings by right-clicking on tray icon
PowerPlanSwitcher is a very nifty tool to allow two-click switching between high performance, balanced and power saving schemes.


Thank you!