We all use Internet on our Windows 10 laptops and desktop but seldom check the amount of data used by PCs. Sometimes when we have a high-speed internet connection we end up using a lot of data and this connection might not be a truly unlimited one and you might end up with higher costs. Similar to Android phones, you can set data usage limits in Windows 10 PCs as well. With the latest update for Windows 10, Microsoft has added this feature. The feature is included in network and settings and in this post we will look at how to set data limits in Windows 10.
How to Set Data Usage Limits in Windows 10
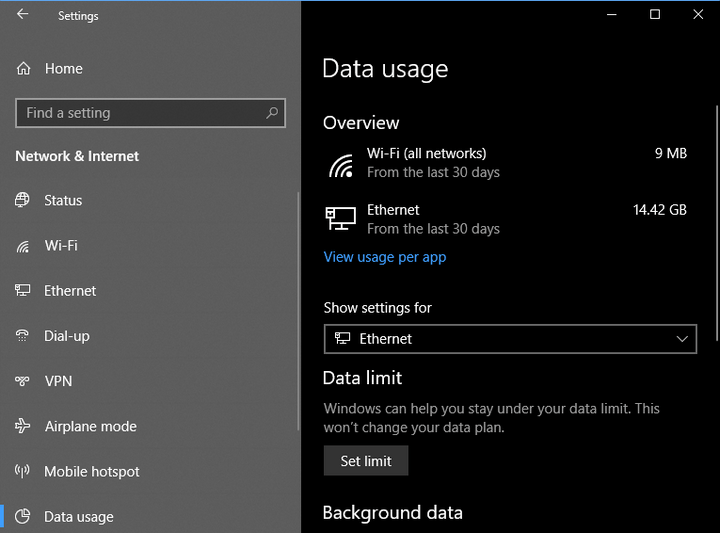
1. To set up data usage limits in Windows 10, open the Settings panel by typing settings in start menu.
2. Navigate to Network and Internet and click on Data Usage on the left sidebar.
3. In the right side panel, select the internet connection for which you want to set the limits.
4. Click on the button Set Limit below.
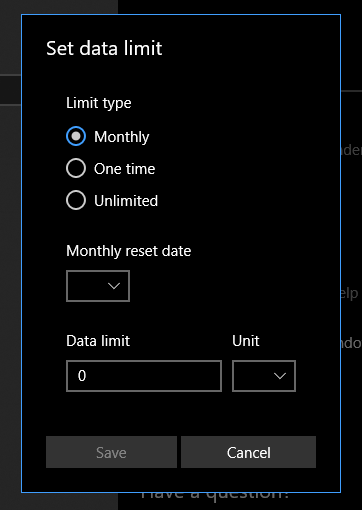
5. Here you will be able to set Monthly, One-time or Unlimited usage. You can also set it to reset at the end of every month.
6. Enter the amount of data you would like to consume for a month and also select the unit. Click on the Save button to set the limits.
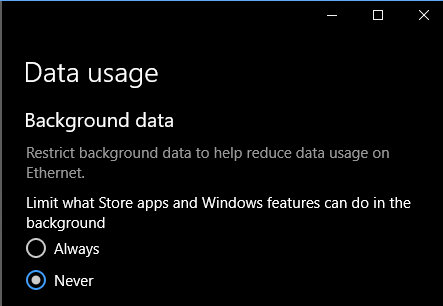
7. You can also restrict the background data usage by apps from the settings below.
Now you have successfully set the limit for monthly usage of data on your PC. This option will make sure that you don’t cross the monthly limit for your internet connection and end up paying high amount for your internet connection. If you are using multiple PCs under the same connection, make sure that the limits are set accordingly.
NB: This option it available only in the latest version of Windows 10.


