There might be instances when you might want to record your desktop. While there are many good screen recording tools available for Windows, many of them are paid. VLC Media Player is one of the most popular video player available for Windows and this tool comes with an option to record screen on Windows. In this post, we will show you how to enable screen recording using VLC Player.
How to Enable Screen Recording using VLC Player:
1. Once you have installed VLC Player, open the app.
2. Now click on the Media tab from the top toolbar. From the media tab select Convert/Save.
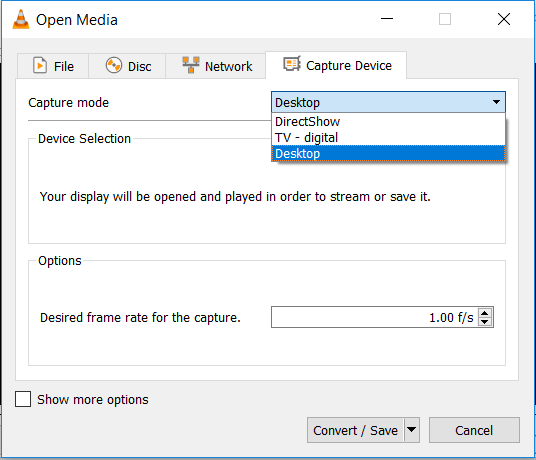
3. In the open media tab, switch to Capture Device. In this tab, you need to select Desktop from the change Capture mode drop-down box.
4. In the next step, you can set the desired frame rate for capture. If you want a high-quality video, then set the rate to 30FPS or more. But at the same increasing, the FPS rate will also increase the file size.
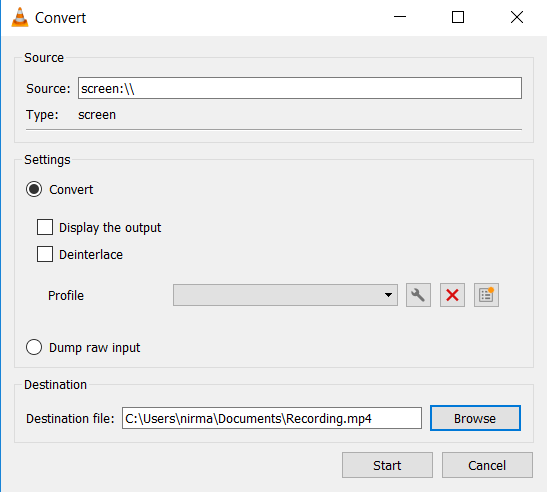
5. Click on Convert/Save button and select the location to which you want to save the screen recording. You can use the browse option and select the file name.
6. Once you click the Start button, the screen recording will be started by VLC in the background.
7. When you are done with screen recording, you can click the stop button and VLC will save the file as MP4 in the location you have specified.
If you are already using the VLC player, this is a pretty good option to record your screen for free.


