There are many instances where you might want to take the screenshot on Windows 10. While there are many third-party apps to take a screenshot in Windows, the OS itself offers some inbuilt tools to take screenshots. So, if you want to share some information with your friends or save some information on the screen, then screenshots are the best way to do it.
In this post, let’s have a look at some of the options to take a screenshot in Windows 10.
How to Take Screenshots in Windows 10:
Option 1:
This is the easiest option and you need to press the Win key and Prt Scrn button on the keyboard. This will save the entire screen as an image on your PC. To confirm the screenshot has been captured, Windows 10 will dim the screen for a second.
Once you have got the confirmation, you need to open Windows File Explorer (Win key + E) and then navigate to This PC > Pictures > Screenshots to view the screenshots.
Option 2:
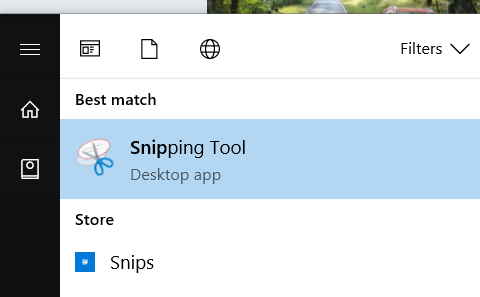
Another option to take a screenshot if you want to capture a particular window or an area on the screen, then probably the best option is Snipping tool from Microsoft. To use this tool, open start menu and type Snipping tool.
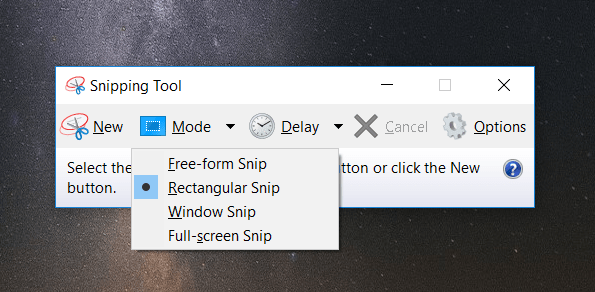
Once the tool opens you can select the type of capture you want to do. You can select from free-form, rectangular, window and full-screen snip.
Once you have captured the screen, it opens a basic editor where you can make some edits and save the screenshots. The Snipping tool is one of the really good options to capture screenshots on Windows 10.

