If you are not able to access some websites in your country or if they are blocked, the best option is to try a VPN connection. A virtual private network (VPN) extends a private network across public networks like the Internet. It enables a host computer to send and receive data across shared or public networks as if they were an integral part of the private network with all the functionality, security and management policies of the private network. Similar to previous versions of Windows, you can set up a VPN connection on Windows 10 as well. In this post, we will show you how to set up VPN connection on Windows 10.
Set up VPN Connection on Windows 10
To set up VPN, follow the steps below.
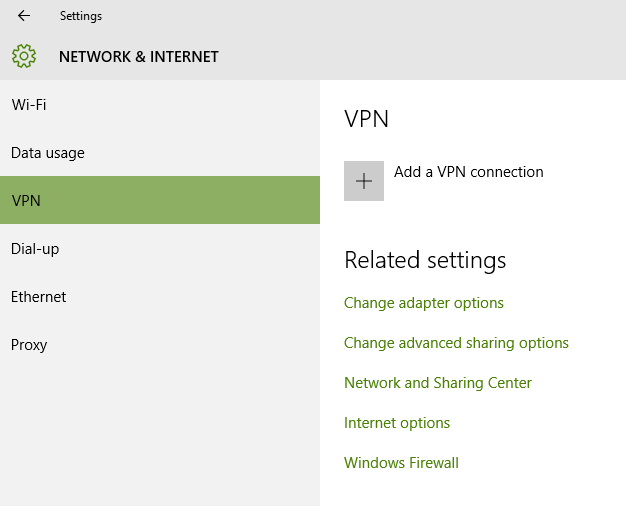
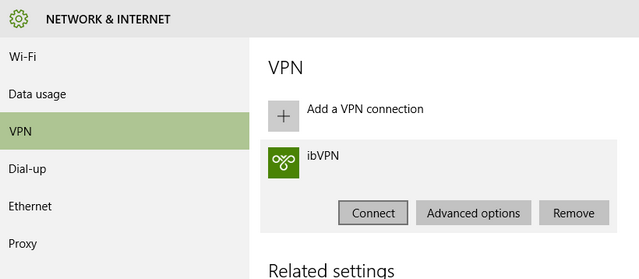
Step 1: Open the settings menu and then navigate to Network and Internet and select the VPN.
Step 2: Here you can see an option “Add a VPN connection”, click this and you can a pop up asking for the VPN details.
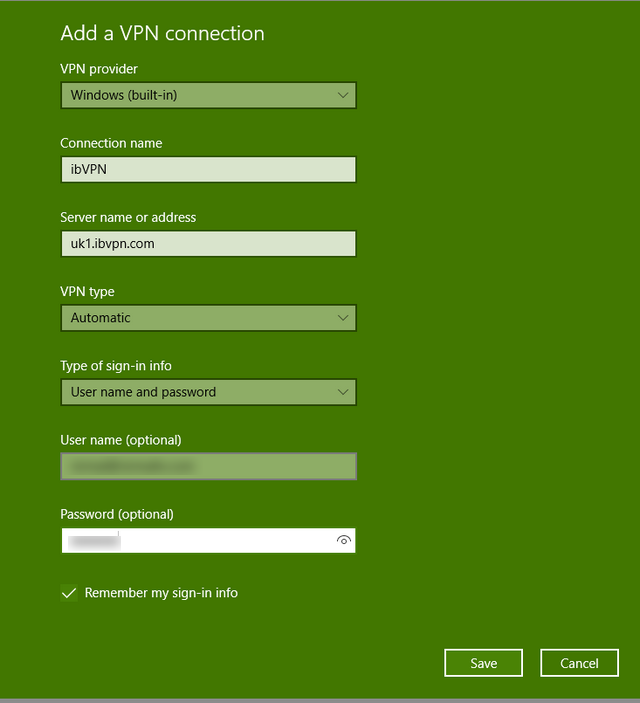
Step 3: Here select the following details:
- VPN Provider- Default Windows (Built-in)
- Connection name: This is the name used to identify the VPN, you can give any name.
- Server name or address: This is provided by the VPN company and they might be having multiple locations, enter any of the server locations of the service provider.
- VPN Type: Automatic
- Type of Sing-in info: If it is a free connection without any user name or password, you can leave rest of the boxes blank. If it has a user name and password, use it in the boxes below. There is also option to use smart card.
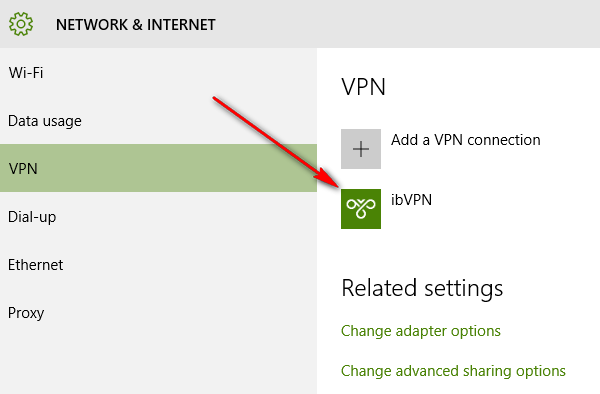
Step 4: Now click the save button. You will see the new VPN connection is saved and is listed under the connections.
Step 5: Now to connect, click on the connection and you can see the option to connect. This will validate the VPN with the server and check your credential and then log in.
Step 6: Once you have logged in, you will be able to see the VPN connected in the network option in the taskbar.
Now you can start browsing and access the websites blocked using the VPN on Windows 10.



thanks for sharing this wonderful post.