Microsoft had the Edge Web Browser on Windows 10 for quite some time now. But recently the company has announced a brand new Edge browser based on Chromium. It is available for download for Windows and Mac OS users. The new Edge browser is based on Chromium which means you get all the aspects of Chrome browser. Similar to Google Chrome, Edge also supports user profiles. In this post, we will show you how to create multiple user profiles in Microsoft Edge browser.
Create Multiple User Profiles in Microsoft Edge Browser
Step 1: Open Microsoft Edge Browser on your Windows PC.
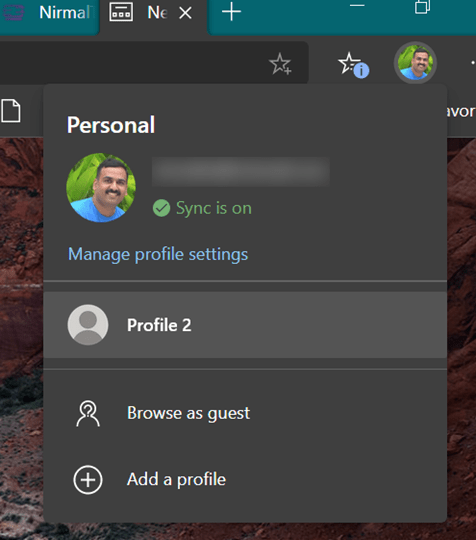
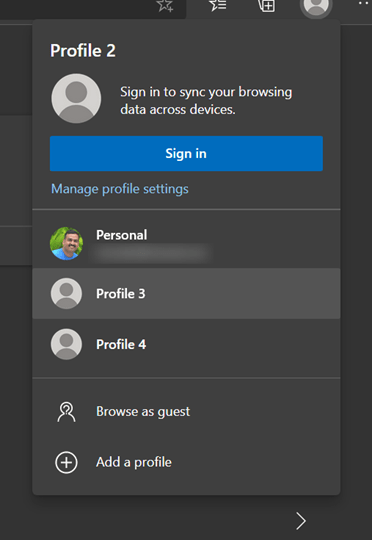
Step 2: There are two options to create a new Profile, first one is to click on the profile icon on the top right corner. This will bring a new menu and you can see the option called Add new profile. Clicking on this adds a new profile. But here you dont have the option to customize the profile unless you go to the settings.
Related Reading: How to Install Google Chrome Extension on Edge Browser
Step 3: Second option is to go to three dots on the top right corner and select Settings from it. Here you will see profiles listed in the sub menu on the left side.
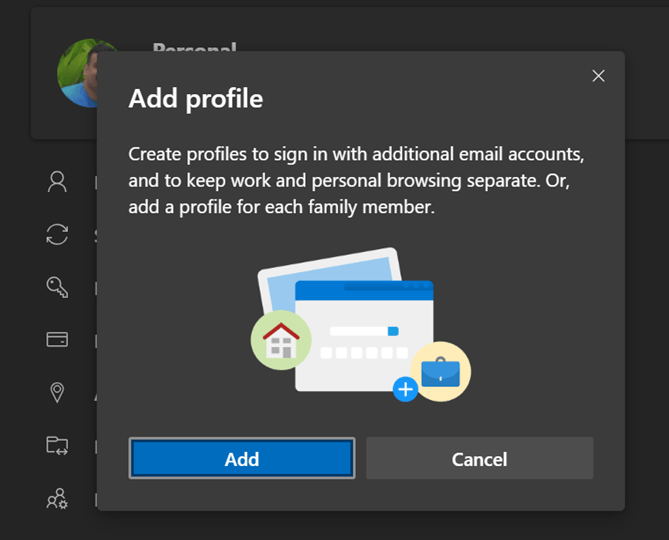
Step 4: This will ask a confirmation to create a new profile. Now click on the add button and your profile is created.
Step 5: Now that the profile is created, you can customize it. You can either sign in with Microsoft account or use a local account. Go to the profile page and click on the three dots against sign in button and click edit.
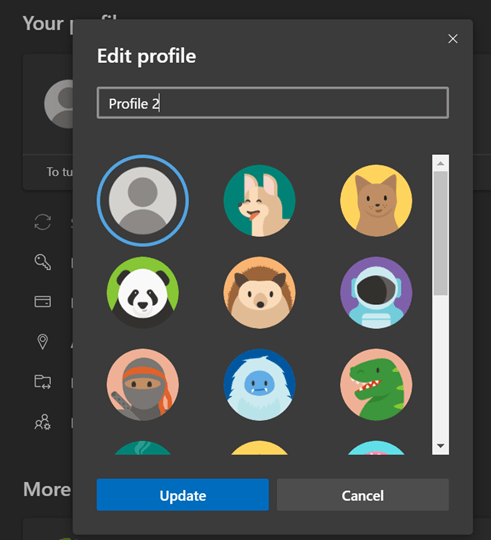
Step 6: Here you can change the name of your profile and also set the default icon for your profile from the list of icons or avatars available.
Step 7: In case you want to switch between different profiles, click on the profile icon on the top and you can see the list of all profiles available. From here you can easily switch between different profiles in Edge browser.
If you do not want to create profiles, you can also browse the web as a guest user. The option is also available in Edge browser. You can also sync accounts in each profiles if you wish.

