Big Sur is the latest version of Mac OS and has been released for all devices. Big Sur comes with a lot of new changes, in terms of design, performance and also brings in a lot of new features too. Every OS has the ability to take screenshots and save them on your system. Mac OS also has the ability to save screenshots, you can take screenshots using the default keyboard shortcuts available. By default, Mac OS saves the screenshots onto the desktop, so how to change the default screenshot location on Mac Big Sur?
In order to change the default screenshot location on Mac Big Sur, follow the steps below.
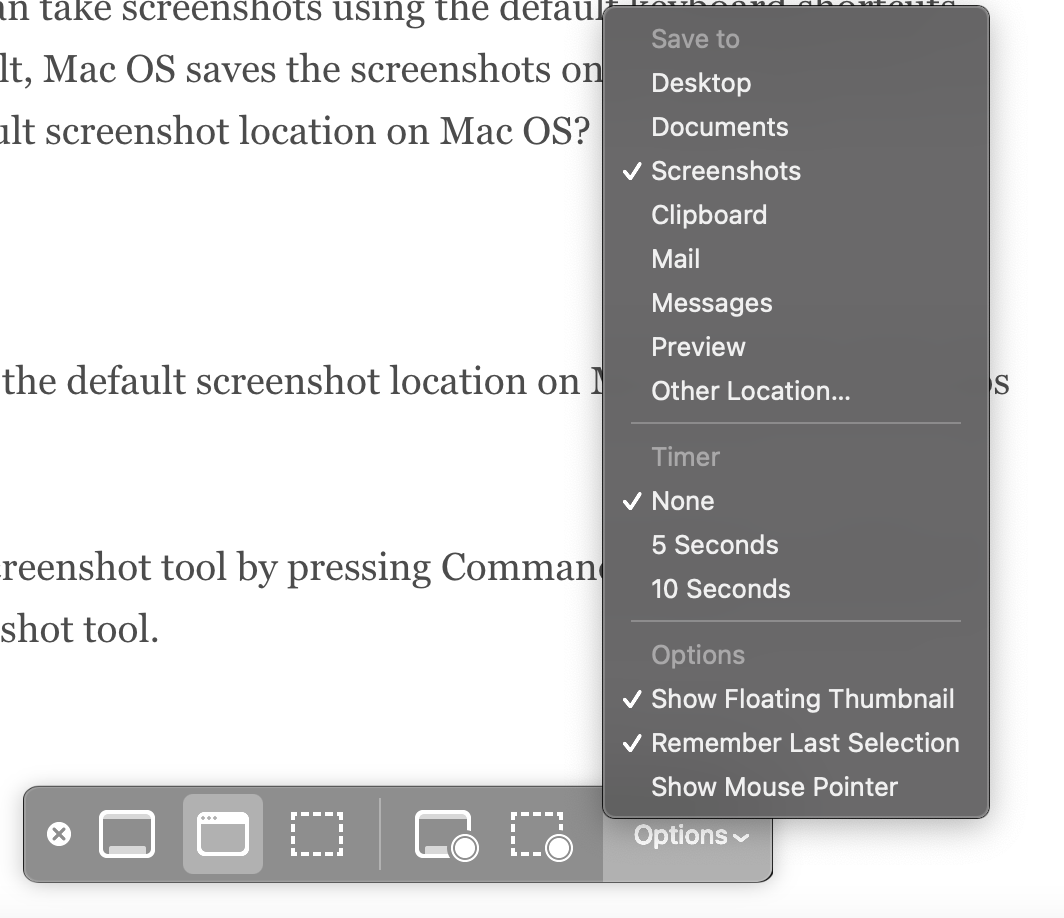
Step 1: Open the screenshot tool by pressing Command+ Shift+ 5. This will open up the screenshot tool.
Step 2: In the screenshot tool, click on the options button and here you will see an option to select the folder where you want to save the screenshots on Mac.
Step 3: Now either pick a folder that is listed in the options or choose Other Location, which means you can specify the location.
Step 4: Once you have changed the location, the next time you take a screenshot, you will be able to see the screenshots saved in the new location.


