Facebook is undoubtedly one of the most popular social networking platforms out there and it is little chance that you are not having an account with Facebook. Now, what if you wanted to change your name on Facebook? this can be due to multiple reasons like you got married and want to change your surname or you officially changed your name, etc. Facebook allows users to change their display name and there are some guidelines available to select your name. So how to change your Facebook name?
Related Reading: How to Download Facebook Videos
How to Change your Facebook name?
Step 1: In the first step, open facebook.com on your desktop web browser and then log in to your account.
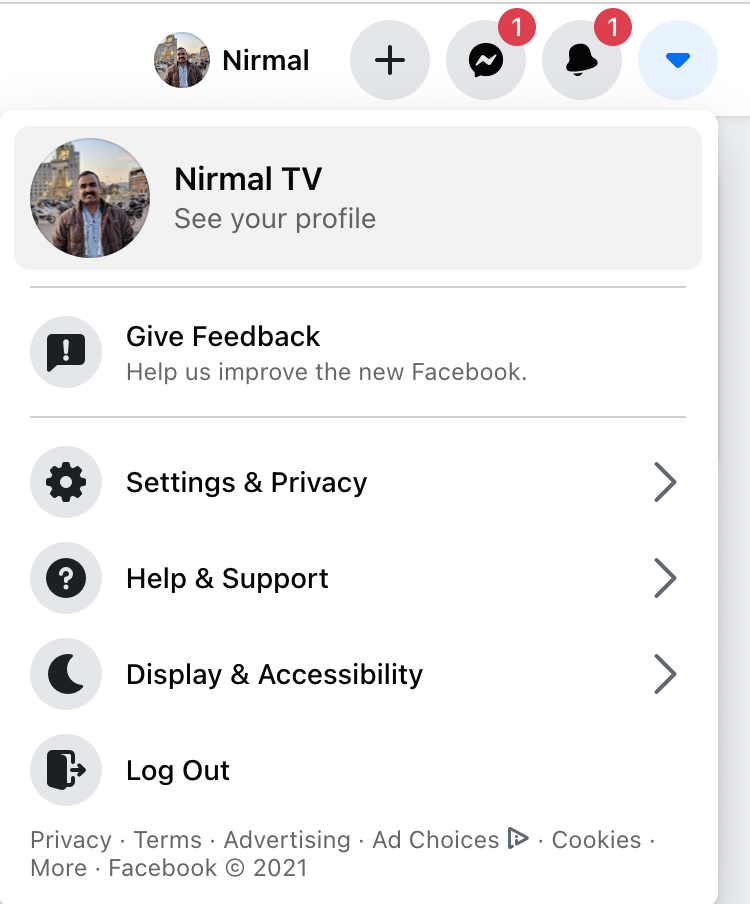
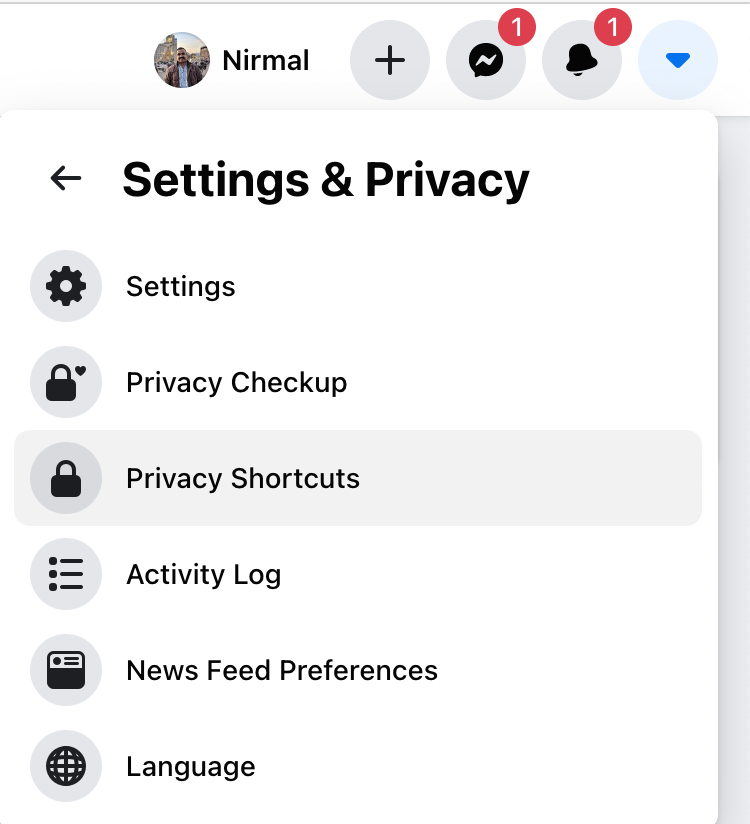
Step 2: Once you have logged in to Facebook, click on the down arrow on the top right corner and this will bring up a menu. Select settings and privacy options here.
Step 3: In the next step, select Settings (first option) from the menu.
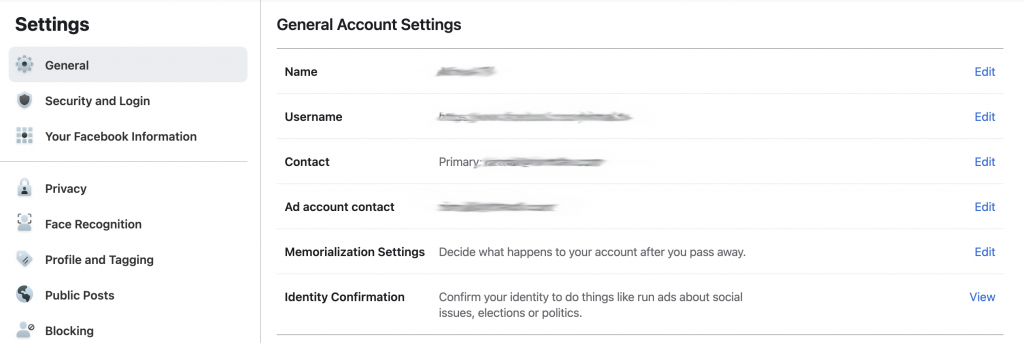
Step 4: On the settings page, you can see your name mentioned under the general tab and you will see an edit button on the right side corner.
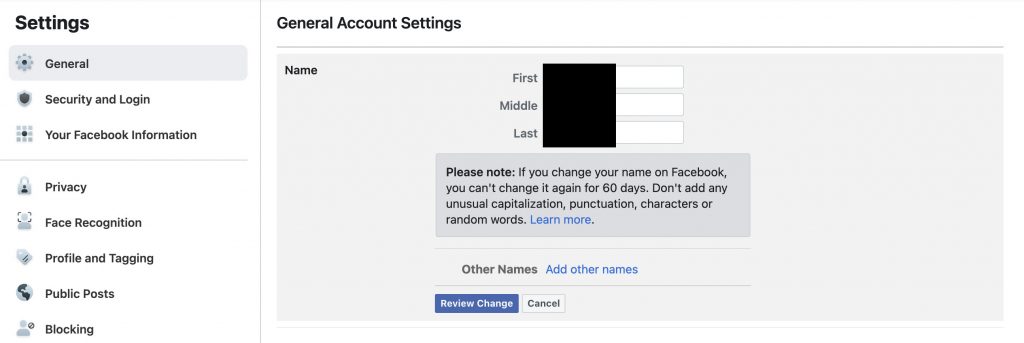
Step 5: When you click the edit button, you will have the option to enter your First name, middle name, and last name.
Step 6: Once you are done with editing, click on the Review changes button, and your name is changed. Remember, you cannot change your Facebook name for the next 60 days.
Things to keep in mind while changing the name:
While you can change your name, there are few things to consider while writing your name. Please do not use special characters, numbers, punctuation, and unwanted capitalization of letters. Also, you need to avoid using religious, professional, and offensive words as names in your Facebook profile.


