When you buy a new Windows 10 powered laptop, you get a lot of options in terms of security for your laptop. Microsoft offers Windows Hello service for your security. Windows Hello is the option in Windows 10 which lets you sign in to your devices, apps, online services, and networks using your face, iris, fingerprint, or a PIN. Whatever info you add to your device for the PC to identifies your face, iris, or fingerprint, it never leaves your device. Windows does not stores pictures of your face, iris, or fingerprint on your device or anywhere else. So Windows Hello fingerprint unlock is a good security option to have on your PC. So how to set it up?
Related Reading: How to Enable Windows 10 Automatic Login
How to Enable Windows Hello Fingerprint Unlock:
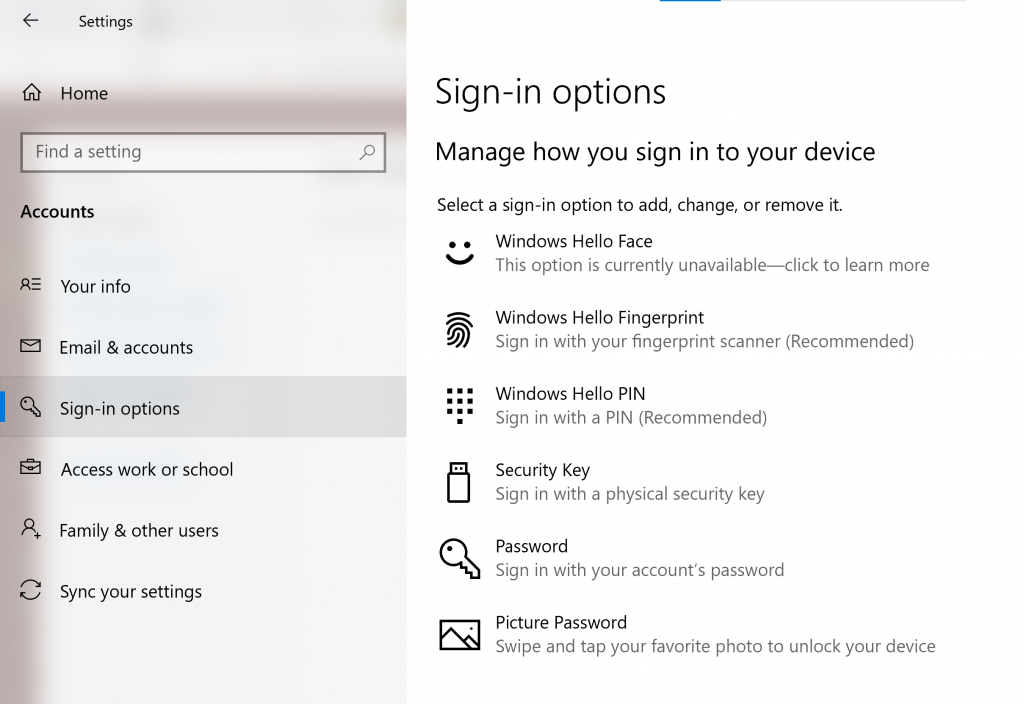
Step 1: In order to set up fingerprint unlock, open Settings panel in Windows 10 and navigate to accounts.
Step 2: Under account, select sign-in options. Here you will see the option to use fingerprint as a part of Windows Hello security option.
Step 3: You need to make sure you have a login password for your Windows account, in case you do not have, you will have to set it up.
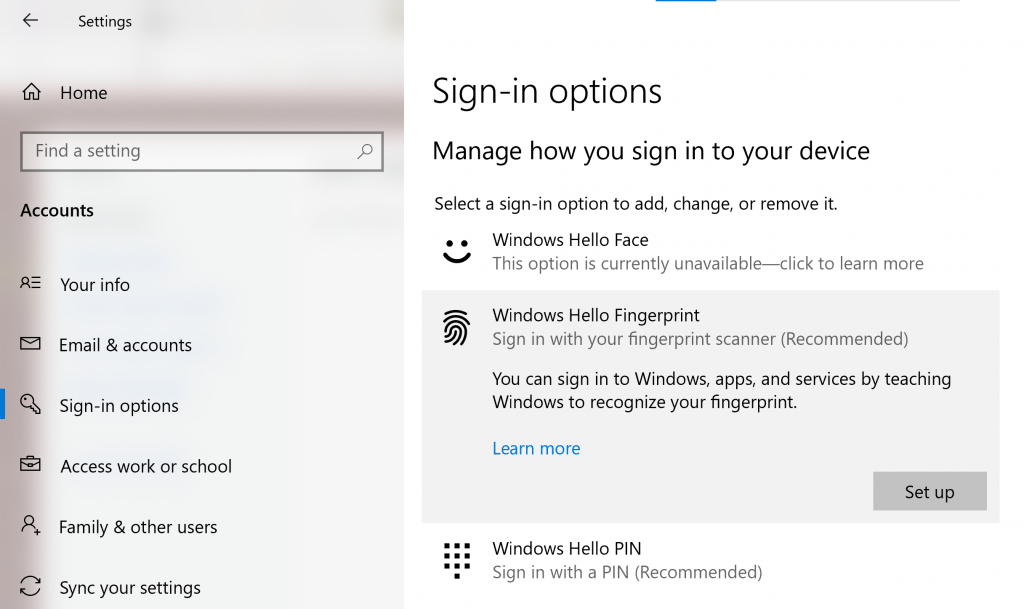
Step 4: Now click on the Set up button under the Windows hello fingerprint in the settings.
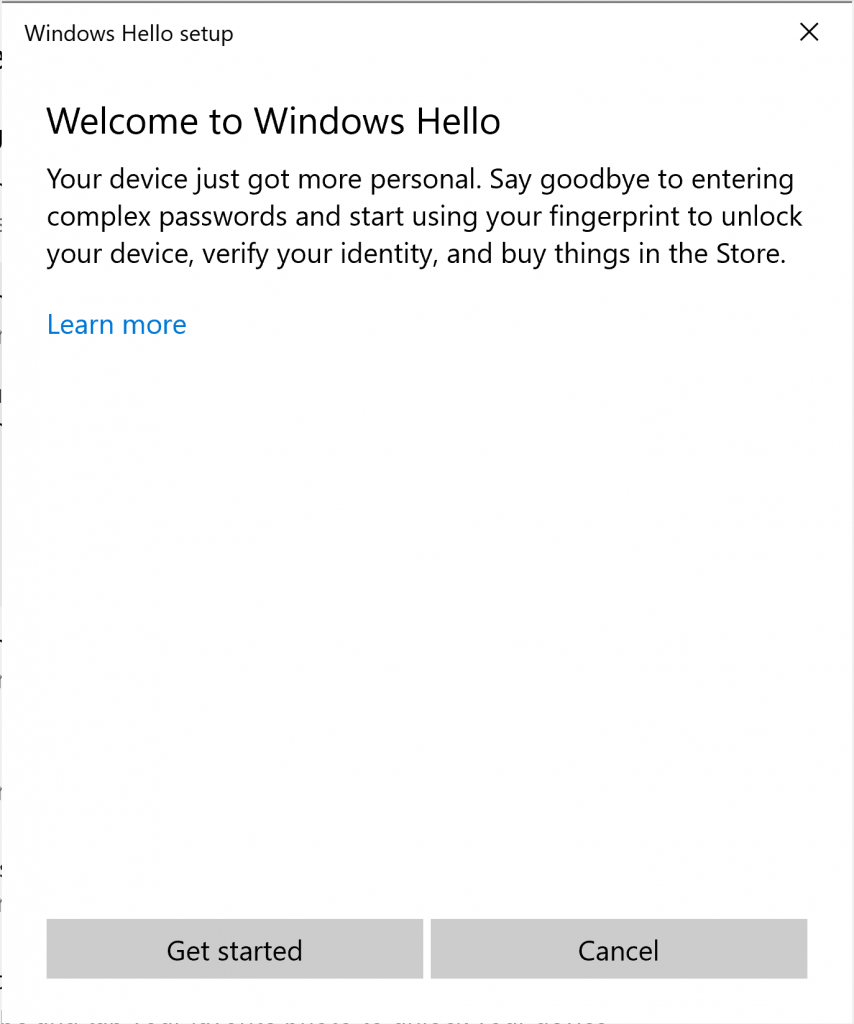
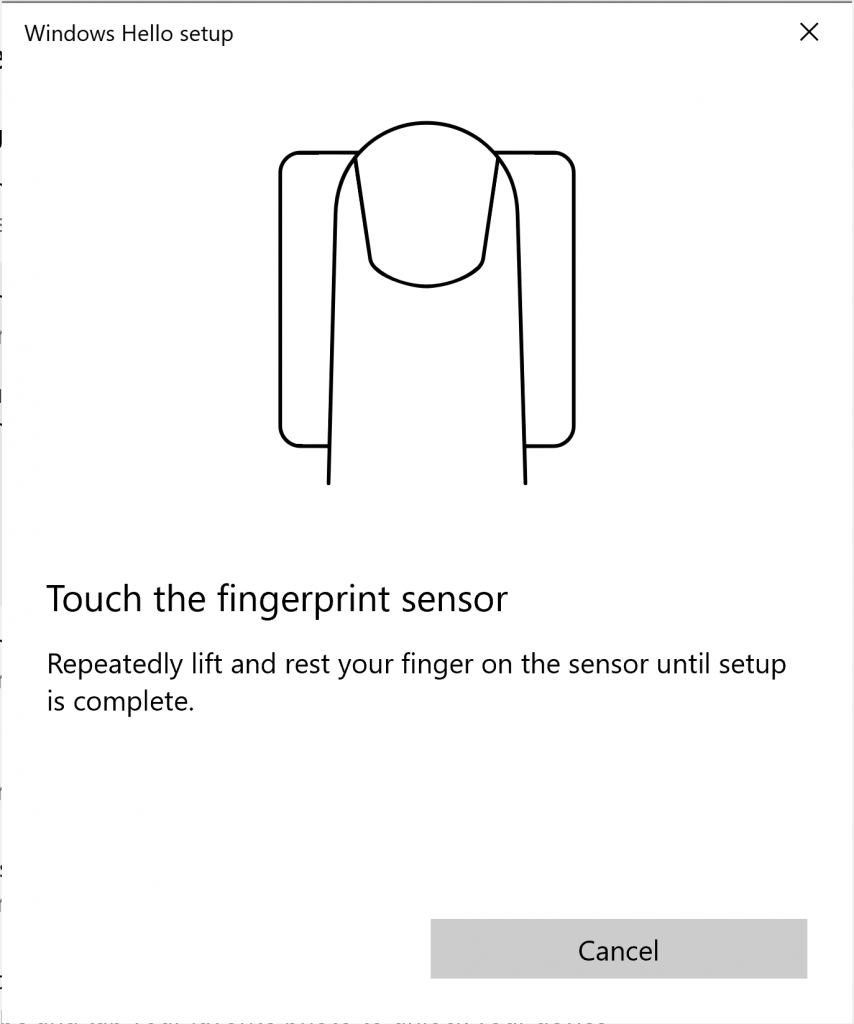
Step 5: In the next step, you need to click on the get started button and touch on the fingerprint sensor on your laptop.
Step 6: Now you need to keep touching on the fingerprint sensor while your fingerprint is registered to the system.
Step 7: Once the set up is completed, you can start using your fingerprint to log into Windows 10 using the Windows Hello Fingerprint unlock.

