Windows 11 was announced by Microsoft a few weeks back and it is available as an upgrade to Windows 10 PCs which are eligible. Windows 11 comes with new UI changes and tweaks along with performance improvements. Once you have upgraded to Windows 11, you can actually reclaim hard disk space by deleting older files. But in case you want to downgrade to Windows 10 from Windows 11, then it is better to keep the upgrade or Windows.old folder. In this article, we will show you how to downgrade to Windows 10 from Windows 11.
If you have not upgraded to Windows 11, you can check our guide on how to upgrade from Windows 10 to Windows 11.
How to Downgrade to Windows 10 from Windows 11:
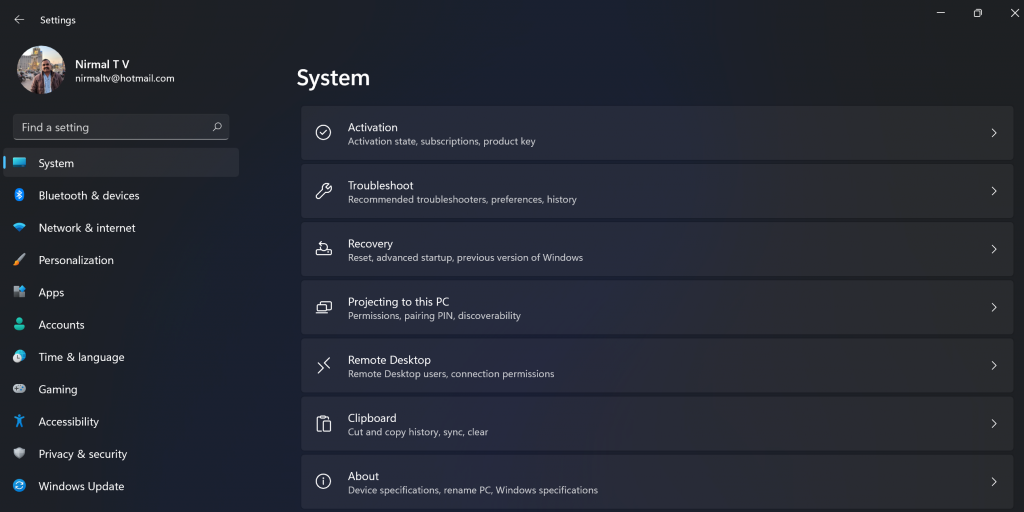
Step 1: The first step is to open the new settings from Windows 11. Here you need to go to System settings as shown in the image.
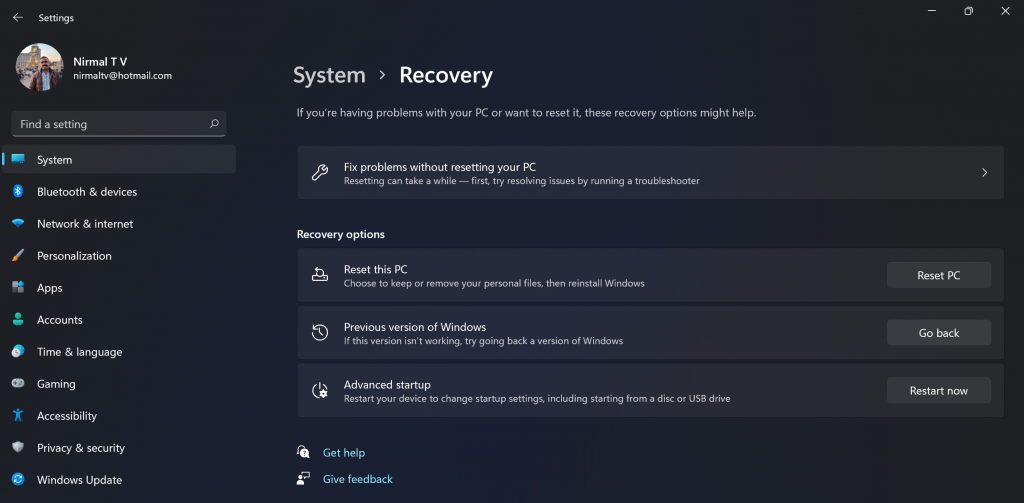
Step 2: Under the system settings, select the Recovery option. Here you will be able to see the “Previous version of Windows” option. You will also be able to see a Go Back button next to it, click on this button.
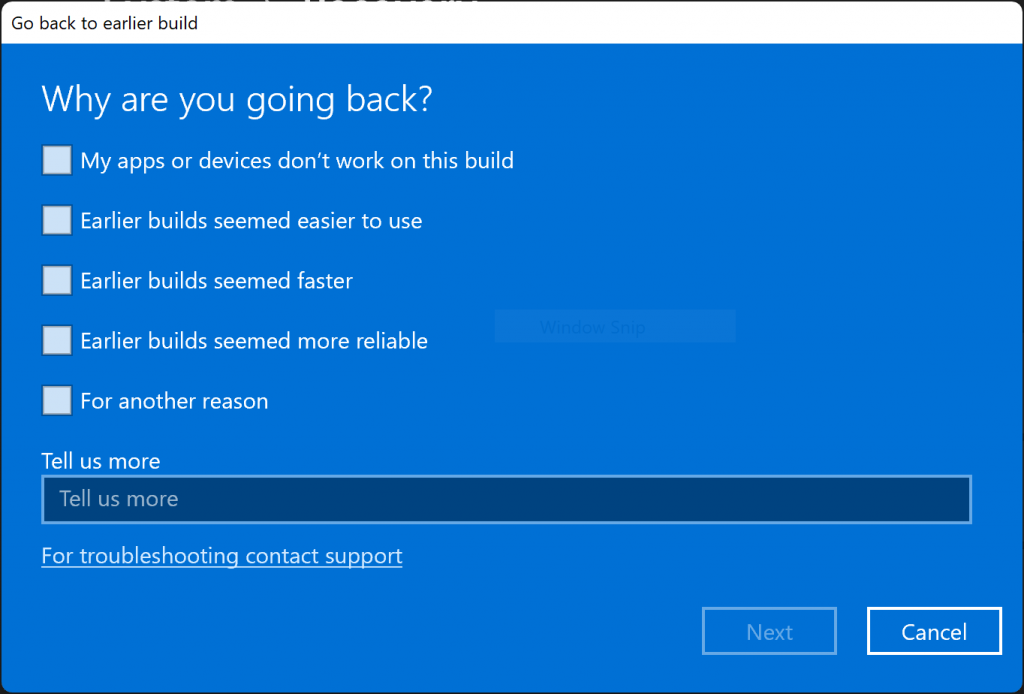
Step 3: You can specify the reason why you are going back to Windows 10 or the older version of Windows. Select any reason and click next.
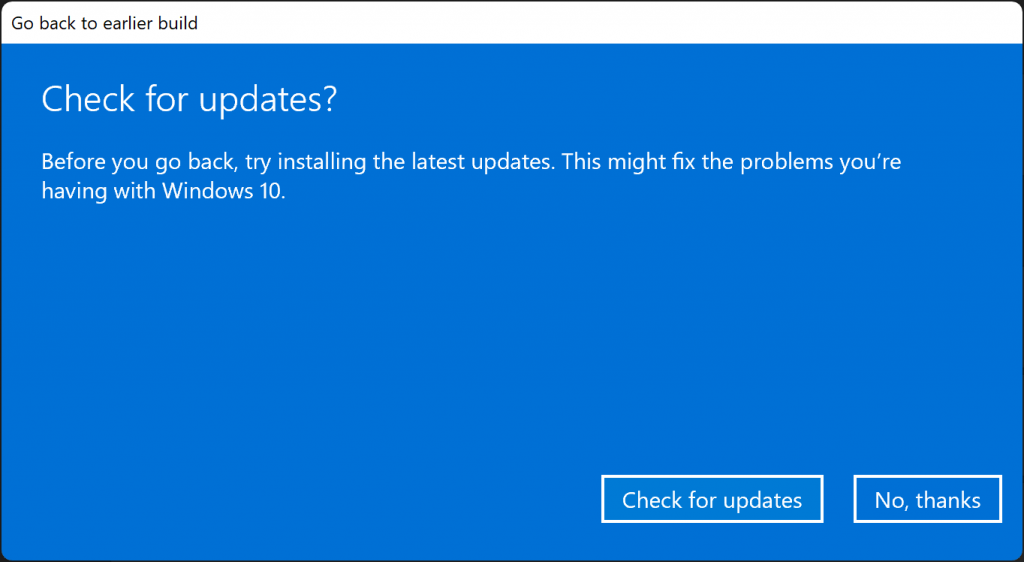
Step 4: In the next step, you can choose to check for updates or skip this step.
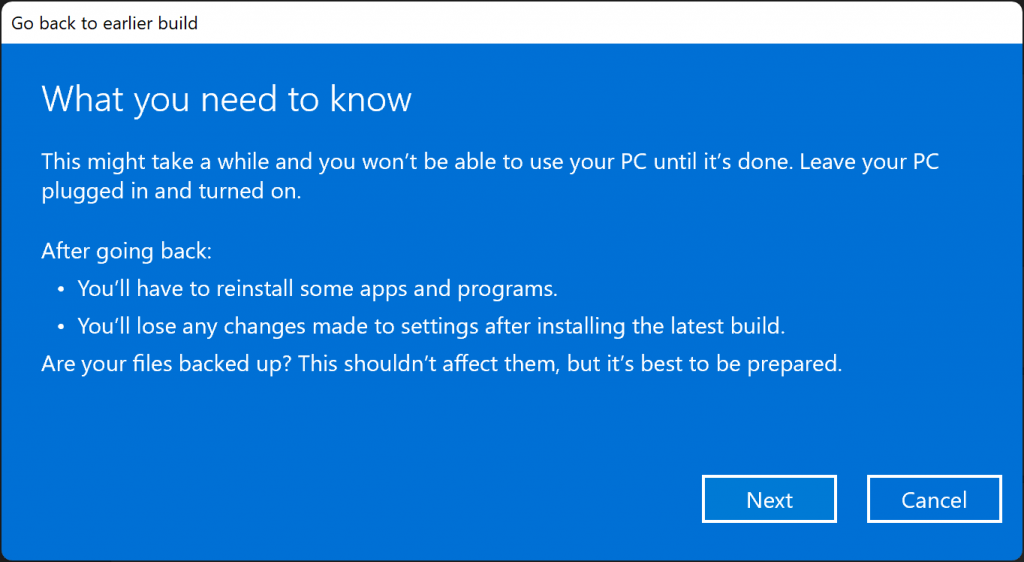
Step 5: In the next step, setup will tell you if you are ok with re-installing few apps after downgrading to the previous version.
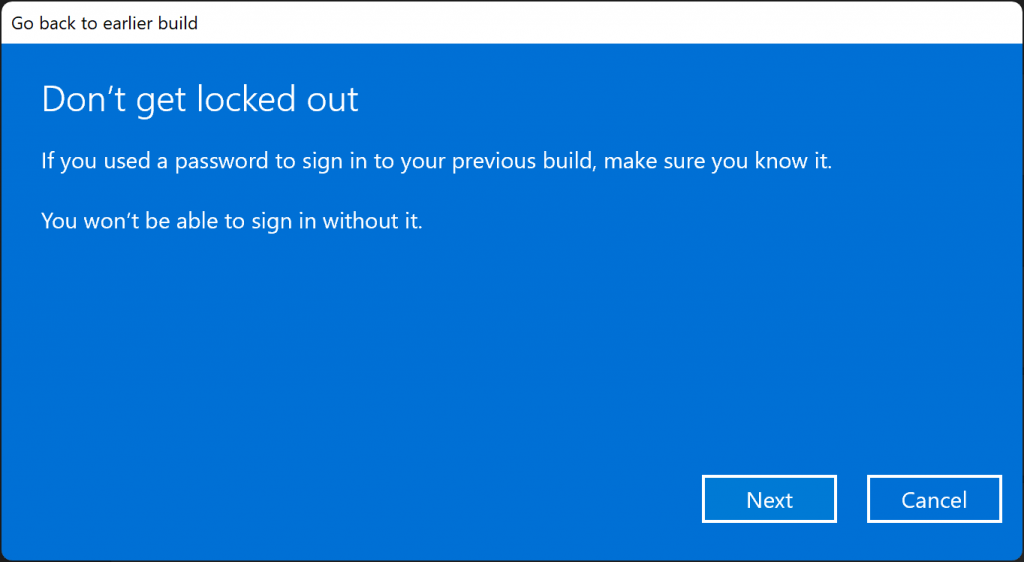
Step 6: Make sure you know the password to sign in to your previous build as it will be needed after the downgrade.
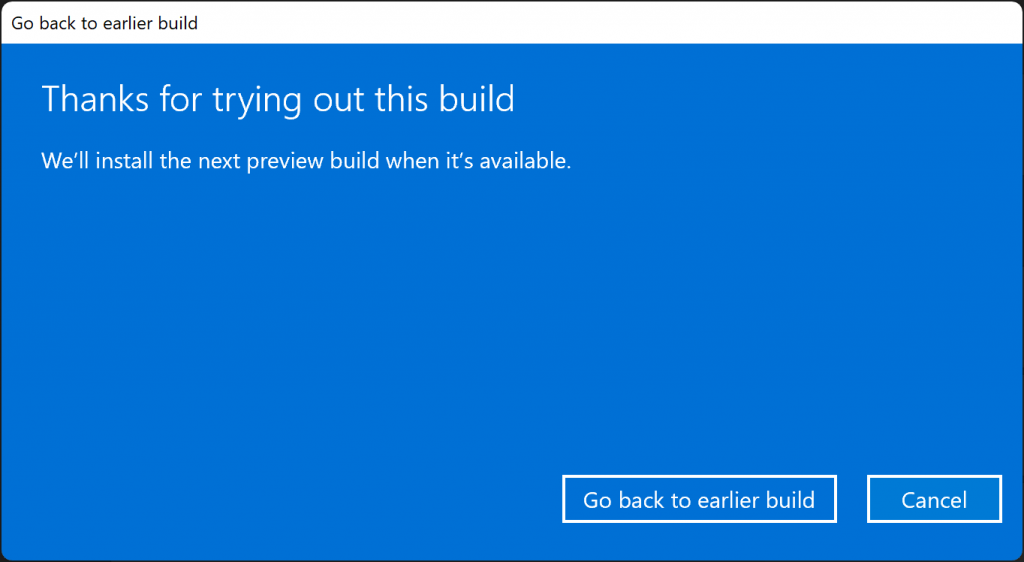
Step 7: The final step is to click on the Go back to earlier build button and Windows will downgrade your PC from Windows 11 to the previous version.



This is awesome.. followed it to every step and back to Win 10. No data loss.