If you are watching a lot of online content in HDR, then you should be enabling the HDR option in Windows 11. You can now play streaming high dynamic range (HDR) video when your Windows 10 device has a display that’s optimized for HDR video and you have Stream HDR video turned on in Windows 11. So how to enable HDR streaming on Windows 11. Here is how to enable HDR streaming on Windows 11.
Requirements for HDR10 in Windows 11:
- The built-in display needs to have a resolution of 1080p or more, and a recommended max brightness of 300 nits or more.
- The Windows 11 device needs to have an integrated graphics card that supports PlayReady hardware digital rights management (for protected HDR content), and it must have the required codecs installed for 10-bit video decoding.
How to Enable HDR on Windows 11
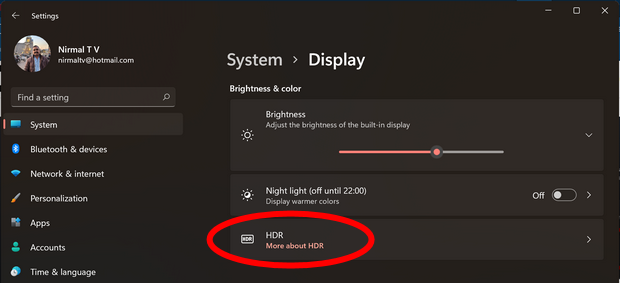
Step 1: Open the settings app in Windows 11.
Step 2: Click on the System option on the left and select Display on right panel.
Step 3: Under the display settings, you will be able to see HDR option under brightness and color group.
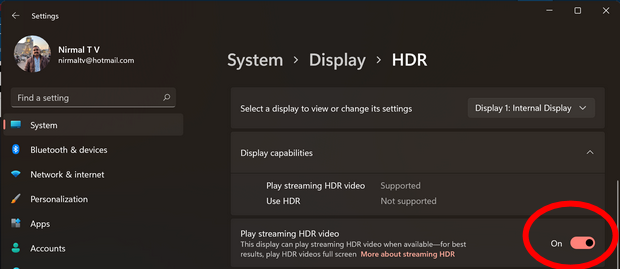
Step 4: Here you will be able to see a slider “Play Streaming HDR video”. You can turn this setting to on position.
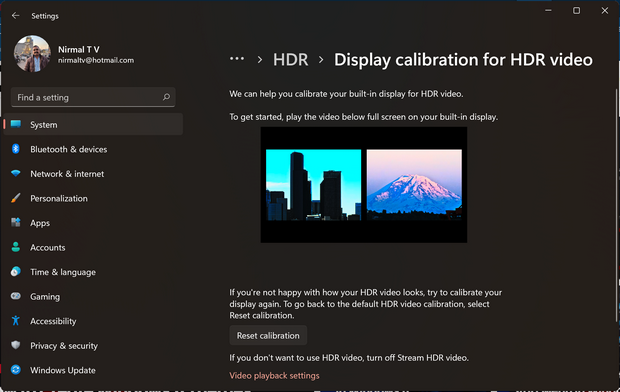
Step 5: There is an option to calibrate your display for HDR video streaming or playback.
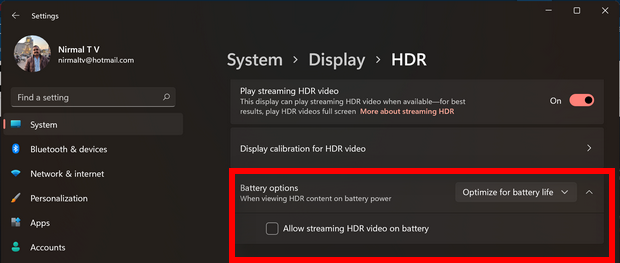
Step 6: Further down in the same settings, you can see an option for battery. If you are using the laptop on battery, make sure you uncheck the box against “Don’t allow streaming HDR video on battery”. This will make sure that Windows streams in HDR even on battery.
Note: Not all displays are optimized for HDR video. If you have two displays and move the HDR video onto a display that’s not optimized for HDR video, you’ll get the appropriate standard dynamic range (SDR) video stream as soon as new content starts to play.


