When you are using Windows 11, there are chances that you might mess up the OS due to bad drivers or bad installation of software. Such issues can cause instability in Windows and can lead to BSOD and frequent crashes. This is where the System Restore feature works. System Restore is a feature in Microsoft Windows that allows the user to revert their computer’s state to that of a previous point in time, which can be used to recover from system malfunctions or other problems. So in case you are facing issues with Windows 11, you can revert to an earlier state with a restore point.
How to Create System Restore Point in Windows 11:
Let’s see how you can create a system restore point and then bring back Windows 11 to an earlier state.
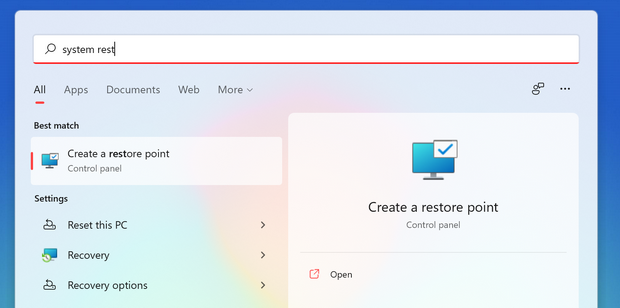
Step 1: Open the start menu and type system restore. You will see the option to create a restore point, open this.
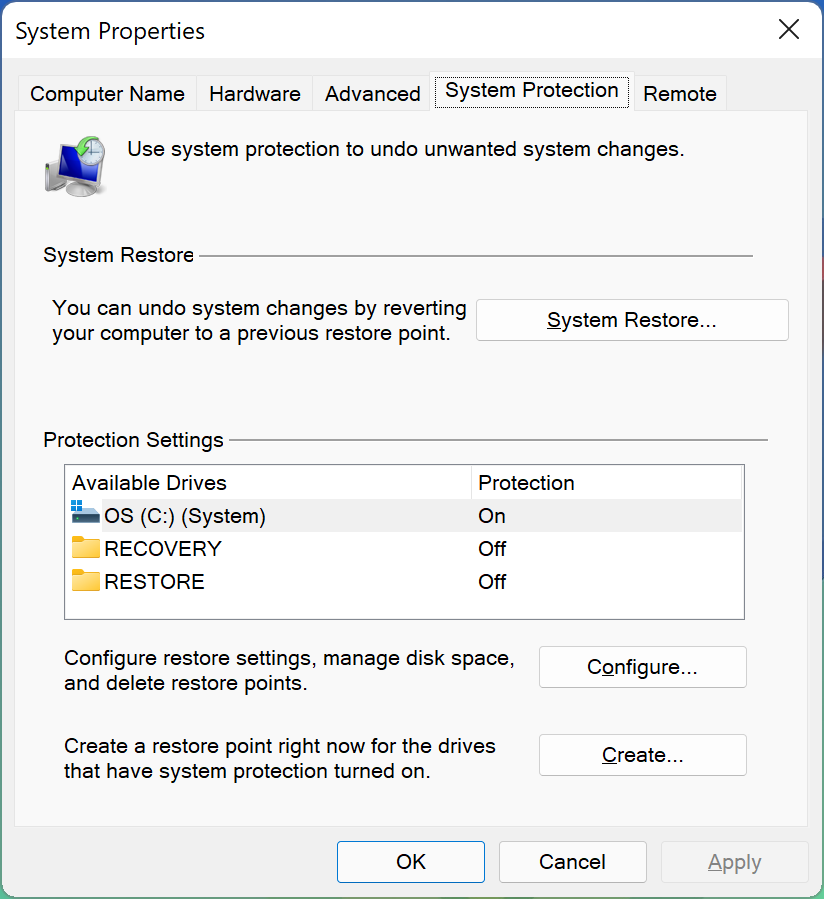
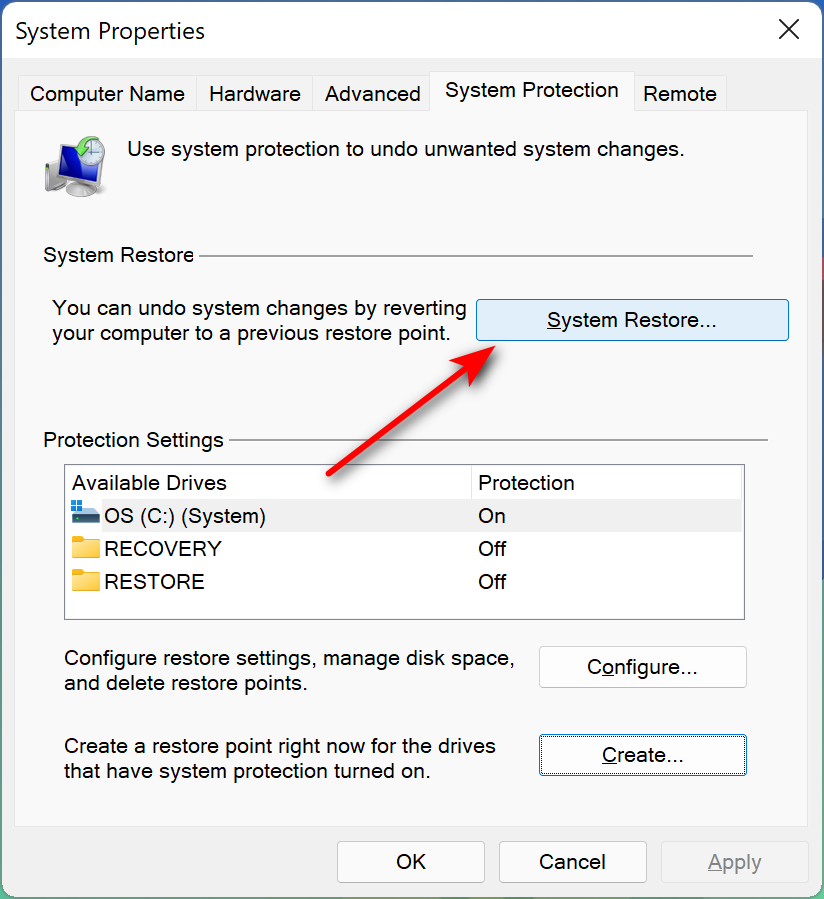
Step 2: This will bring up the System Properties window and select the System Protection tab.
Step 3: Now click on the create button at the bottom of this tab.
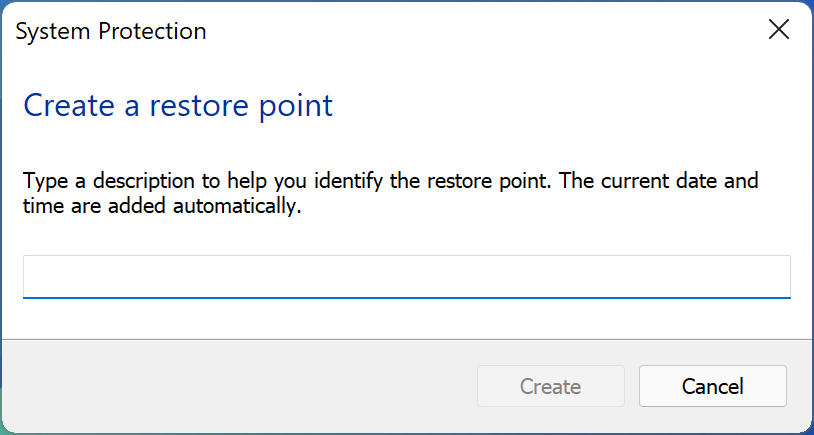
Step 4: Enter a name for your system restore point. You can specify any name for this, but make sure it is identifiable.
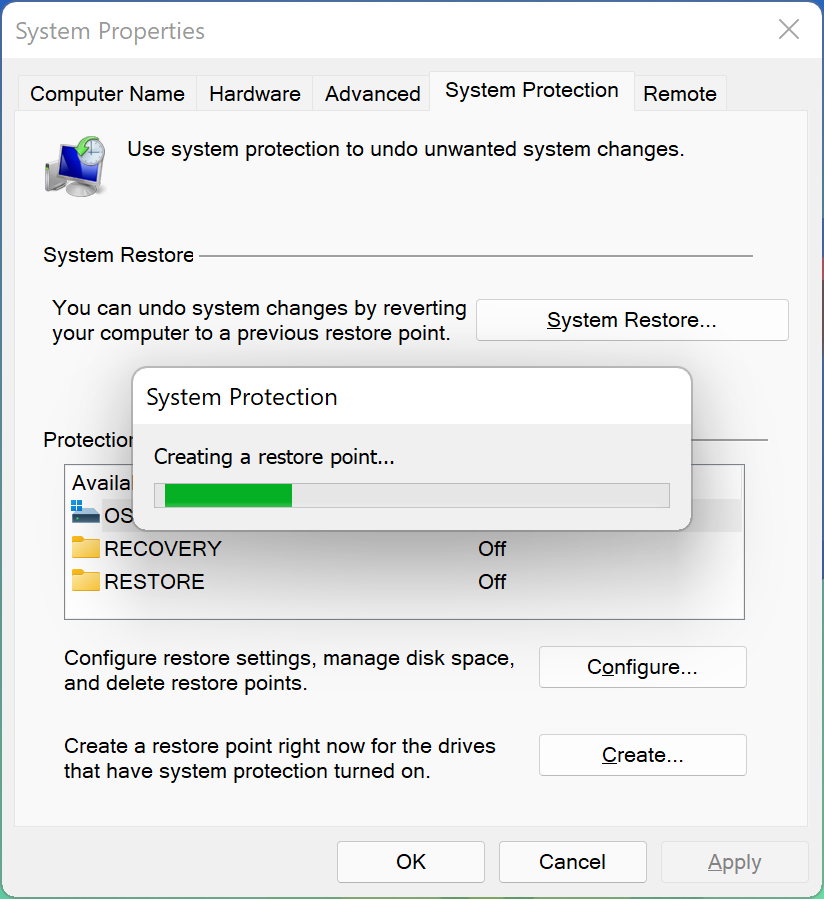
Step 5: Now Windows will create the system restore point, wait for the process to complete.
Step 6: Now if you want to restore to the previous state, the same window has a System Restore button at the top.
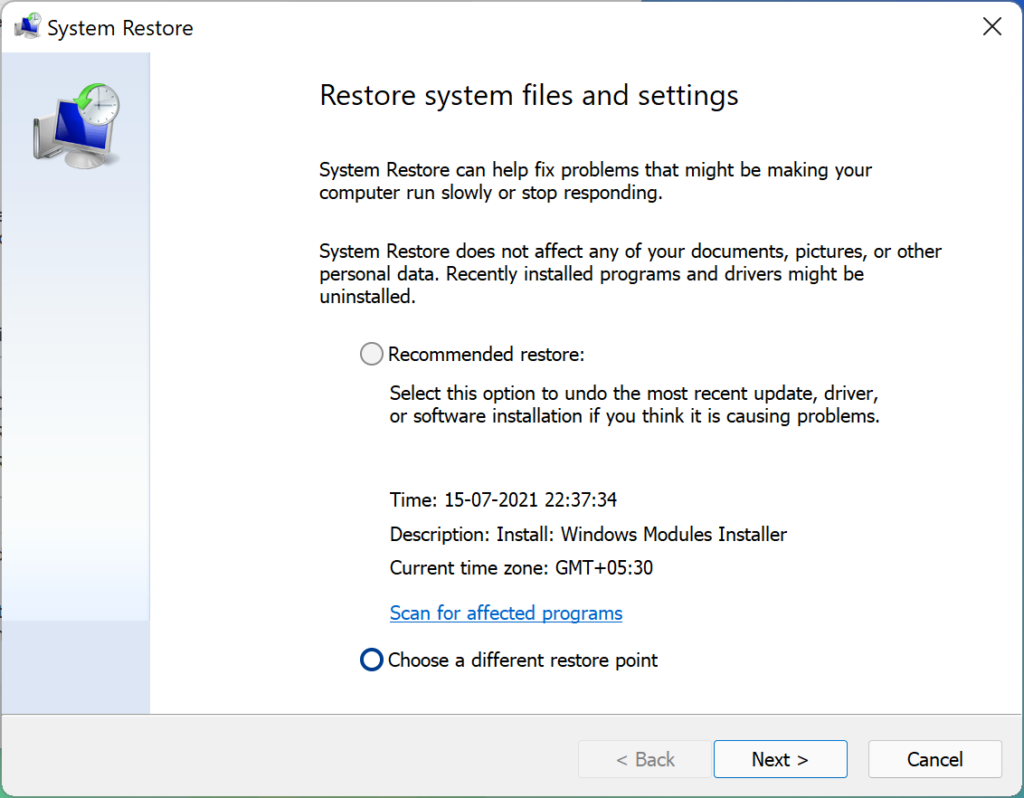
Step 7: This will bring the option to restore system files and settings. You can either go with recommended restore point or manually select the point.
Step 8: If you are selecting manually, you can choose the point you have created before from the list.
System Restore point is one of the really useful features of Windows to restore files and system settings to previous point.

