When you use Windows 11 over a period of time, a lot of caches and temporary files are saved on your PC. Basically, a cache is a reserved storage location that collects temporary data to help websites, browsers, and apps load faster. But over a period of time, they are obsolete data that take up your hard disk space. So it is better to clean up these unwanted data saved on your PC. So here are the options to clear cache and temporary files in Windows 11.
Clear Cache and Temporary Files in Windows 11:
Windows 11 cache and temporary files can also be due to software updates and patches rolled out by Microsoft to fix issues in the OS. So let’s see how we can clean up these files.
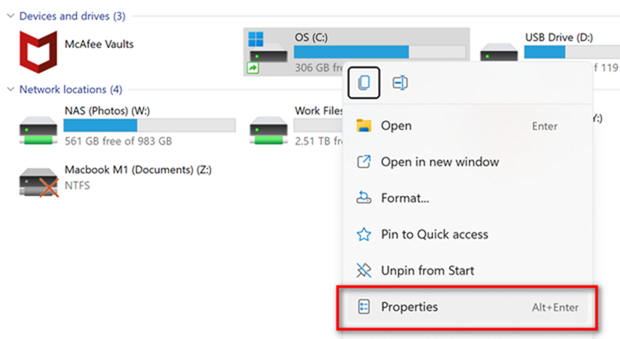
Step 1: Open Windows Explorer and right-click on the drive you want to clean up. Generally, the drive where you have installed Windows will have the temporary files stored.
Step 2: From the menu, select properties.
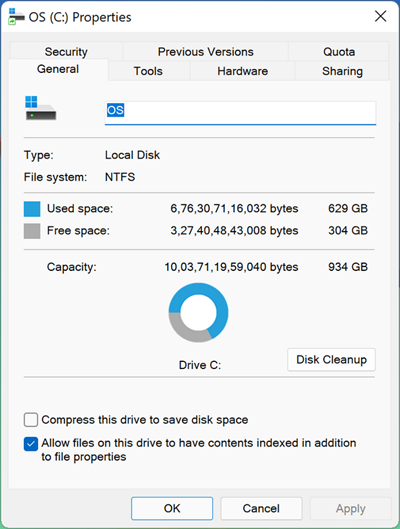
Step 3: In the properties windows, under the general settings, you will be able to see the Disk Cleanup option.
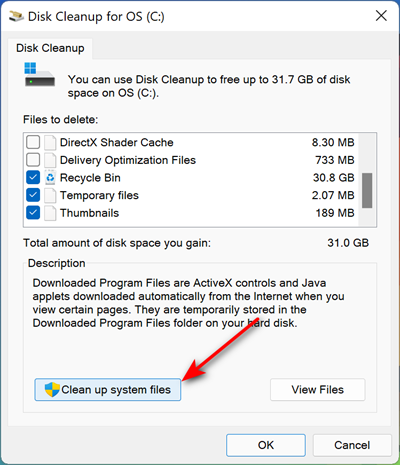
Step 4: This will bring the disk clean-up tool. Here you need to click on the Clean up system files button.
Step 5: Once the scanning is complete, it will list out all the unwanted temporary files in the “Files to delete” section at the top. You can select what all items you want to clean and then click ok to clean up.
Second Option:
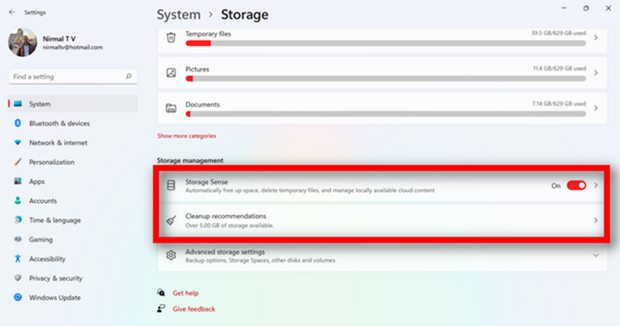
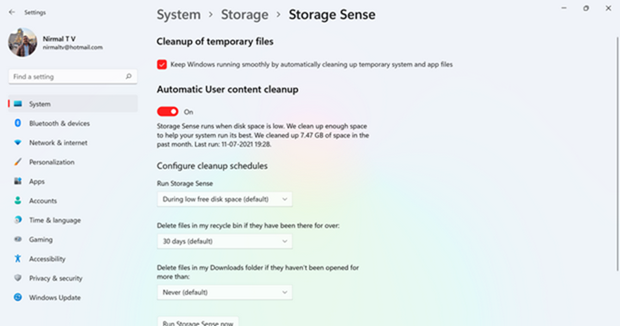
Step 1: Open the Settings panel in Windows 11 and navigate to the System-> Storage option.
Step 2: Here you will see a couple of options at the bottom, storage sense and clean-up recommendations.
Step 3: Under the storage sense, you can ask Windows to automatically clean up temporary files after a specific time (30 days). You can also manually run the storage sense and find out the amount of storage you can reclaim by deleting temp files.
Step 4: Similarly, under the clean-up recommendations, you will be shown the options to clean up unwanted files.
There are also many third-party tools that allow you to clean up all the temporary files including the ones in the browser.

