We all use the internet for browsing, downloading stuff, emails, and also watching movies. Not all of us have a truly unlimited internet connection available at home and there would be a data-limited or Fair Usage Policy (FUP). So if you are on a limited data internet connection, it is better to have a watch on the data consumed every month, or else it might lead to higher bills. So how do you find data usage in Windows 11 and how to set a limit to data usage? Let’s find out in this article.
How to Find Data Usage in Windows 11:
Windows 11 has an option to find the data usage and also to set the limit. It is available in the settings.
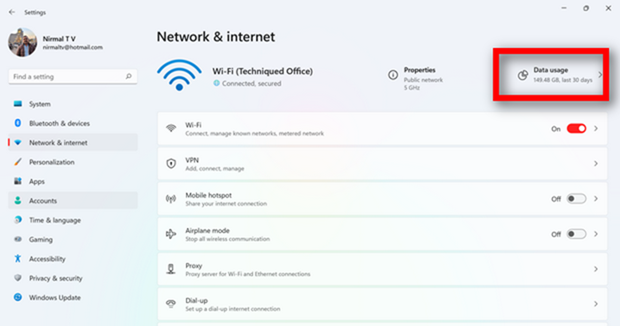
Step 1: Open the Settings app and then select Network and Internet on the left panel.
Step 2: On the top right side, you will be able to see the Data usage mentioned, click on this option.
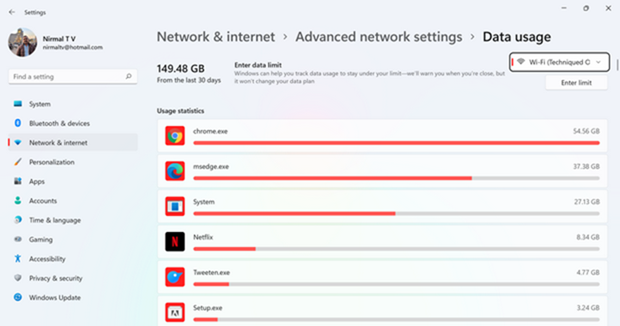
Step 3: Here you will be able to see the total data usage for the month and how much data was consumed by each app.
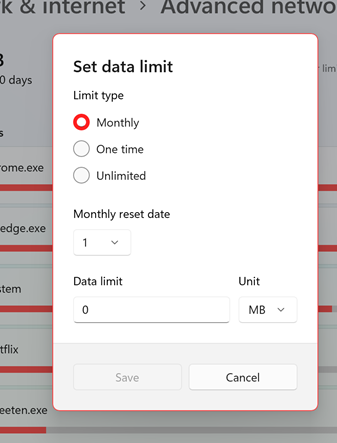
Step 4: If you want to set a data limit for the month, then click on the Enter limit button on the top. Here you will be able to set a monthly or one-time limit for the data consumed on the network.
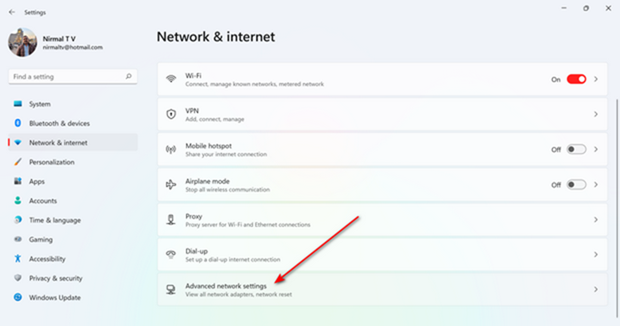
Alternatively, you can also navigate to these settings by clicking on Advanced network settings in the Network and Internet.
This option is quite handy for people with limited data connections and who want to manage limits for their internet usage.

