When it comes to editing videos on Windows 11, there are many third-party tools available which include the basic editing tools and also advanced tools for creators. But when you want to quickly trim a video in Windows 11, you may not need to install these third-party tools as Windows 11 provides you with a basic video editor included in the OS. So here is how to trim a video on Windows PC. The Video editor tool is included in the OS and you do not have to download anything or install anything additionally.
How to Quickly Trim a Video in Windows 11:
We are going to use the video editor which is shipped with Windows 11 PCs.
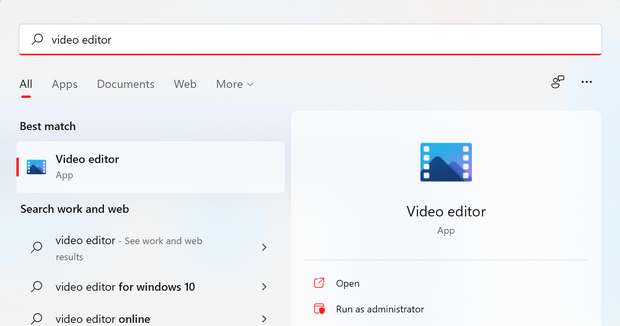
Step 1: Open the start menu and type video editor in the start menu. You will see the video editor in the search result, open this app.
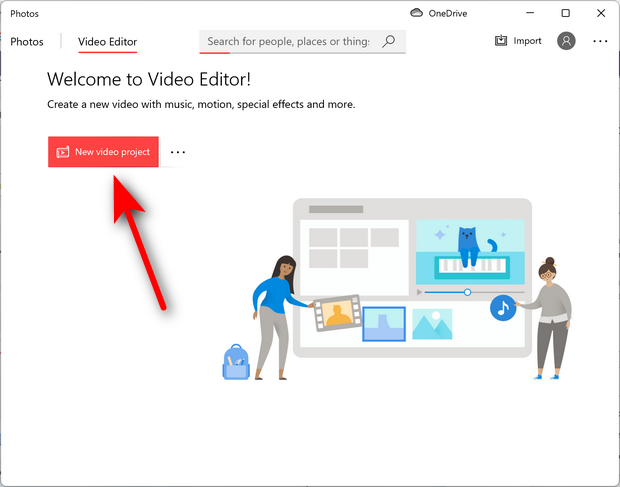
Step 2: Once the video editor is open, click on the New video project button available.
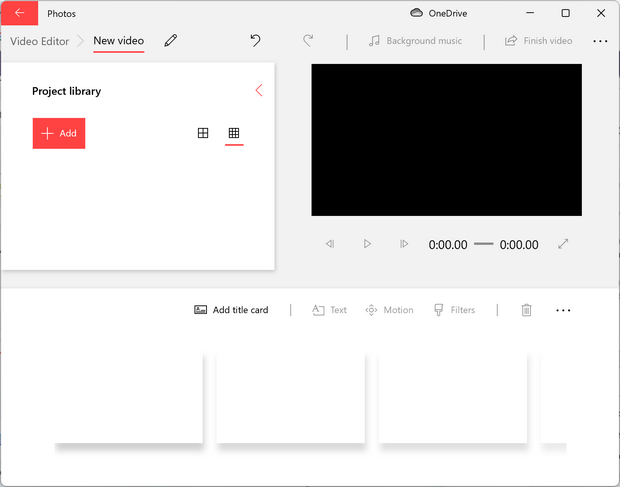
Step 3: In the next step, add a name to your project and click on the Add button. You can add image files from the web or even your local files.
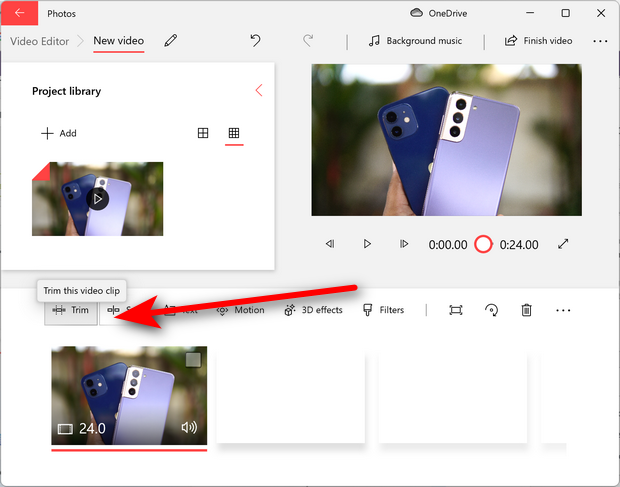
Step 4: Now you need to drag and drop the file to the timeline. Here you will be able to see the Trim option in the settings.
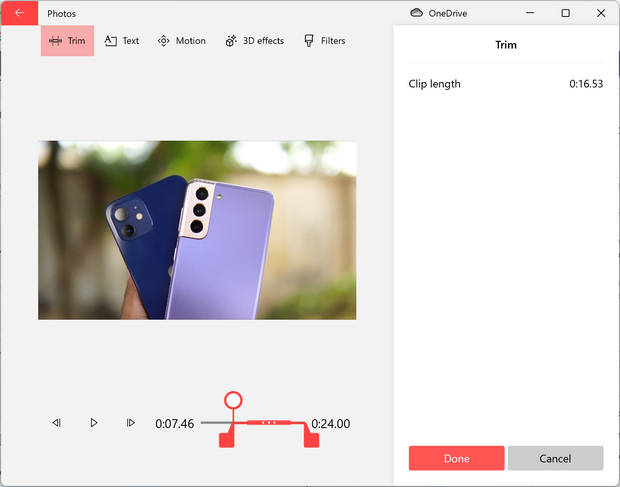
Step 6: Now you can trim the portion which you do not want in the video using the slider available in the tools.
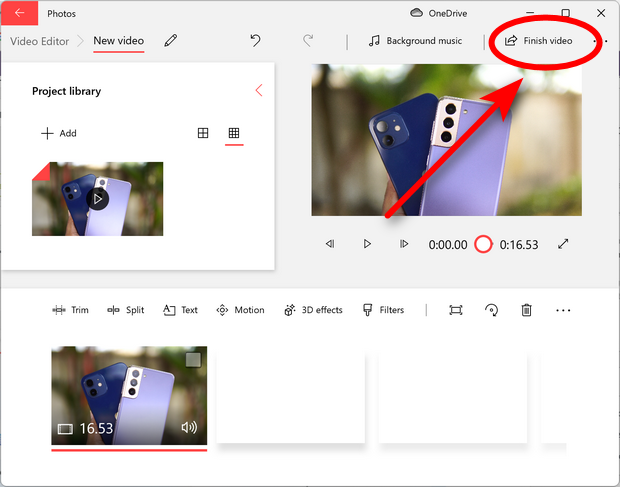
Step 7: Once the trimming is complete, click on the Finish video button.
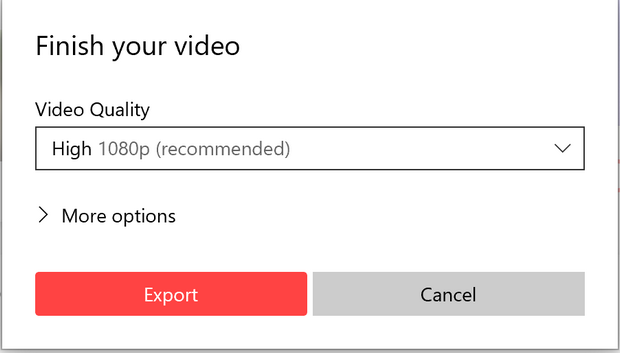
Step 8: In the final step, you can select the video quality for the trimmed video and finally click on the export button.
Now, your trimmed video will be ready and you can use it on your PC or on social sites. This method does not involve the installation of any third-party tools.



Please how to get the Android app downloaded