Most of us handle a lot of images on a daily basis. This could be for our work, school, or personal usage. Sometimes, you might not have the images in the format which you actually want and in such cases, we use image converters to convert images from one format to another. There are many third-party free and paid tools to manage images. There are also web services to convert images. But now, you get the option to quickly convert images in macOS without any additional app installed. Let’s find out how to do it.
How to Quickly Convert Images in macOS:
This option is now available in macOS Monterey and here is how to use it.
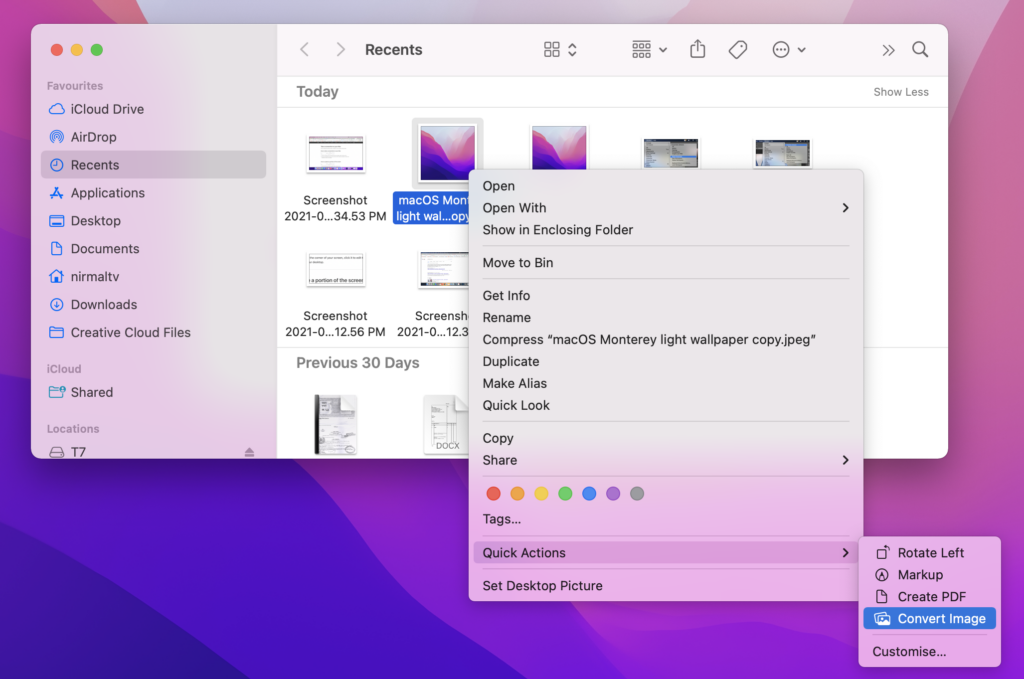
Step 1: Open the folder where your image is saved, using Finder.
Step 2: Right-click on the image and select the option Quick action-> Convert Image.
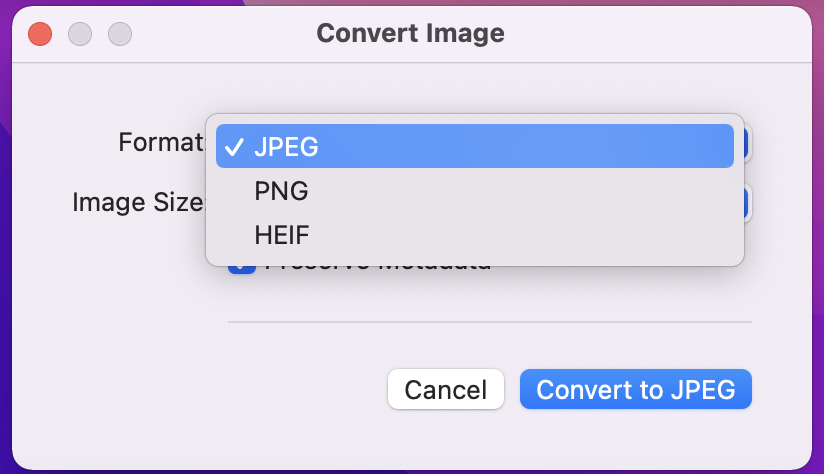
Step 3: This will bring up a new window to convert the image. Here you can choose the format to which you want to convert the image to. You get the option of JPEG, PNG, and HEIF.
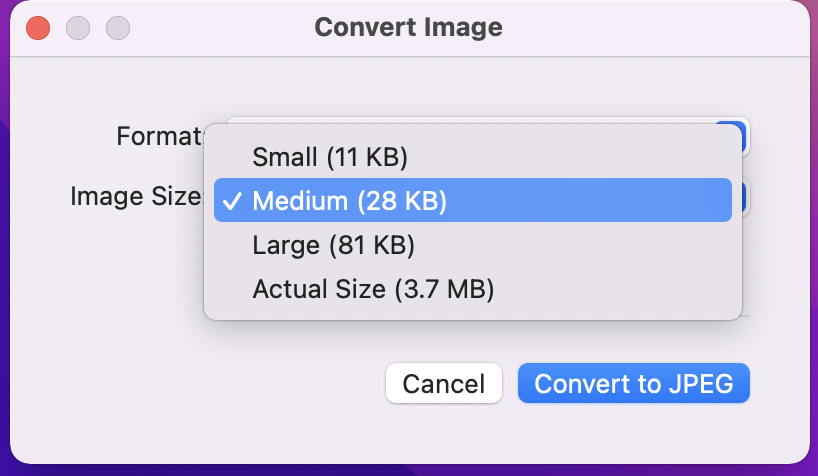
Step 4: You also get the option to select the image size, small, medium, large and actual size. The smaller the size, the lower the resolution, so you have to keep this in mind.
Step 5: Finally, you need to click on the convert button and the image will be converted to the format selected.


