If you are using a dual-band Wi-Fi connection at home or office, you can make your internet connection faster on Windows using the 5GHz option. Switching from 2.4GHz to 5GHz will improve your browsing speeds on Windows drastically and hence it is recommended to go with this option. But before you do this, you need to make sure that your Windows laptop or desktop supports a 5GHz WiFi band. So how to check this and how to enable 5GHz Wi-Fi on Windows? Let’s find out.
How to Enable 5GHz Wi-Fi on Windows:
Before you can enable 5GHz Wi-Fi on Windows, you need to make sure your laptop or desktop supports the dual-band. For this, you need to make sure your laptop supports either of these protocols- 802.11a or 802.11ac. If there is support for these, then you are good to go.

If you are still not sure of the support, then open the command prompt in Windows (start menu-> cmd) and then type netsh wlan show drivers in the command and press enter. Here you will see the radio types supported.
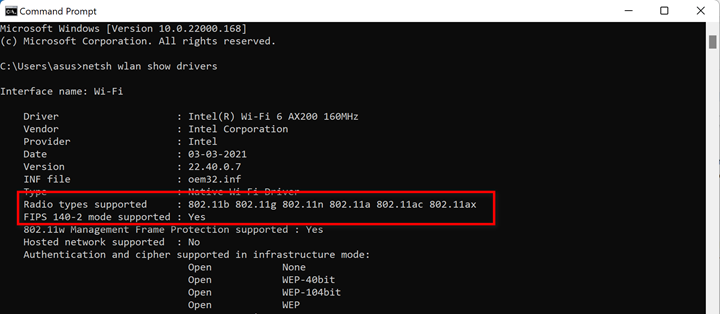
Once there is support, here is how to enable it.
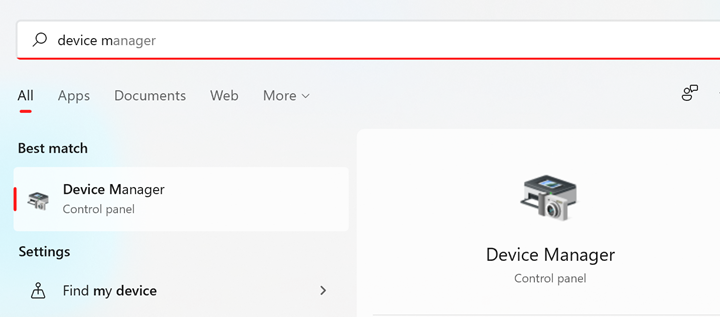
Step 1: Open the start menu on your Windows and type device manager in the search.
Step 2: Open the Device Manager from the search result.
Step 3: Once you open the Device Manager, check for the Network adaptor, and under this, you will be able to see the Wi-Fi adaptor. Now right click on the adaptor and click properties.
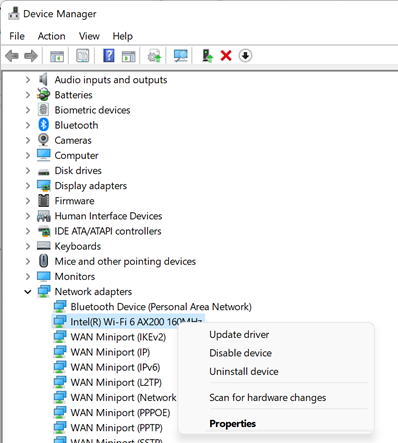
Step 4: In the properties, select the Advanced option.
Step 5: Under the Advanced settings, search for the preferred band option and select this. On the right side, select Prefer 5GHz band option and click on the Ok button.
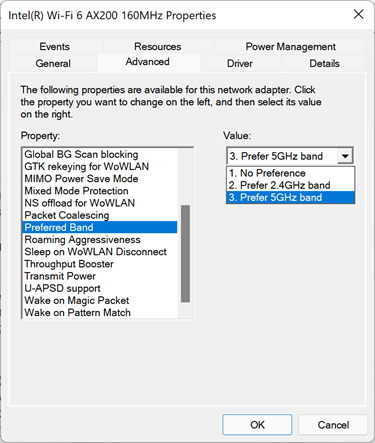
Now your internet connection will disconnect and connect again and if you have a Wi-Fi router supporting dual-band, Windows will automatically connect to a 5Ghz connection.


