Almost all of us use the physical keyboard to type when we are using Windows 11 on our PC. But there might be instances when the physical keyboard stops working and you are not able to input anything to the PC. In such cases, the best option is to enable the on-screen keyboard on Windows 11. The on-Screen keyboard allows you to input into Windows 11 without having to use the physical keyboard. You can either use a mouse to input or if you are having a touch-enabled display, then you can even use that.
How to Enable On-Screen Keyboard on Windows 11
Windows 11 comes with an on-screen keyboard and you can enable it using multiple ways. Here is how to do it.
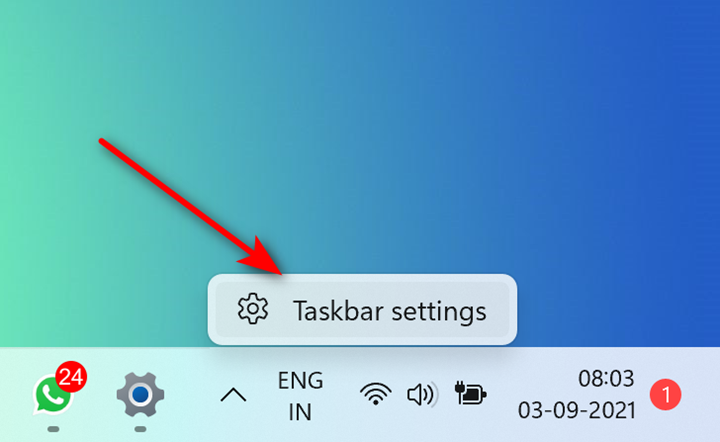
Step 1: Open the taskbar settings by right-clicking on the taskbar and you can see the option there.

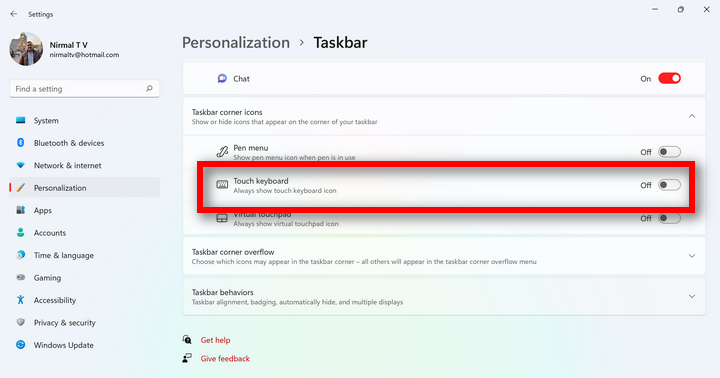
Step 2: In the taskbar settings, under the personalization options, you can see the Touch Keyboard option listed, make sure you turn it on.

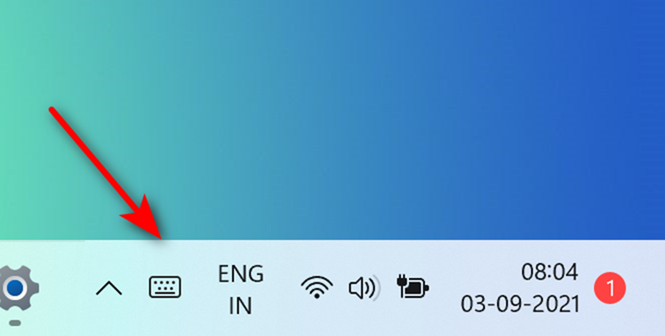
Step 3: Now, you will be able to see a keyboard icon in the system tray.

Step 4: When you click this icon and the on-screen keyboard will be enabled in Windows 11.

Alternatively, you can also type directly on the start menu, and from the results, you can open the keyboard.
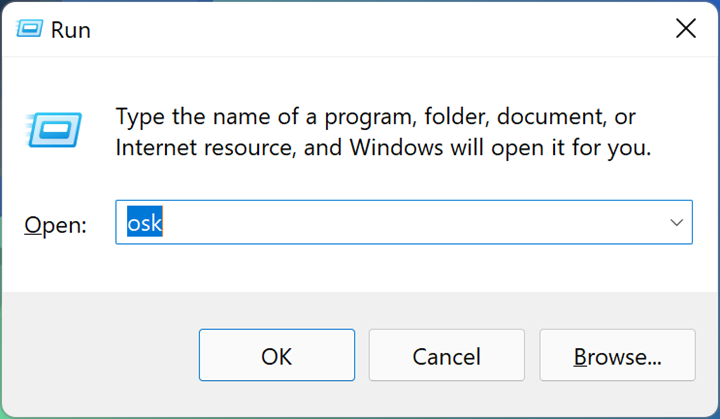
A third method or the fastest way to enable the On-Screen Keyboard in Windows 11 is using the Run command. While this is the fastest method, this will need a physical keyboard and won’t be helpful if you are having issues with your physical keyboard. Open the run command on Windows 11 using the Win+ R command and type “osk” (without quote) and press enter.

This option will also open the Windows 11 on-screen keyboard.


