Like every laptop, MacBooks also come with a default HD webcam. This webcam can be used for your video calls, taking videos, and also photos. If you are using video calling software, then the app will automatically connect to the camera and start using it. But how to use the camera on MacBook if you just want to take a picture of yourself. Unlike Windows 10, there is no camera app installed by default on MacBook. So how to turn on the camera on MacBook? Let’s find out.
How to Turn on Camera on MacBook:
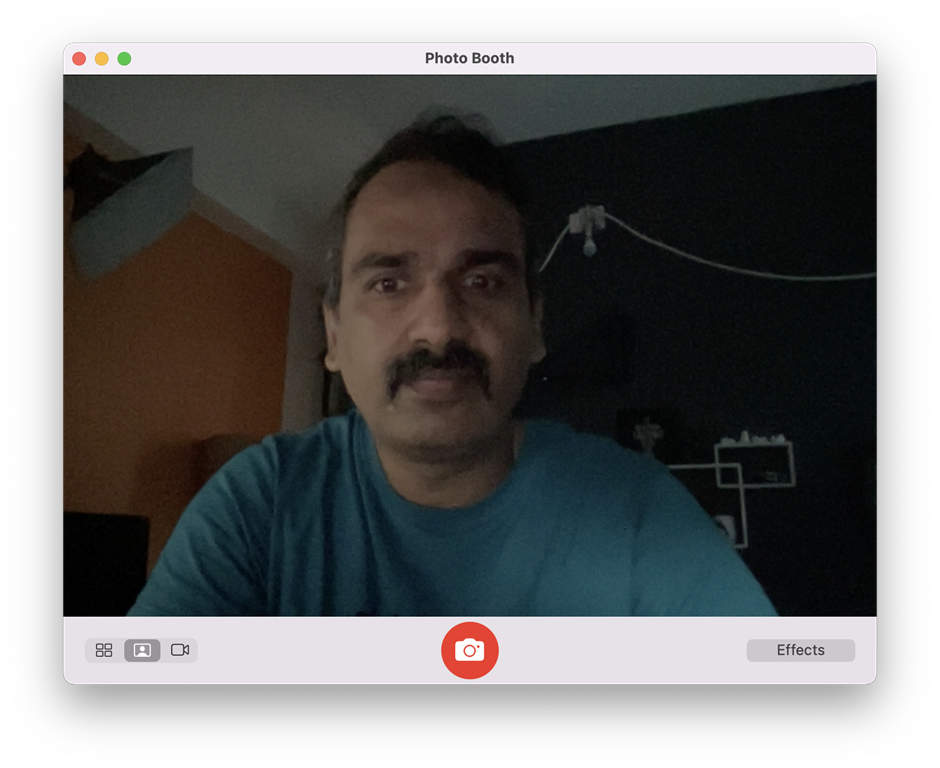
In order to use the camera on MacBook, you need a supporting app. As I said before, if you are using a video calling app, it will automatically open the camera. But if you want to take a picture, then probably the best app is Photo Booth. All you need to do is to open the launchpad (all applications) and then select the Photo Booth app.
You will be able to see a green LED light glowing on the top portion of your MacBook and this indicates that the camera is being used by the app. Photo Booth allows you to take photos using the front camera. You can also switch between photo mode and video mode.
Another app that allows you to record videos on MacBook is Quicktime player. You can open the Quicktime player and click File > New Movie Recording. This will start the camera and you can start the recording of your movie using the default camera on MacBook.
Enable Camera Permissions:
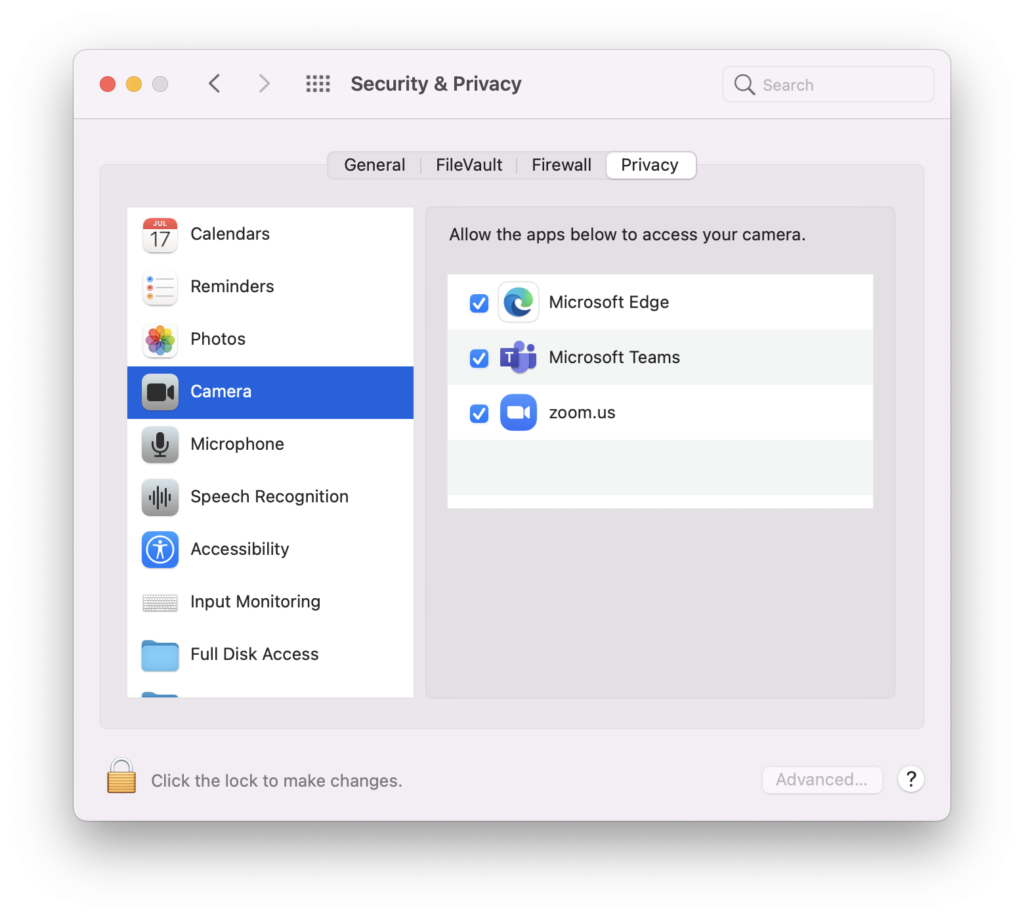
If your photo and video apps are not able to access the camera, it could be due to the permissions granted to the camera app. When you set up the app, you might not be given access to use the camera. You can actually change the permissions of the camera app.
To enable permissions, open System Preferences on your Mac and select Security & Privacy option. Here you need to click on the Privacy tab. You’ll see a list of options to choose from on the left side of the window. Select Camera from that list.
Now, your installed app will have access to the camera and you will be able to use it on MacBook.

