On Windows 11, you might be running a lot of apps of varying sizes and CPU requirements. Some apps might need priority and if you are using Windows 11, you can actually set the CPU priority level. There are six priority levels, ranging from Low, Below Normal, Normal, Above Normal, High, and Realtime. The advantage of setting a CPU priority level is that whenever the app needs more CPU, it can get more power based on the criteria set and it won’t have issues with lagging. But at the same time, this can also lead to other programs having issues if these are not set properly. So how do you set CPU priority levels on Windows 11? let’s find out.
Related Reading: How to Edit Hosts File in Windows 11
Set CPU Priority Levels on Windows 11:
Follow the steps below to set the CPU priority levels on Windows 11.
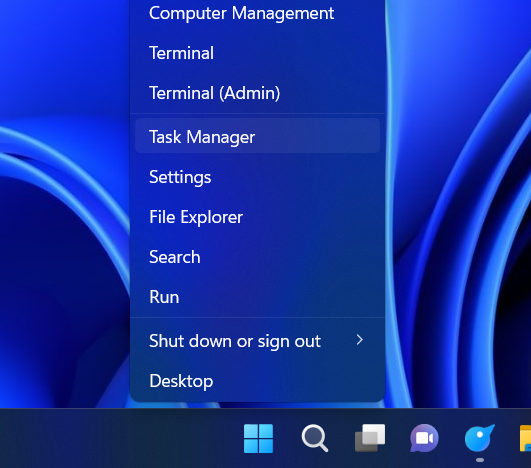
Step 1: Open the task manager in Windows 11. You can right-click on the start button and choose Task Manager. Alternatively, you can also use CTRL+ ALT + DEL to open the task manager.
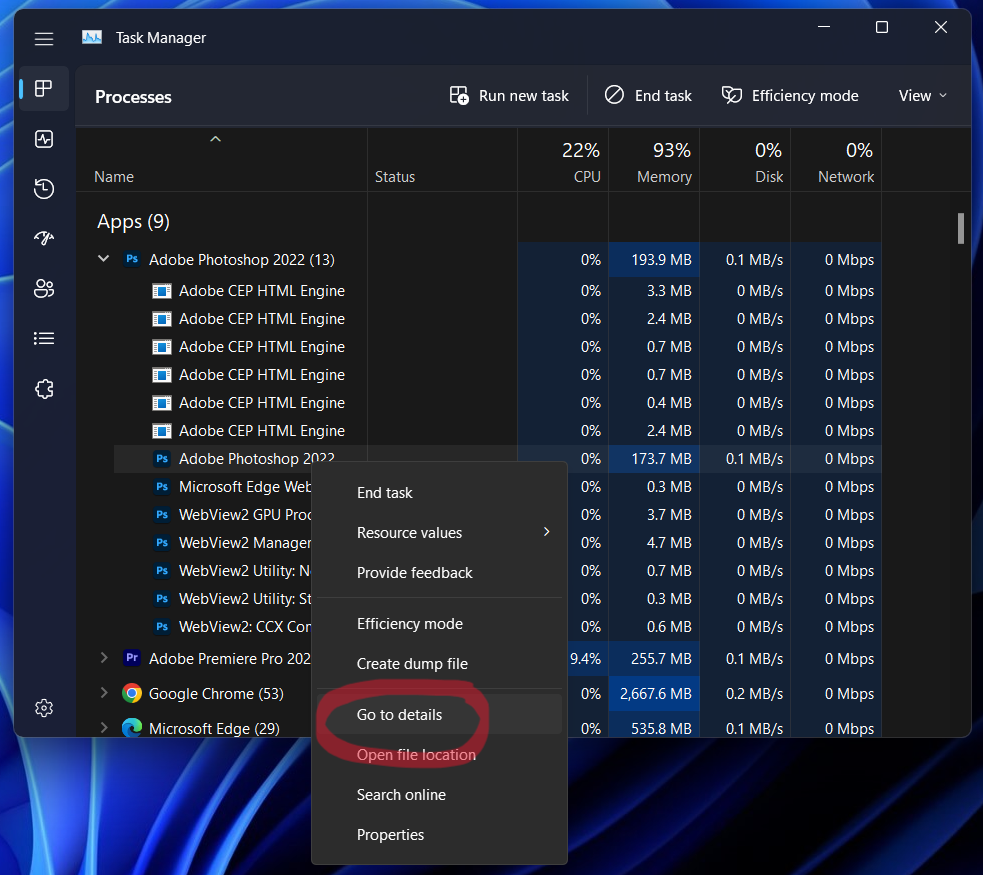
Step 2: In the task manager, find the app which is running and you want to change the CPU priority levels. You need to expand the app to see the list of all threads running. Here you will be able to see the app’s exe file running. You need to right-click and select the Go to details option.
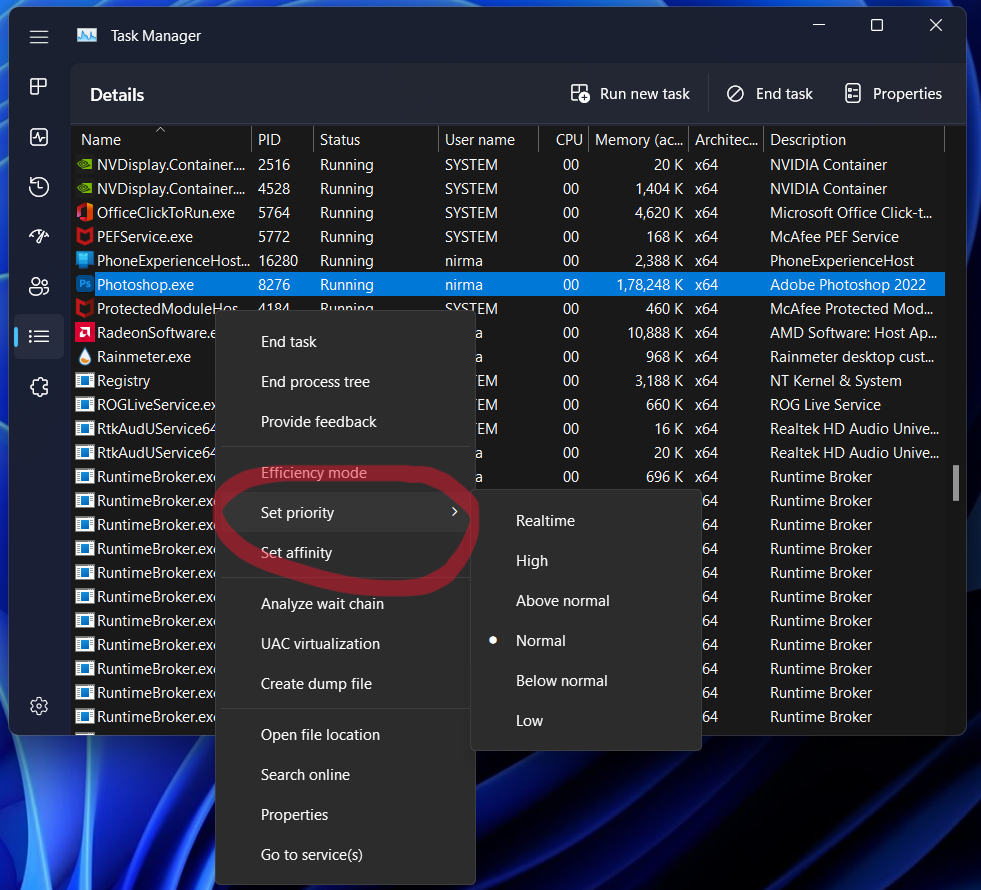
Step 3: On the details page, you need to once again right-click on the app’s exe file and select “Set priority from the context menu. Here you will be able to see six options in the priority list. Choose the one which you feel is needed for the app.
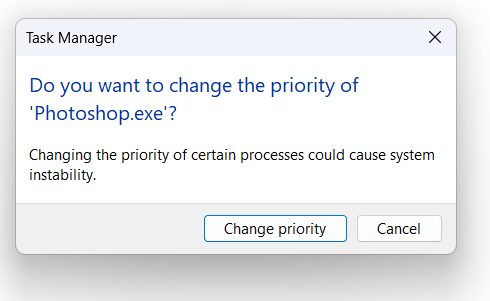
Step 4: Windows 11 will ask for confirmation before changing the priority of the app. Here you will need to click Change priority.
Please note that the setting is only applied temporarily which means if you close the app and run it again, the priority levels will be once again the default ones.


