Google Docs is one of the most popular document-sharing services which is online. You can instantly create your document without having to install anything and then share it with anyone. Google Docs offers a lot of flexibility in creating a document, like the ability to add formatting, images, tables, and many more. But one of the features missing is the ability to add custom fonts. You might be using a certain font in your Windows and you want to use that same font in Google Docs. Here is how to use custom fonts in Google Docs.
Related Reading: How to Install Add-ons in Google Docs
Use Custom Fonts in Google Docs:
Google Docs by default offers a plethora of fonts to choose from. You can click on the drop-down list and change your font. But if you don’t find your favorite fonts in that list, here is how to use custom fonts in Google Docs.
Step 1: To use custom fonts, you need to download an extension in Google Docs. Docs support a lot of extensions.
Step 2: Click on the Extensions from the menu list and select Get add-ons from the list.
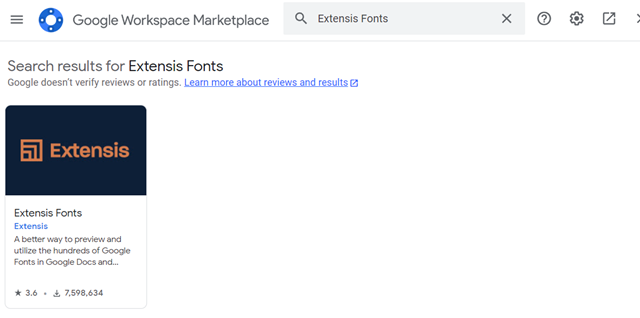
Step 3: This will open up the extensions marketplace for Google Workspace. Here you need to search for Extensis Fonts.
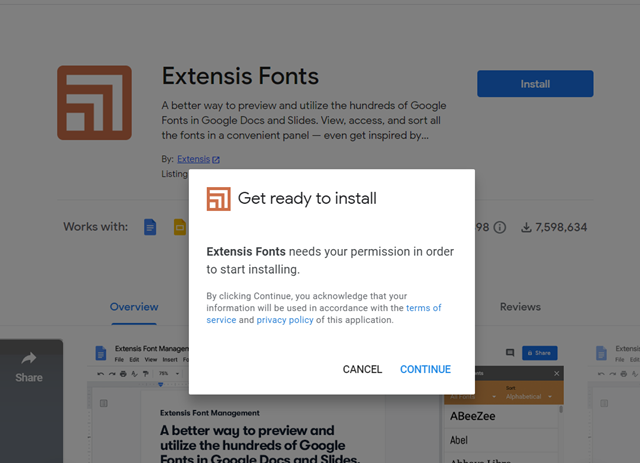
Step 4: Now you need to install this extension by giving the required permission.
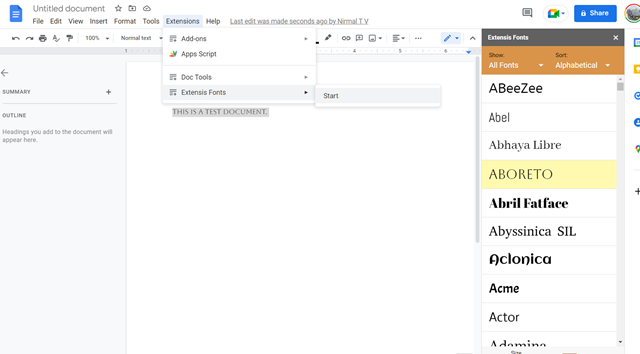
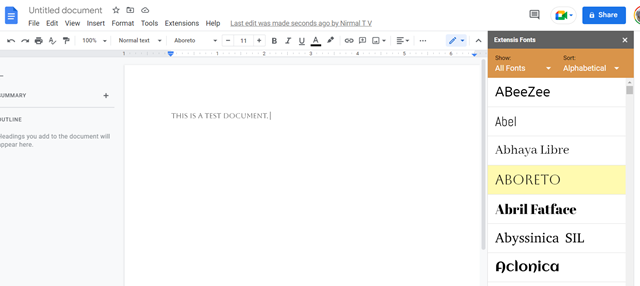
Step 5: Once the extension is installed, you can select the extension from the list and then click start as shown in the image below. This will add a sidebar with the extension.
Step 6: This sidebar will have additional fonts available that you can use in your document.
Use Google Font in Google Docs:
Alternatively, if you want to use Google Fonts in your document, here is how to do it.
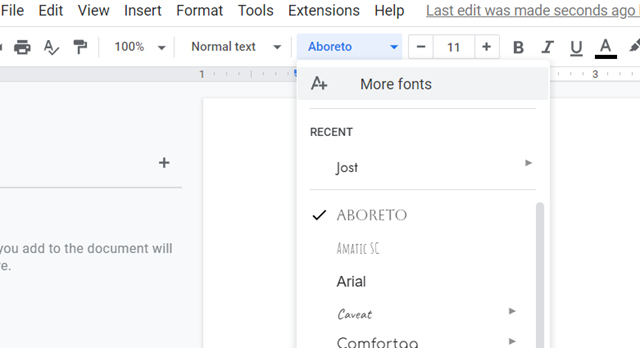
Step 1: Click on the font list from the dropdown and select More fonts from the list.
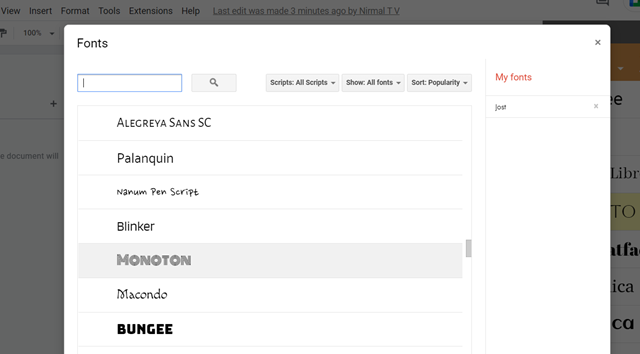
Step 2: This will open another pop-up with all the fonts listed in it.
Step 3: You can use any fonts from this list which is populated from Google fonts. You can also use the search bar or filters to find a font.
This is how you can use custom fonts of your choice in Google Docs.

