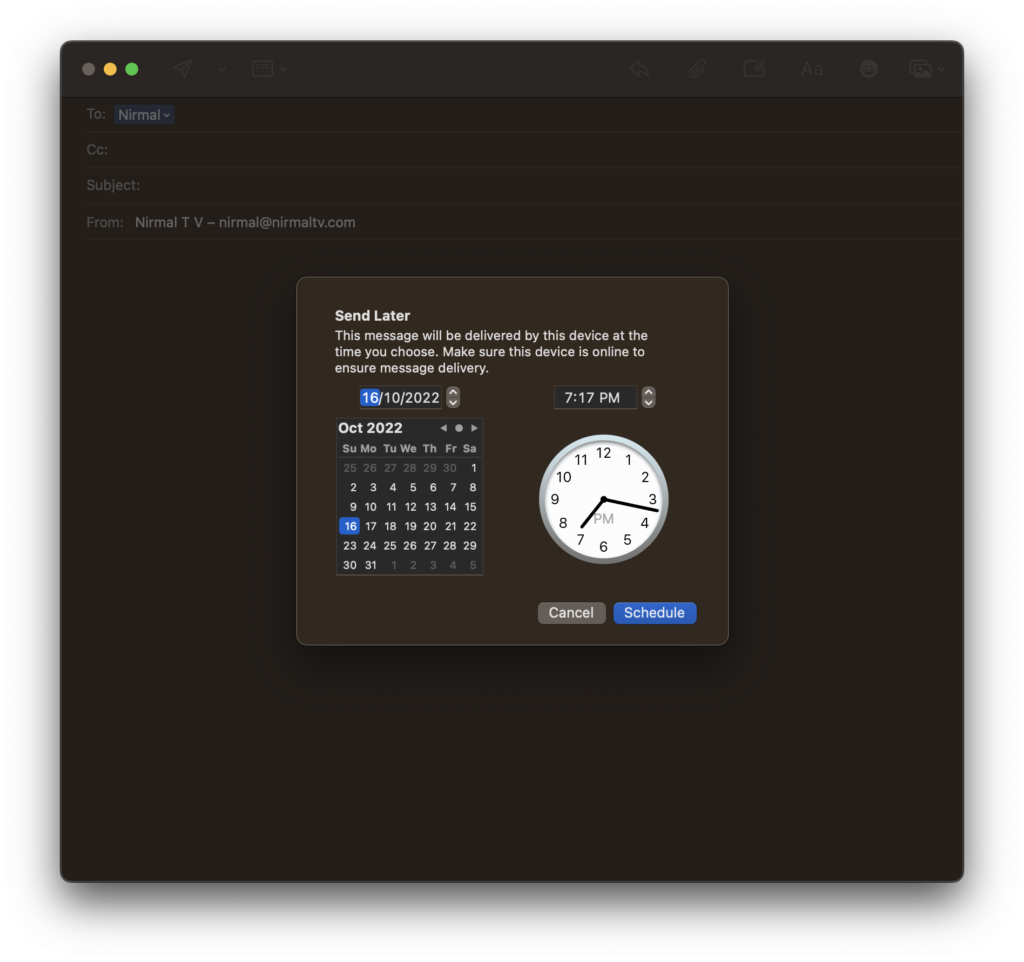
Apple is all set to release the latest version of macOS, the Ventura. This is the new version which comes with new features and also a lot of improvements. One of the new features added is the ability to send an email at a specific time. You can schedule an email to be sent at a specific date and time using the new email client in macOS Ventura. Let’s see how you can send an email at scheduled time in macOS.
Related Reading: 4 Ways to Take Screenshots in macOS [Ventura]
Send an Email at Scheduled Time in macOS Ventura:
Here is how you can schedule an email in macOS.
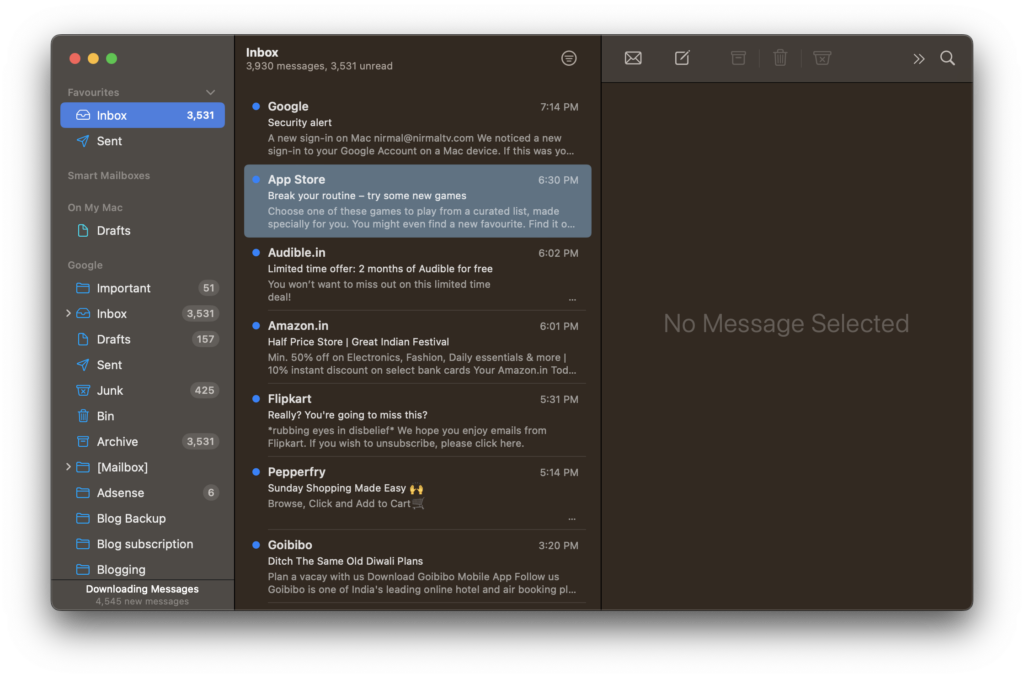
Step 1: Open the email app in macOS Ventura and if you have not set up an email account, then you need to configure it first. You can add Google or iCloud or any other email account.
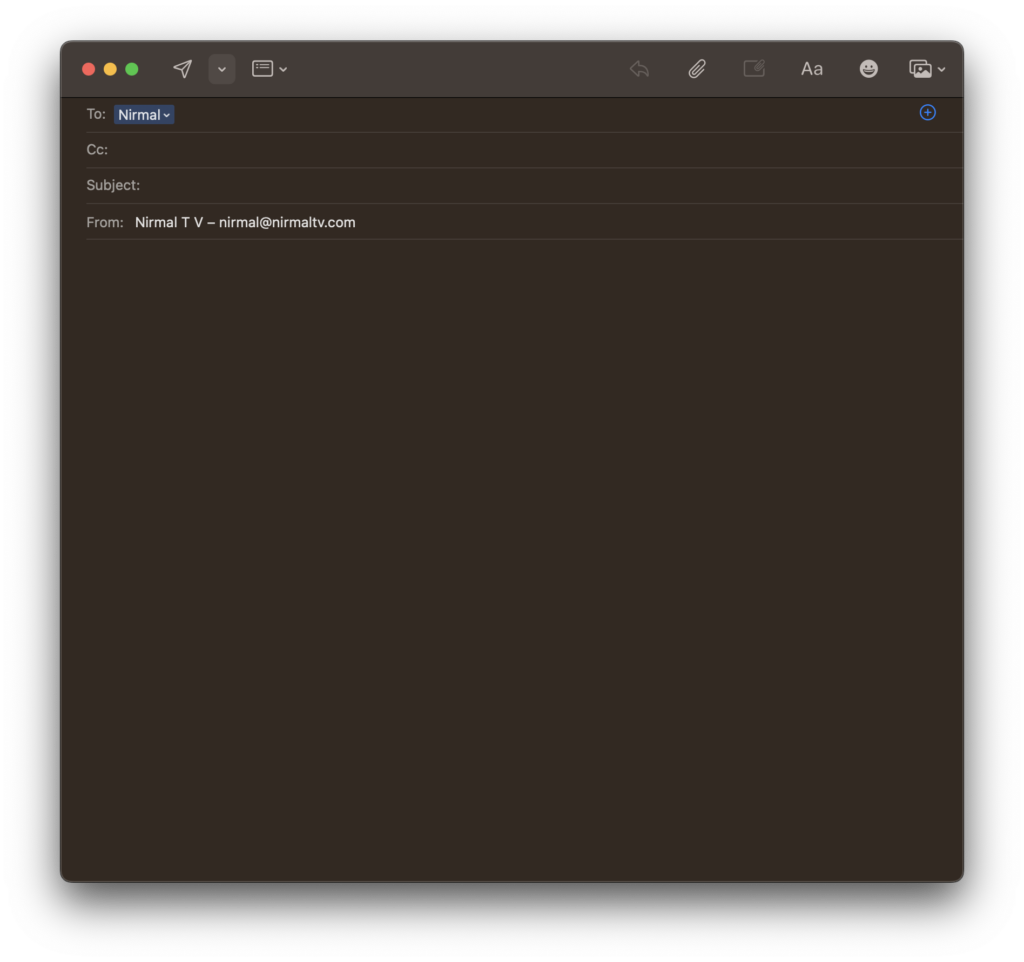
Step 2: In the next step, you need to click on compose email icon on the top menu bar. This will take you to a pop-up where you can compose your email.
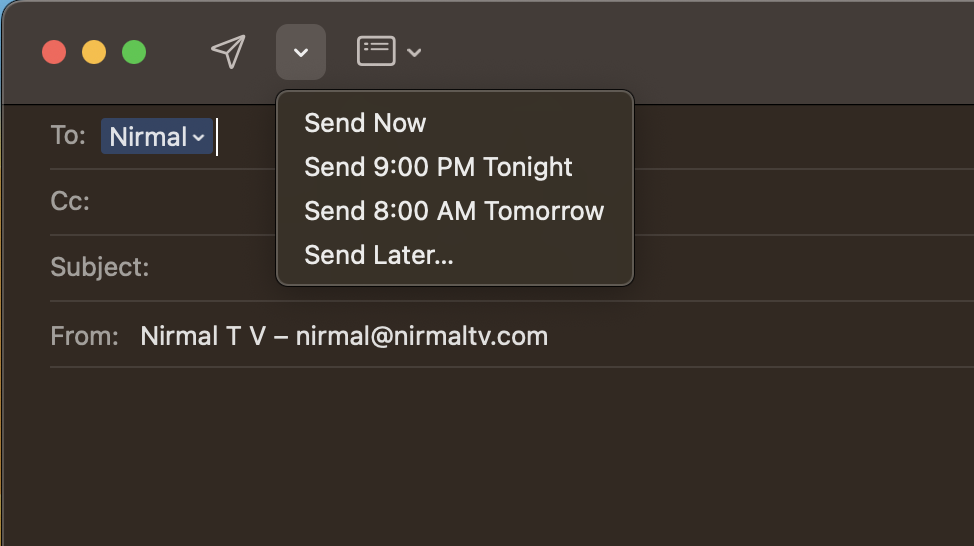
Step 3: Once you have composed the email, you need to enter the recipients of the email. Now click on the small arrow next to the send button and you will see a few options. Here you will see the option Send Later. Alternatively, you can also choose Send at a particular time given by the app.
Related Reading: How to Check if Mac Performance is Throttled due to Heating Issues
Step 4: This will prompt you to select the date and time by showing a calendar. You need to choose the date and time at which you want the email to be dispatched.
Step 5: Now click on the Schedule button and you are set to send the email at the time and date you have mentioned.

