macOS Ventura is the latest version of macOS and there are a lot of changes coming into the OS. Recently with iOS16, Apple introduced the feature of hiding and password-protecting photos. While the feature of hiding photos already existed, they couldnt be password protected. But with iOS16, you can use Face Unlock to protect your hidden photos. Now, a similar feature makes its way to macOS as well. You can now hide and password-protect your photos so that no one has access to your hidden album. Here is how to hide photos using a password in macOS.
Related Reading: How to Send an Email at Scheduled Time in macOS Ventura
How to Hide Photos using Password on macOS:
The process of hiding and protecting your photos is available in the Photos app on macOS.
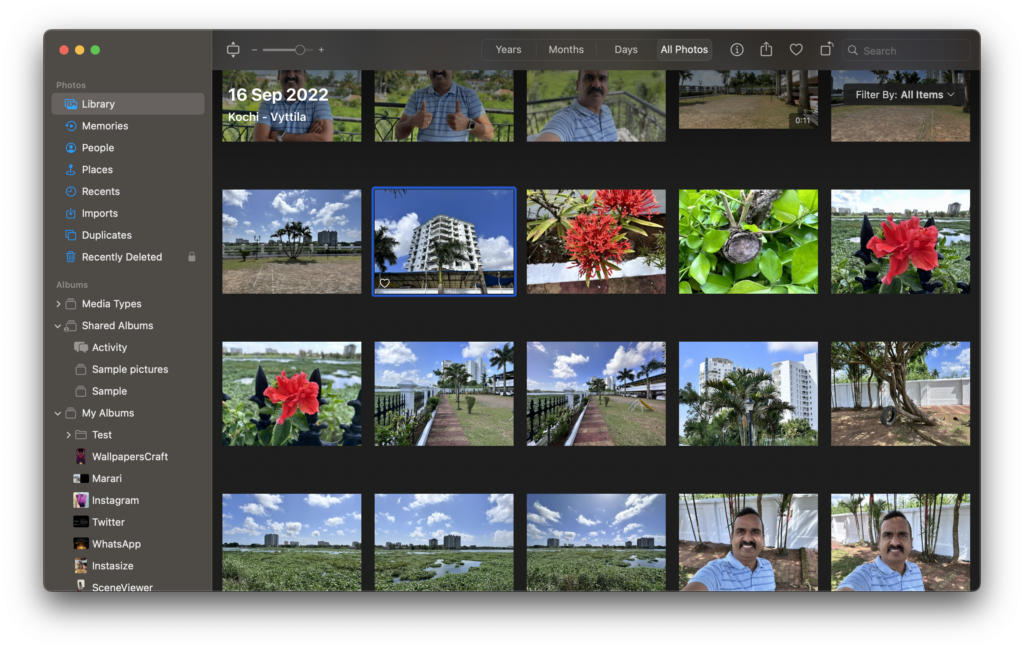
Step 1: Open the Photos app on your macOS and select the photos you want to hide.
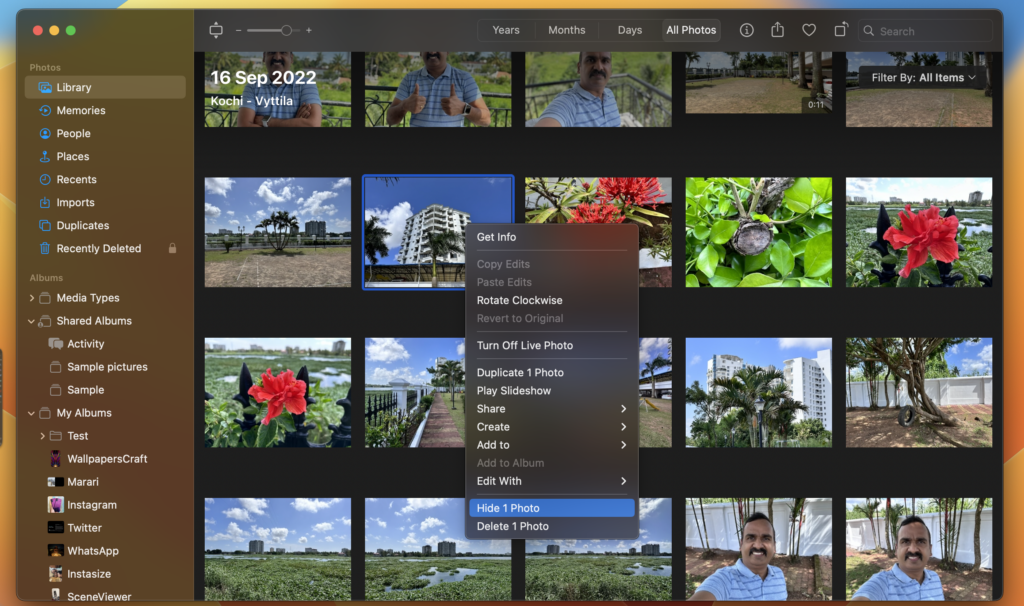
Step 2: Once you have selected the photos, right-click on them and then select Hide Photo from the menu.
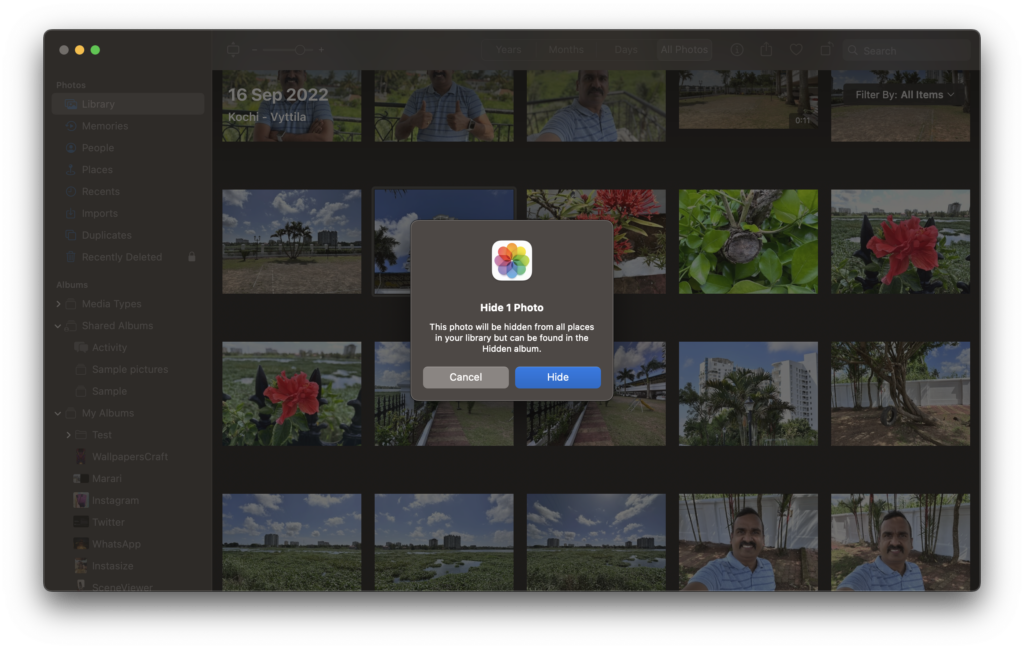
Step 3: Now you will be asked for confirmation if you want to hide the photos. Click on the Hide button.
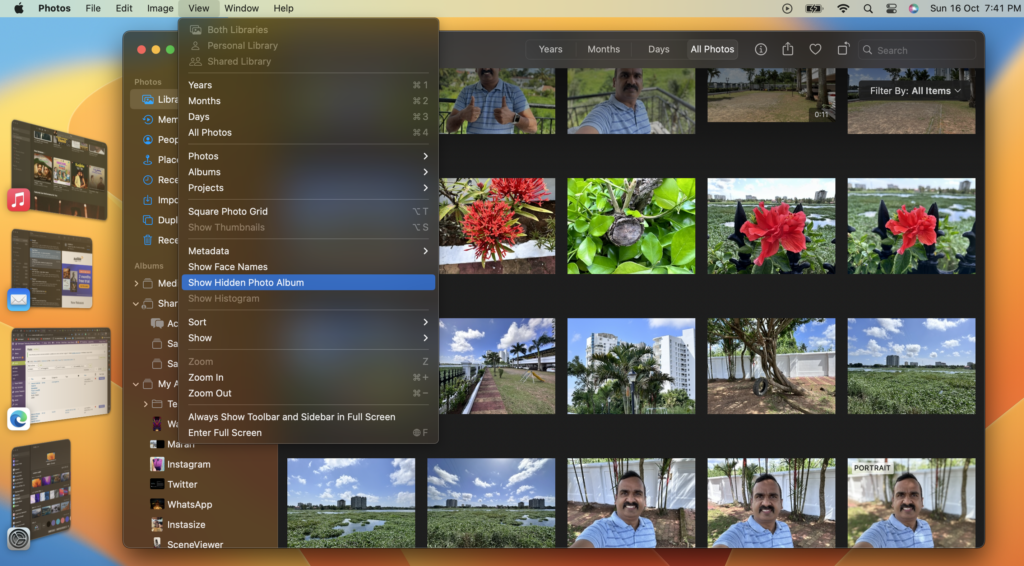
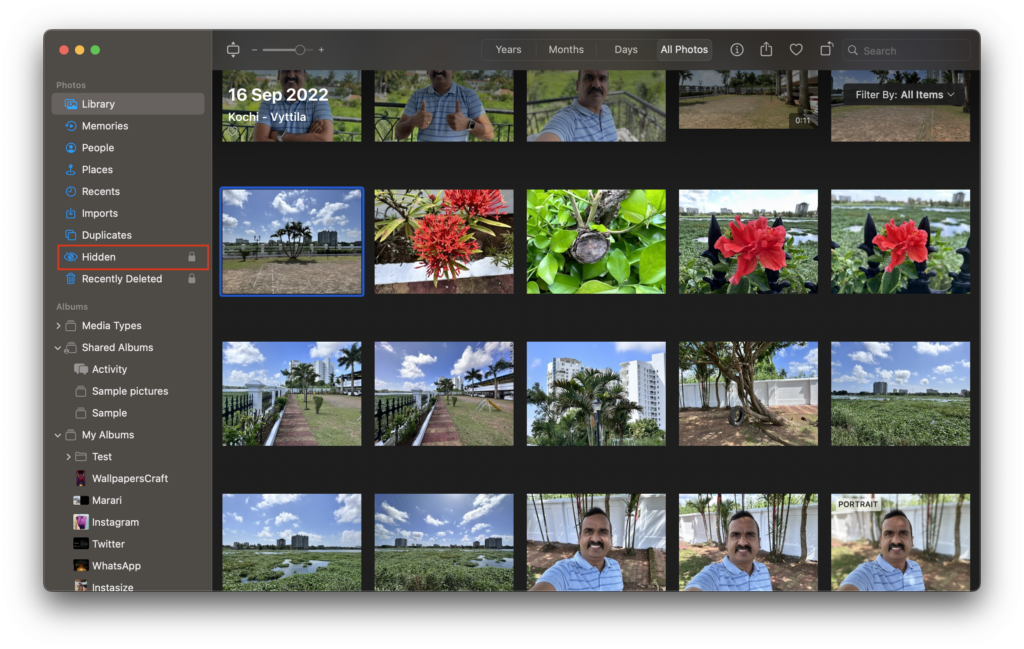
Step 4: Now, your photos will be hidden and won’t be visible in the Photos app. But how to view hidden photos? If you look at the photos app, you won’t see any Hidden albums. For this, you need to select the View menu and click on the Show Hidden Photo Album option. Unless you opt for this, the album will not be visible.
Step 5: Now you will be able to see the Hidden album on the left side panel.
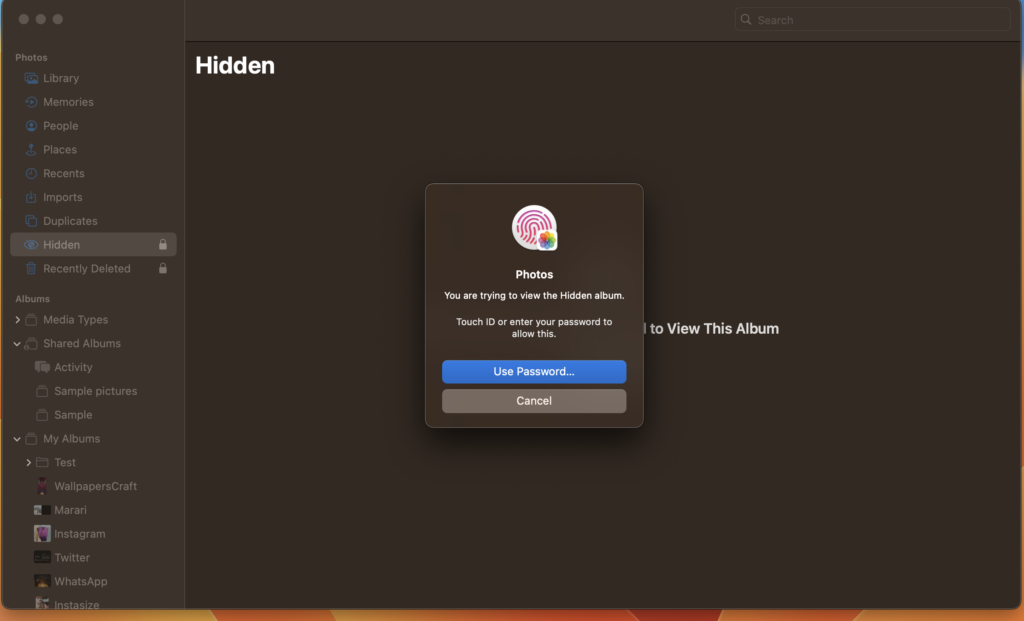
Step 6: Click on the Hidden Album and you will be asked for a password or fingerprint to unlock it. Unless you provide these details, the album cannot be viewed.
This is how you can lock and hide photos in macOS using a password.


