High Efficiency Image File Format (HEIF) is a container format for storing individual digital images and image sequences. Apple adopted this format for iPhones back in 2017 and if you have opted for high-efficiency photos in the camera app on iPhone, then all the images will have HEIF extension. But we all use JPG as one of the most popular formats for sharing images. So in case you have a bunch of HEIF images and want to quickly convert HEIC to JPEG on macOS, here is how to do it.
Related Reading: 7 Best Video Editors for macOS
There are two easy options to convert images from HEIC to JPG on macOS.
Step 1: Launch the Preview app on your macOS.
Step 2: Now open the HEIC image you want to convert to JPG.
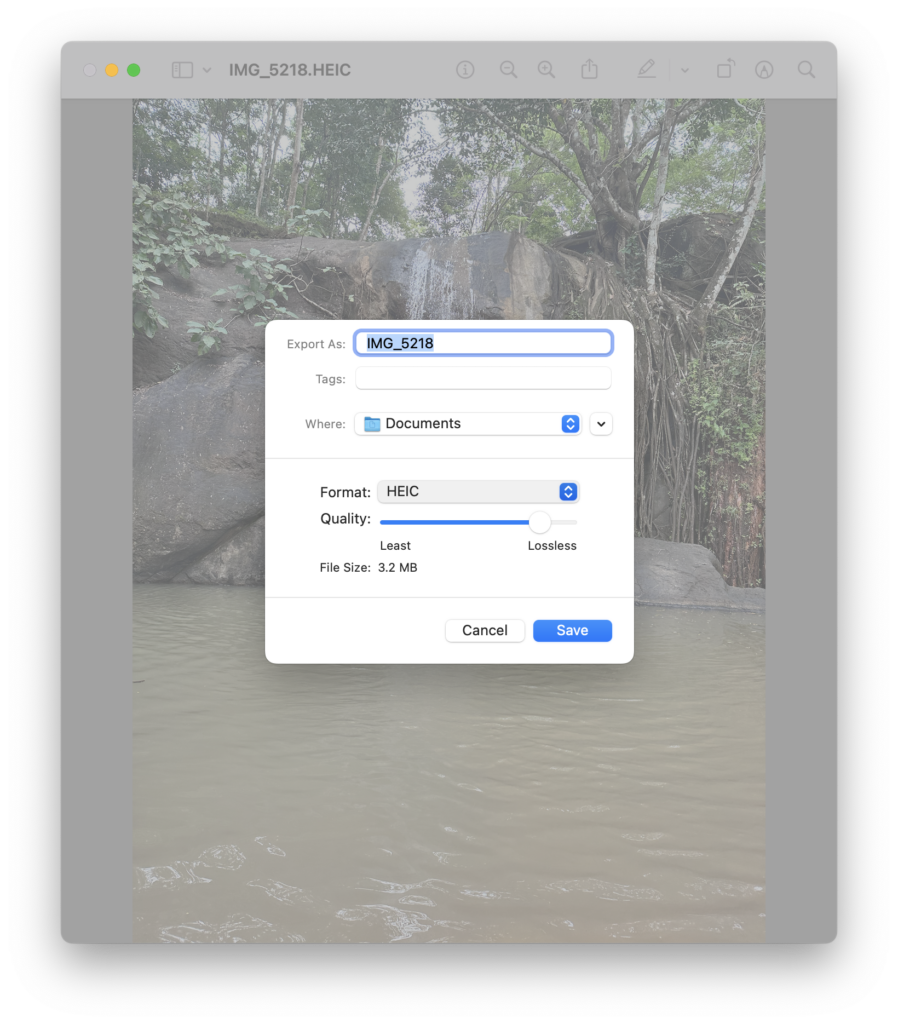
Step 3: Once it is opened, click on the File menu and select Export.
Step 4: This will bring a pop-up window where you have the option to select the format.
Step 5: Here you need to select JPG from the drop-down list for format. You can also select the quality of the JPG image and then click on the save button.
Another option for converting from HEIC to JPG is to use the photos app in macOS.
Step 1: Open the photos app on your macOS and search for the image you want to convert.
Step 2: In case you can’t find the image in the photos app, use the Finder for searching the image and then drag and drop the image into the Photos app.
Step 3: Once the image is in the photos app, drag and drop it back to the desktop.
Step 4: Now you will see that the image is automatically converted to JPG from where you can share it easily.
So these are the best options to convert HEIC to JPG on macOS without using any third-party apps or services.


