If you are using a laptop for work, one of the important things to consider is the battery life. This is very important especially if you travel a lot. While there are some great laptops with excellent battery life, if you are a frequent traveler, it is always advisable that you save battery especially when traveling. Each laptop and it’s OS will have the option to save battery. If you are using a macOS Ventura, it also comes with the option to use low power mode. Here is how to enable low power mode in macOS Ventura.
Related Reading: How to Show Hidden Files in macOS
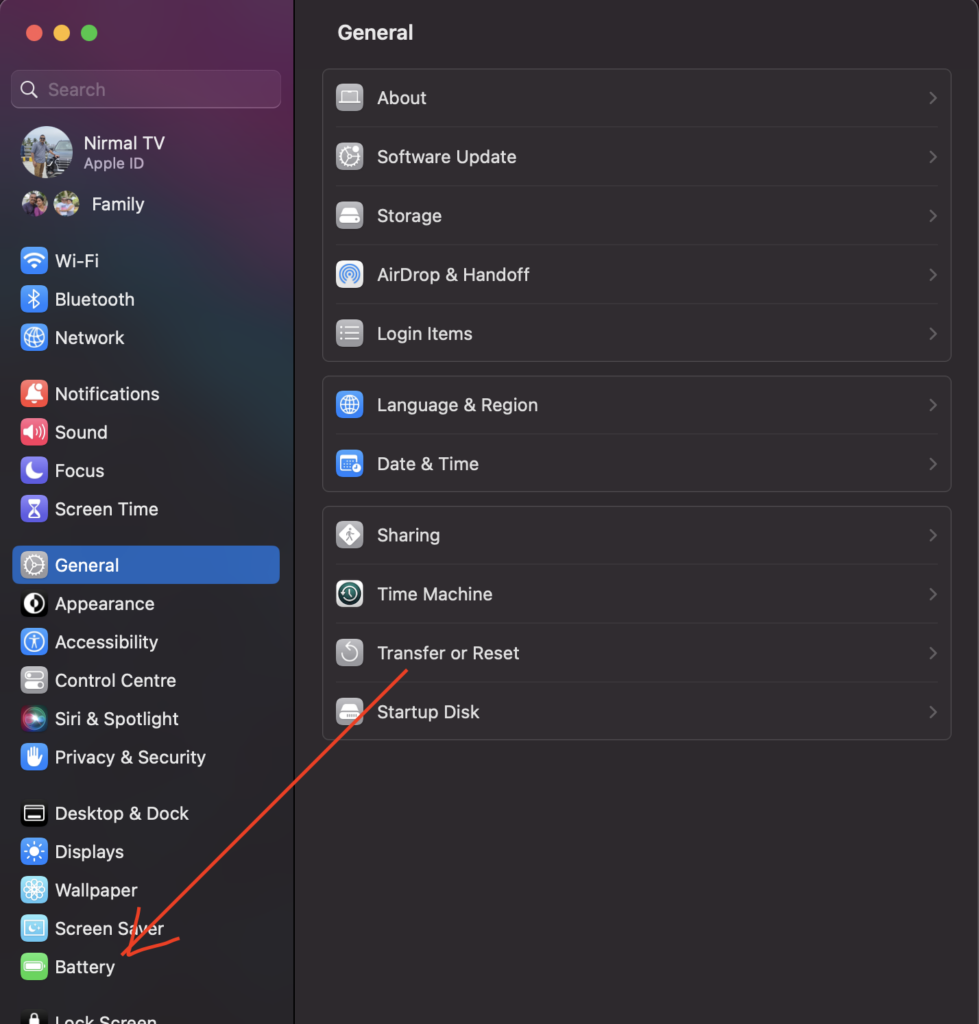
Step 1: The first step is to open the settings panel in macOS Ventura. Please note that the look and feel of the settings panel have changed with Ventura.
Step 2: Under the settings panel, on the left sidebar you will be able to Battery settings, select this.
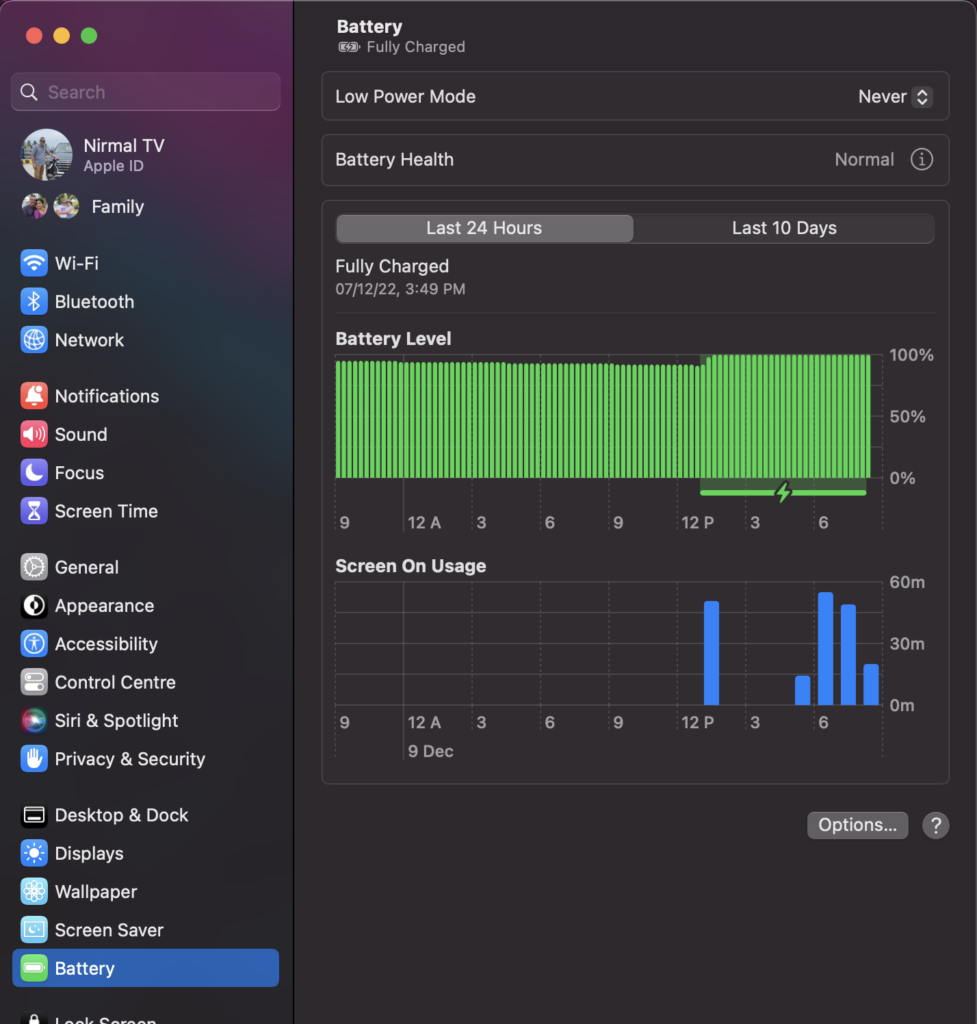
Step 3: This will open the battery settings for your macOS. Here you will be able to see an option “Low power mode”. This will be probably set to the Never option.
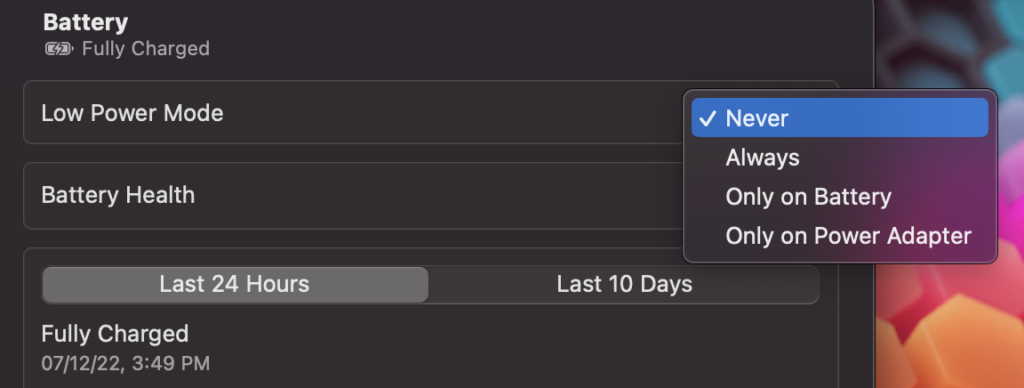
Step 4: In the low power mode, you can see a few options- Never, Always, Only on Battery, Only on Power Adaptor.
Step 5: You can select when you want to enable the low power mode on your macOS. It is better to enable low power mode when the laptop is on battery. The system will ask you to verify using either password or biometric before you can enable this setting.
You can enable this option based on your workflow. In case you are using apps that need a lot of power, then turning on the low-power mode might not help. But in case you are using macOS for browsing and emails, then it might work well with low-power mode.


