Just like smartphones, one of the important things about laptops is the battery performance. Battery performance is an important criterion to consider especially if you travel a lot with your laptop for work. There are different types of laptops and some of them offer great battery life while some of them are performance-oriented like gaming laptops. So the battery performance of the laptop depends on the hardware, the battery capacity, and software optimization. But as a consumer, you can check the screen on time you are getting on average with your Windows 11 laptop. Here is how to find the Screen on Time on Windows 11 Laptop.
Related Reading: 6 Ways to Improve Battery Life on Windows 11
How to find the Screen on Time on Windows 11 Laptop:
Follow the steps below to find the screen on time on Windows 11.
Step 1: First open the settings app on your Windows 11 and select the system option on the left sidebar.
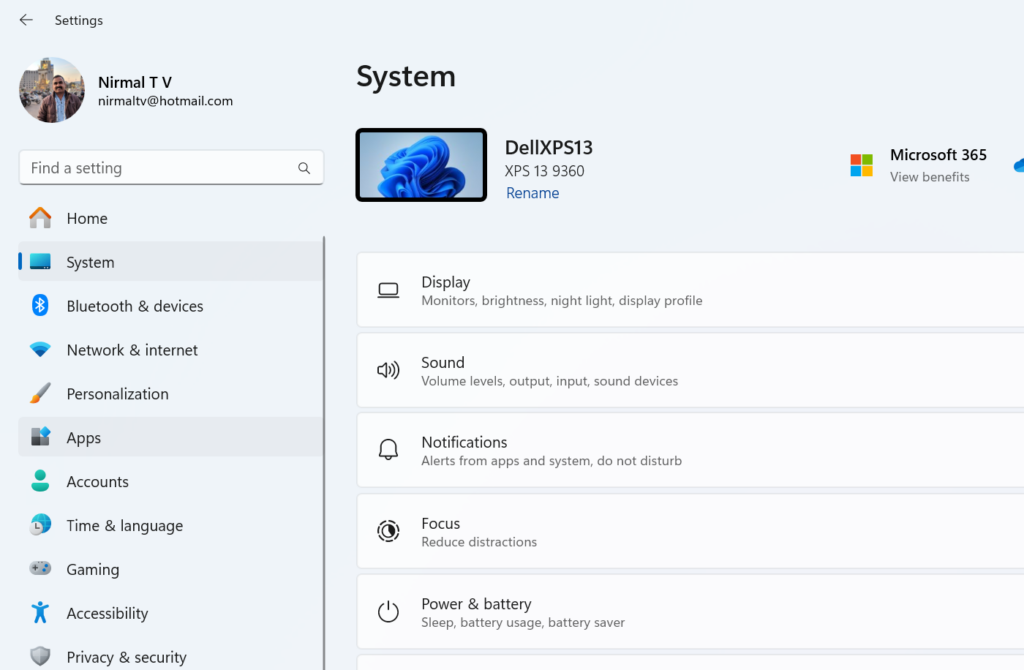
Step 2: Under the system settings, select the Power and Battery option. Here you will be able to see a graph of battery usage for each hour. The battery usage will show whether your laptop was on power or on battery. Clicking on each hour shows the usage for that hour.
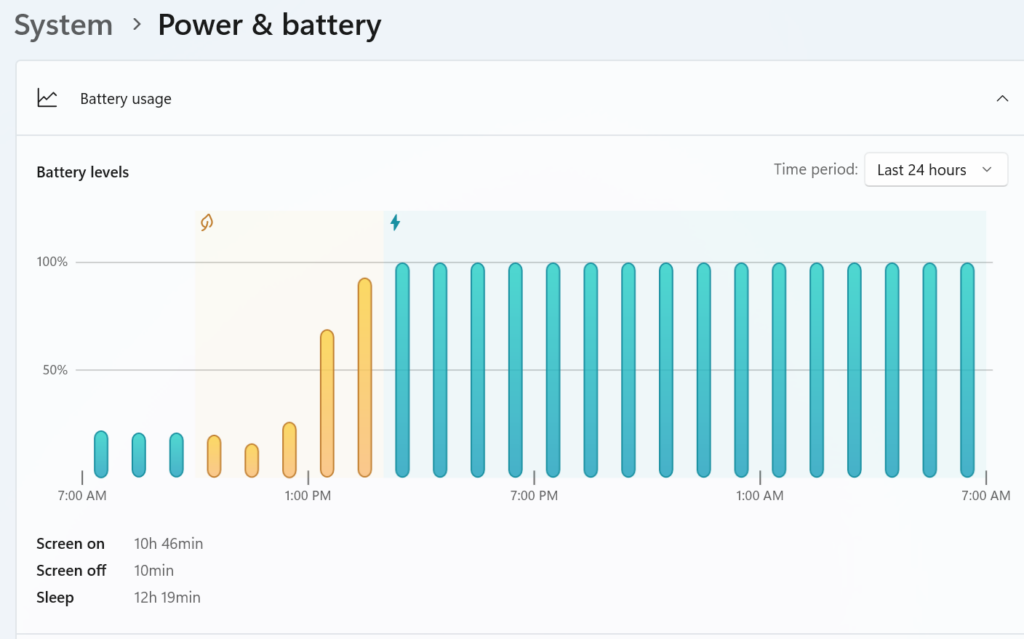
Step 3: At the bottom section, you will be able to see the screen on time, screen off time, and also the sleep time of your laptop.
Step 4: You can also view the stats for the last 7 days by using the drop-down option on the top right corner of the chart.
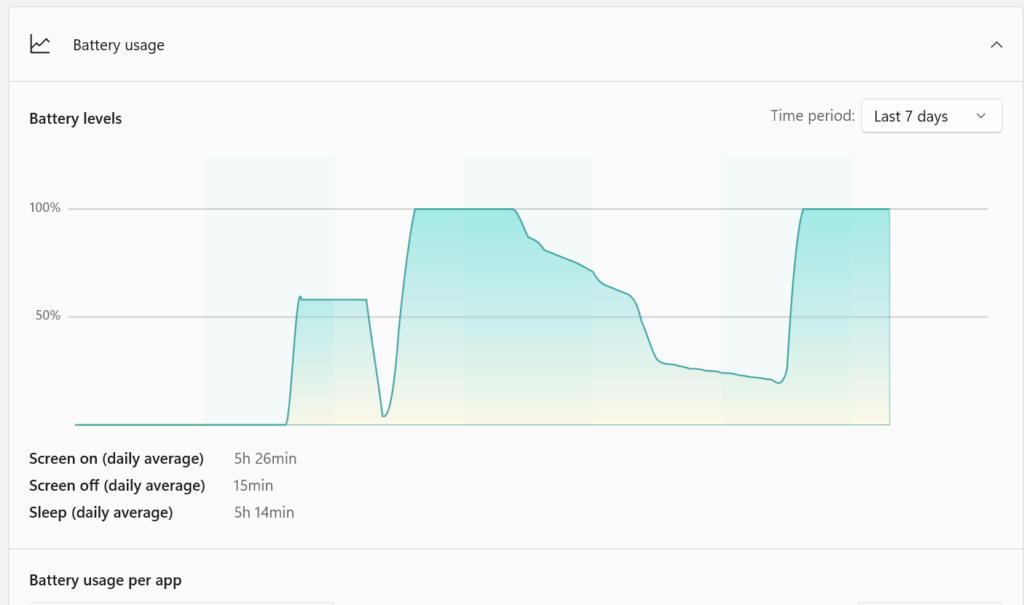
Step 5: Now, if you want to see the battery usage per app to find out which app is using the battery the most, you can scroll down and see the list. Here you will see all the apps using the battery and their overall usage will also be listed.
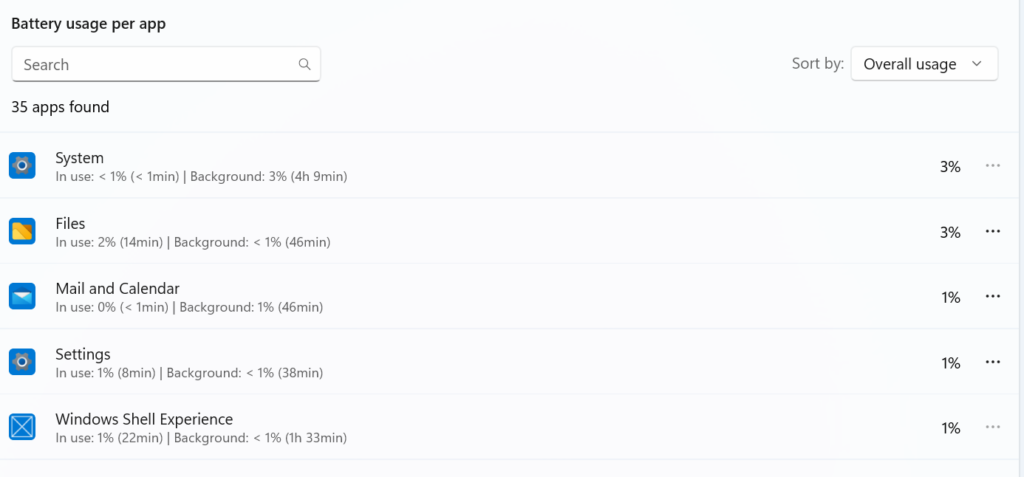
This is how you can check the battery usage and find the screen on time of your laptop.

