Most modern-day laptops have good battery life, which is important when traveling or forgetting to take your charger with you. While traveling, it is always better to save the battery with minimal usage of resources on your laptop. Windows 11 also comes with an energy-saving mode, which helps reduce your laptop’s battery consumption. The energy-saving settings in Windows 11 have changed compared to Windows 10, so here is how to use Energy Saver on Windows 11.
Related Reading: How to Find the Screen on Time on Windows 11 Laptop
How to Use Energy Saver on Windows 11
To enable this setting in Windows 11, follow the steps below.
Step 1: Open the settings panel in Windows 11.
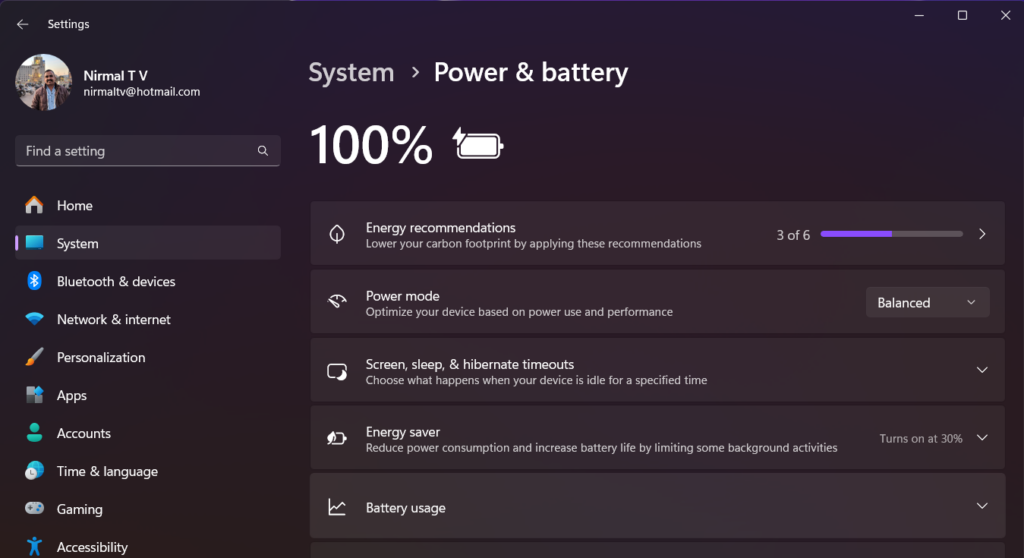
Step 2: Under settings, select System and then navigate to Power and Battery settings.
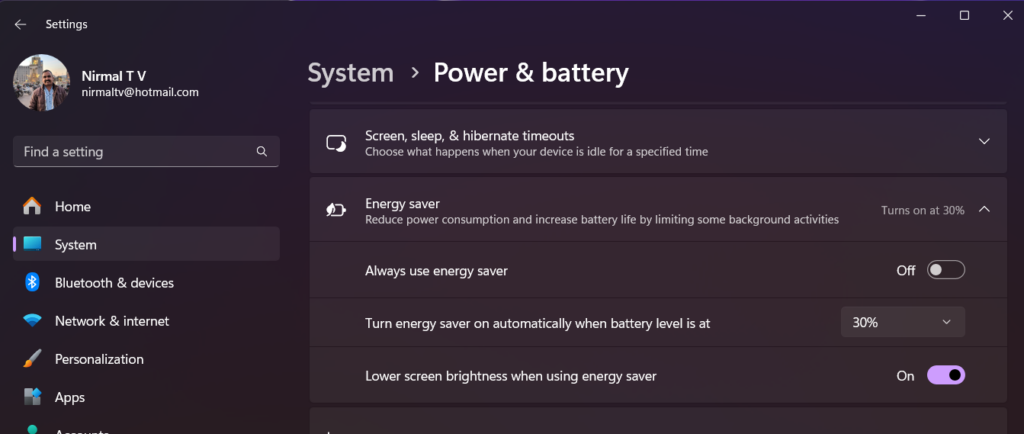
Step 3: Under this option, you will be able to see the Energy Saver option. By default, this option turns on at 30% of the battery.
Step 4: If you want to enable Energy Saver option all the time, then expand the option and you will be able to see a toggle to enable it. Once you toggle the “Always use energy saver” toggle, your laptop will be in energy saver mode all the time and it will not be in the highest performance mode.

